Showing posts with label chameleon markers. Show all posts

Thursday, July 20, 2017

Aloha Pineapples!

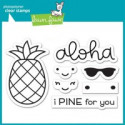
Hello, MarkerPOP friends! Pineapples are really popular right now! They are everywhere! Stamps...Papers...even Home Décor! I love them!!! So when I saw the super cute Lawn Fawn's Aloha stamp set, I had to have it!!!

I decided to pair up the stamp set with Chameleon markers and used the no-line technique:


The pineapple image is randomly stamped across a blank card. I used a light colored ink, so it 'disappears' once the image is colored in. The stem of the pineapples were colored in first. The Chameleon markers YG3 and GR3 were used. The body of the pineapple were colored in with the YL2 and YO3 markers.
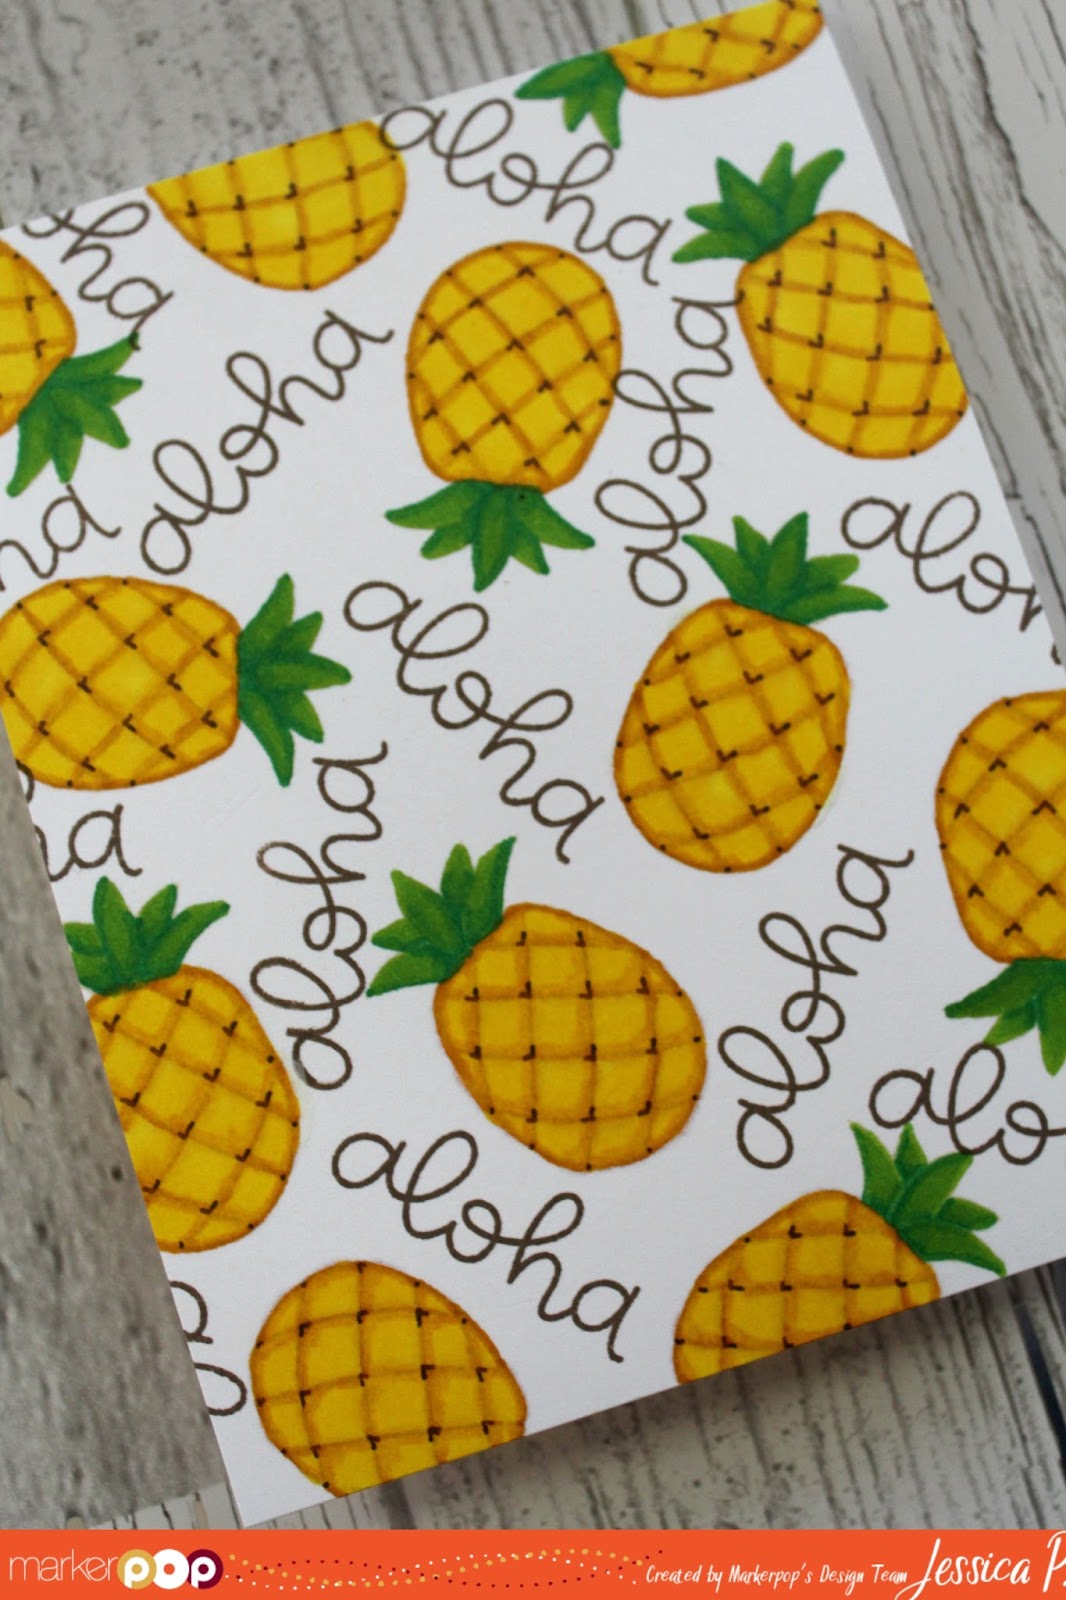

To fill the empty space on the card, I stamped the 'aloha' word across the card. To finish the card, I used a brown fine tip pen and added the spikes to the pineapples. 


Who loves a giveaway? Click HERE to get more details!

Thank you for stopping by! Have a wonderful day!

Jessi


Thursday, June 22, 2017

Hello, Friend

Hello, MarkerPOP friends! My style is Clean and Simple. I love the simplicity of the final project. I sometimes feel guilty with how quick it takes to make a card. So I have started to added some additional touches that I believe push the card to the next level! One of my new favorites is the NUVO Drops!

Today, I am using the Altenew's Be Strong stamp set and Chameleon markers:


I used Memento Tuxedo Black ink to stamp the images onto the white cardstock. I used a couple orange and yellows Chameleon markers to color in the individual bulbs. To make the bulbs look more life-like, I covered each one with Clear Nuvo Drops. When the drops dry, they give off a glassy look to the bulbs. A sentiment is stamped at the bottom of the card.


I used the following markers on today's card:
Chameleon markers -

Please head on over to the MarkerPOP blog for the list of supplies used on today's card.

Thank you for stopping by! Hope you have a great day!

Jessi

Thursday, June 8, 2017

A Sweet Hello

Hello, MarkerPOP friends! Are you bird watchers? My mother and her parents are. I never really thought I was until I moved to Texas near the Gulf Coast. One of the first things I realized were the different birds and in the certain area that I live...the lack of birds. One of my favorite birds are hummingbirds. They are some fascinating birds. Their bright colors and their speed!

Today's card showcases the Pink & Main's Hummingbirds and Chameleon markers:


The images are stamped with Memento Tuxedo black ink onto white cardstock. The images are colored in with a variety of Chameleon markers. The images are then cut out using the Hummingbirds coordinating dies. The sentiment is stamped onto a printed strip of paper from the Photo Paper Play Summer Bucket List 6x6 paper pad. The background panel is from the same paper pad.


The following Chameleon markers were used on this project: RD2, RD4, BG1, BG4, GR1, GR3, YG3, BR4, OR4

Hop on over to the MarkerPOP blog to see the list of supplies on today's card.

Thank you for stopping by today! Have a wonderful day!
Jessi

Friday, May 12, 2017

Llama Tell You Thank You

Hello, MarkerPOP friends! Llamas are pretty popular right now! I have seen them on stamps, papers, clothes, mugs...you name it! Everywhere you turn, there are llamas! I just chuckled as I wrote that... a few weeks ago, my daughter's field trip was at a local wildlife zoo. You know, the kind you drive your car through and the animals are roaming free. While I was leaving the zoo, I turned the corner and the road was being blocked by a number of llamas. They would not budge, so I had to sit there surround by llamas.  Anyway, that is my llama story, guess I should move on to my card :)

Today's card uses the super cute Gerda Steiner Designs Llama Tell You and Echo Park's Summer Dreams papers:


The stamped images are on white cardstock and called in with Chameleon markers. The images are then cut out using the coordinating dies. I used other dies to create the panel for the scene. I used a paper pad to make it super easy to coordinate the papers.


The scene is pieced together. The panel is then attached to another coordinating print. The sentiment is stamped onto a thin strip of paper and attached towards the bottom of the card. To finish the card, I added a few NUVO drops to fill in the empty space next to the sentiment.


Stop by the MarkerPOP blog for the list of supplies used on today's card.

Did you hear about our latest giveaway? Check out this POST for the details!


Thank you for stopping by today!

Friday, May 5, 2017

You Are Out Of This World

Hello, MarkerPOP friends! This is the last day for Teacher Appreciation Week for our local schools. So I have been working on a few cards to hand out to our teachers. I found it challenge it make a card for my son to give to his teacher. I wanted the card to share some of his personality.

This month, the design team will be using a variety of different alcohol markers. One of my favorite marker brand is Chameleon Markers. I love how easy these markers are to use. The blending comes so easy with these markers. 

Today, I am working with the Lawn Fawn's Out of This World and a bunch of Chameleon markers.


I wanted to create a scene in the center of the cut out of the card. To start the card, I stamped the planet images and colored them with the alcohol markers. The spaceman image is also stamped onto white cardstock, colored in, and cut out. I used a few different grays to color in the background of the scene.  


To add some additional elements to the card, I added glossy accents to the spaceman's mask. I added "stars" to the scene, by adding enamel drops. The sentiment is stamped and embossed ink white on black cardstock. The cardstock is then cut out in a strip and attached to the card.


The following Chameleon markers were used to color in this card: RD2, RD4, VO2, VO4, OR3, OR4, YO2, YO3, CG5, CG8, BR2, PR4, BG4, BL3, BL6, BG4, PK3, NU1, NU2

Please stop by the MarkerPOP blog for the list of other supplies used on this card.

Thank you for stopping by! Have a great day!

Jessi

Friday, March 31, 2017

Hoppy Easter

Happy Friday, MarkerPOP friends! Can you believe that today is the last day of March? Bring on April! So when someone mentions the month of April, I usually think of flowers and bunnies. So let's get to work with some bunnies.

Today, I am working with the Lawn Fawn's Hoppy Easter stamp set and Chameleon markers:


To create the background for the card, I used a few different prints from the Doodlebug's Hello Sunshine 6x6 paper pad. The hill is formed using a stitched wave die. The two printed are attached to the cardbase.


The bunnies are stamped onto white cardstock, along with the carrot, egg and basket. All images are colored in with a variety of Chameleon markers. The images are then cut out with their coordinating dies. The bunnies are attached on the hill. The egg, carrot, and basket are attached to the bunnies as if they are holding the items. A simple sentiment is stamped onto a orange printed paper and attached to the top of the card.

Please hop on other to the MarkerPOP blog for the list of supplies used on today's card.


Thank you for stopping by and have a wonderful day.

Jessi


Friday, January 6, 2017

All You Need is Love

Hello, MarkerPOP friends! It feels great to get back to posting. I enjoyed the little break, but ready to get back! With New Year's behind us, the next big holiday is Valentine's. Lots of gorgeous Valentine's projects are being released! Make sure to check in to see all the new products arriving in the MarkerPOP store!

Today, I am working with a super adorable Memory Box stamp set, Love Grows. This set is perfect for Valentine's projects and even gardening projects.


To start of this card, I stamped a variety of images from the Love Grows set randomly on the card front. I started with the larger images and worked my way to the smaller stamps to fill in the white spaces.


I stamped a few images onto a separate white sheet. The images are colored in with a variety of Chameleon markers. The images are cut out and attached individual onto the sentiment strip of cardstock.


This is such a simple card to recreate! I love how the colored images really pop against the black and white background!

Please stop by the MarkerPOP blog to see the list of supplies used to create this card!


Thank you for stopping by! Have a great day!

Tuesday, November 22, 2016

Donut Birthday - Neat & Tangled

Hello, MarkerPOP friends! Have you ever had donuts instead of cake for your birthday? I haven't! But I think I need to change that on my next birthday. All these pictures of donut cakes are making me want one!

Today, I am working with the Neat & Tangled's Say Yes to Donut stamp set. I paired up the stamps with the Simple Stories So Fancy 6x6 paper pad:


The donut image is stamped onto white cardstock. The image is colored in with a variety of Chameleon markers. The image is cut out using a stitched circle die. I used a couple of different prints from the paper pad to finish the card. The floral print is used to cover the front of the card. The purple print is cut with a stitched rectangle die. The sentiment is stamped onto a yellow print and attached to towards the bottom part of the purple. The circle die is attached towards the top.


The stamped image is stamped in black ink. This made the sprinkles black. I covered the black part with a white gel pen to turn the sprinkles to white.


Please stop by the MarkerPOP blog for the list of markers and supplies I used to create this card.

Thank you for stopping by today! Hope you have a great one!


Thursday, November 17, 2016

Inspired by Stamping - Layered Windows

Hello, Inspired by Stamping friends. It is Jessi here for my last guest designer spot. I want to start off by thanking Joanna and the team for allowing me to play along with them this month! It has been a pleasure working with you!

I love creating layered windows on cards. So I decided to show you how to complete one with Inspired by Stamping stamp sets:


The first step is to form your A2 card base and cut our a 4in. x 5.25in panel that will be the front of the card. With this panel, use a circle die to cut out the window.


I took the forest stamp from the Winter Friends stamp set and stamped the image twice onto the cardbase. I used a grey ink, so the inks would blend into the scene. I used a light blue to color in the sky portions of the stamp.


The deer image is stamped in a brown ink and colored in with a variety of brown markers. A black marker is used to color the hooves and the tip of the nose.The image is cut out and set aside.


The front panel is flipped over and the snow drift and tree dies are attached to the back side of the window. Several foam dots are attached around the card. The panel is then attached to the cardbase.


The deer image is attached to the scene, tucked behind the die cut trees.  A simple sentiment from the Inspired by Stamping stamp set Poinsettias is stamped onto glitter paper and attached to the card.


Thank you for stopping by today and I hope you have a great day!

Supplies:
Inspired by Stamping - Poinsettias and Winter Friends
Spellbinders Circle Dies
CC Designs Tree Die
Pink & Main Scalloped Wave Die
DCWV Glitzy 6x6 pad
Neenah Solar White Cardstock
Chameleon Markers
Spectrum Noir Markers
Memento Ink - Rich Cocoa and London Fog
Foam Dots

Wednesday, November 16, 2016

Merry Christmas Packages

Hello, MarkerPOP friends! It is Jessi here. Are you ready for the holiday season? Can you believe that it is right around the corner?

Today, I am sharing a CAS Christmas card that would be simple to recreate in mass numbers and send out to your closest family and friends:


To make the card unique, I used a scalloped edge die to create the card base. The image from the Avery Elle's Christmas Packages stamp set is stamped and colored in with a variety of markers. The image is then cut out using a tag die. The tag is attached to the card and the sentiment is stamped around the tag.


Check by the MarkerPOP blog to see what markers were used on this project!


Thank you for stopping by! Have a wonderful day!

Jessi
Monday, October 31, 2016

Have a Delightful Day

Hello, MarkerPOP friends! Hope you had a great weekend! I managed to set some crafting time in between all the kids' activities.

Today, I am working with the My Favorite Things'- Sweet Forest Friends. This is a fall stamp set, but I am pairing it up with a few different elements that help turn it into a winter set.


I am in love with the My Mind's Eye's Sugar Plum paper pad. The colors are so soft and pretty. Definitely, not your traditional colors! I loved the snowy print with deer in the background. I thought it would be perfect to create a scene card with it. I used a circle die to create the window on the front of the card. I designed the scene in layers. To create the layers, I used birch tree dies and a snowy hill die. The deer image is colored in with a few markers using the no-line technique. The deer is cut out with a coordinating die and attached to the card with a simple sentiment. To finish the card, I add a few enamel dots and a few white spots on the deer using a white gel pen.

_

The following markers are used to color in the deer: Chameleon - BR2 and NU3, along with the black detail pen.


 Thank you for stopping by today!


Wednesday, October 19, 2016

Merry Christmas Tag

Hello, MarkerPop friends! It is Jessi here today. I am excited to share with you my latest project. I paired up a couple different stamp sets with a super adorable paper pad for today's project.

I decided to take a step away from cards and create a tag. I used the C.C. Designs Layering Tag dies and My Mind's Eye's Sugar Plum to form the tags.


I used one of the deer images from the Avery Elle's North Pole Pals stamp set and colored it in with Chameleon markers. The image is then cut out and attached to the front of the tag. A simple sentiment is formed from the Lawn Fawn's Frosty Fairy Friends stamp set and attached at the bottom of the tag. To finish the tag, a hole is punched at the top and twine is insert. The tag is now ready to be added to the perfect gift!
 

You can hop on over to the MarkerPop blog to learn more about the markers and supplies used on today's project.


Thank you for stopping by today! Have a wonderful day!

Wednesday, October 12, 2016

Thinking of You - Polar Bears

Hello, everyone! It is Jessi here with you today. I am excited to share with you the card I created using the super fun, Polar Bear stamp set from Poppystamps. If you are new to Poppystamps, check out the selection available in the MarkerPop store.


To create this scene card, I started the card base with a variety of blue prints. I attached them onto the front of the card base. Snowy hills are made using white cardstock and Pink & Main's Scalloped Waves border dies. The polar bears are stamped in black ink onto white cardstock. I used a light grey and colorless blender to create the shadows onto the bears. The iceberg image is stamped in gray ink and also shadowed with a gray marker. The simple sentiment is stamped at the bottom of the card.


Thank you for stopping by today!

Jessi

Wednesday, October 5, 2016

Memory Box- Christmas Botanicals

Hello, everyone! It is Jessi here today! Making Christmas cards is getting me ready for the upcoming holiday season? It is not too early to start of those cards, right?

Today,, I am showcasing the super adorable, Memory Box's Christmas Botanicals stamp set.


I was inspired by the wreath image included in the stamp set. I wanted to enlarge the wreath to where you only saw part of it on the card. I started with the leaf stem stamp and repeated the image a few times, forming a circle. I randomly filled in the empty spots around the leaves with the smaller stamps in the set. The leaves are colored in with a few greens. The poinsettia flowers are colored in with a mixture of red and brown. To finish the card, a simple sentiment is stamped on the bottom corner. The panel is then attached to the front of a card base.


Stop by my MarkerPop post for the list of supplies used on this card!

Thank you for stopping by today!
Have a great day!