Tuesday, September 22, 2015

Pretty Cute Stamps - Thanksgiving Eats

Hello, Pretty Cute Stamps friends! Who else is ready for fall? I know that it is around the corner. I cannot wait for the weather. And most of all the food!
For today's card, I am using the new Thanksgiving Eats stamp set.
Thanksgiving Eats
I love the cute food images in this set. Perfect for coloring and even more perfect for paper-piecing!

Sometimes I have a hard time determining if certain prints go together with each other. So to make that task easier, I love using 6x6 paper pads.  To paper-piece the images, I started off stamping the images on several different prints. Once all the images are cut out, it is time to assemble the images together using the different prints. 

Did you see the new Pretty Cute Stamps Challenge? This month's challenge is to 'Include a Button'. Check out the details, HERE!
Thank you for stopping by today! Have a wonderful day!
Jessi

Supplies:
Pretty Cute Stamps - Thanksgiving Eats
DCWV Harvest House 6x6 paper pad
Tog Dog Dies- Fall Pocket Page Die

Saturday, September 19, 2015

Pink & Main 'Anything Goes" Challenge

There is still time to play along with the Pink & Main Stamps Monthly Challenge! Even though Pink & Main stamps are always encouraged, they are NOT required! If you do not have any Pink & Main Stamps, this is a great opportunity to try to win some! The first prize is a $50 gift certificate and second place will win a $25 gift certificate! Isn't that tempting to join in the challenge!

Here is a card I created for the 'Anything Goes' Challenge. It is still steaming hot here in Texas, so still plenty of lemonade being had!

I used the Pink & Main's Soda Pop stamp set to create this card. I simply stamped the images on cardstock and colored with a variety of markers. The images are cut out and attached to a lemon print background.
 
Please stop by the Pink & Main Challenge blog for more details!
 
Thank you for stopping by today!
 
Supplies:

Pretty Cute Stamps Monthly Challenge - Include a Button

Today starts a new Pretty Cute Stamps Challenge! This month the challenge is to "include a button" to your project!
 

I created a tag using one of the new stamp sets, Gingerbread Kisses.


This simple tag would be a great detail in wrapping any gift treats. You could wrap the tag around a mason jar or around the handles of a gift bag. So many possibilities!

The gingerbread image is stamped onto patterned paper and cute out. A variety of markers are used to color in part of the image. The sentiment is stamped onto a patterned paper and a banner was cut out of the strip of paper. A button and twine bow are added to the tag to finish the project.

Pretty Cute Stamps Monthly Challenge Rules:

  • This month's challenge is Include a Button. So, create any project using Pretty Cute Stamps...just be sure to include at least one button on your project. A Pretty Cute Stamp must be used to create the project.
  • Please link to your actual blog post...not to your blog.  If you don't have a blog, you can add a photo of your project to the current Monthly Challenge photo folder in the Pretty Cute Projects Facebook Group.
  • You can enter as many different projects that follow the monthly theme as you want for more chances to win.
  • The challenge will run for 3 weeks.  You must link up your project by 11:55 pm CST on Saturday, October 10, 2015.
  • One random winner of a $15 Gift Certificate to the Pretty Cute Stamps store will be chosen. The winner will be announced before the next challenge starts on Saturday, October 17, 2015.

  •     
    You can link up you Button project HERE!

    Thank you for stopping by! Cannot wait to see what you create!

    Supplies:
    Pretty Cute Stamps - Gingerbread Kisses
    Trendy Twine - Totally Sky Blue and Totally Kraft

    Friday, September 18, 2015

    MFT Card Design Superstar #3

    (Looking for the Pretty Cute Stamps Day 2 Hop post?
     Continue to scroll down or click HERE)
     
    This post will be my 3rd entry for the MFT Card Design Superstar contest.
    Card Design Superstar


    I took a look at the MFT Summer School Series and took some notes. I decided to incorporate the rule of thirds onto my card. The cupcakes dies and watercolor background fall in line with the rule of thirds. I decided to use pinks and purples to highlight this card. Once the cupcakes were added to the card, it seemed that the card needed something else. I decided to add texture to the card with the addition of sequins (sprinkles) on the cupcakes.
     
    Thank you for stopping by! I hope to be able to crank out a couple more card designs for this contest! If you are interested in learning more, check out the post HERE.
     
    Supplies:
    Watercolors

    MFT Card Design Superstar #2


    (Looking for the Pretty Cute Stamps Day 2 Hop post?
     Continue to scroll down or click HERE)
     
    This post will be my 2nd entry for the MFT Card Design Superstar contest.
    Card Design Superstar


     I was inspired by a few cards created by the talented May from Mayholic in Crafts. When I saw these video, I wanted to give this a try!  My coloring skills are not very high. So the idea of not having to color the entire card is very tempting. First, I stamped the clown image on the bottom right corner of the card. Next, the balloon image is randomly stamped to feel in the empty space. I started coloring with the clown image. After I 'spot' colored the clown, I colored in some of the balloons. Balloons tend to be more primary/secondary colors, so decided to use the common balloon colors. The sentiment is stamped on a pendant diecut and attached with foam dots.
     
    Thank you for stopping by! I hope to be able to crank out a couple more card designs for this contest! If you are interested in learning more, check out the post HERE.
     
    Supplies:
    My Favorite Things Clowning Around stamp set
    Chameleon Markers
    Spellbinders Pendant Dies
     

    MFT Card Design Superstar

    (Looking for the Pretty Cute Stamps Day 2 Hop post?
     Continue to scroll down to the following post or click HERE)
     
    When I heard about My Favorite Things Card Design Super Star contest, I was hesitant to participate. I figured what are the chances among the extremely talented cardmakers out there. I honestly, put the contest behind me. Then a few days ago, I watched Susan Opel's Periscope video she did about the 10 reasons to join the contest. So I figured why not!
    Card Design Superstar
     
    So my first creation is using the My Favorite Things Pure Innocence Mummy stamp set and Die-namics Snow Drifts dies.
     
     
    The mummy image is stamped in Distressed Ink - Antique Linen. Once the ink dried a little, I used a paintbrush dripped with some water and smeared the ink. I cut the image out and set aside. The scene is created using a variety of DCWV papers.
     
    Thank you for stopping by! I hope to be able to crank out a couple more card designs for this contest! If you are interested in learning more, check out the post HERE.
     
     
    Supplies:
    My Favorite Things Mummy stamp set and Snow Drift Dies
    Top Dog Dies - Haunted House Dies Set


    Pretty Cute Stamps Day 2 September Blog Hop


    Welcome Pretty Cute Stamps  friends! Today is Day 2 of the September Release Blog Hop!

    If you came here from Amber's blog, you are in the right place.  If you just stumbled upon this post and would like to start from the beginning, please visit the Pretty Cute Stamps Blog.

    The September release stamps can now be purchase in the Pretty Cute Stamps Store. All of the new items (even the bundle) are ON SALE until 10:00 pm CST on Tuesday, September 22, 2015. You can find all of these new items in the PCS store HERE.


    Throughout the blog hop, the design team members will be showing off the new September release now available in the Pretty Cute Stamps store.  I am showcasing the new Gingerbread House stamp set:


    I broke out the watercolors for this card! To start of, the house image is stamped and heat embossed with white embossing powder. Once the embossing dried, it was time to paint! I used dies to create the snow drifts. To create the snow falling background, I used a white gel pen. To finish the card, I stamped a simple sentiment.

    Now, let's talk about a prize:
     

    One lucky hopper will win a $15 Gift Certificate to the Pretty Cute Stamps Store!  Here's what you need to do for a chance to win this Gift Certificate:

    1. Leave a comment at EACH blog along the hop on each day.  Be sure to leave us a way to get in contact with you if you win.
    That's all you have to do.  If you would like EXTRA entries, you can also do one or more of the following:
    2.  Like the Pretty Cute Stamps Facebook Page.  Leave me a separate comment on this blog telling me you did. (The separate comment is your extra entry.)
    3.  Sign up for the Pretty Cute Stamps Mailing List and leave a comment on this blog telling me you did.  You'll get occasional emails telling you about new releases, sales, coupon codes, and events. (The separate comment is your extra entry.)
     
    I will randomly choose a winner of the hop candy on Tuesday, September 22, 2015.
     
    Thank you so much for stopping by today! I hope you enjoyed the PCS blog hop!

    Here's the lineup for day 2 of the hop, just in case you get lost along the way:
    Lisa: http://prettycutestampsblog.blogspot.com/
    Karla: http://creative-love-affair.blogspot.ca/
    Joann: http://jlopezdesigns.blogspot.com/
    Debbie: http://debbiedee.blogspot.com/
    Melissa: http://8ers.blogspot.com/
    Amber: http://sew-ink.blogspot.com/
    Jessica: http://www.kissinkrafts.blogspot.com/  (You are here!)

    Tuesday, September 15, 2015

    Pretty Cute Stamps September Sneak Peek!

    Who wants to see a sneak peek of the upcoming Pretty Cute Stamps September release? Let me just say that I am super exciting to be a part of the Pretty Cute Stamps design team! And equally as exciting to be joining in my first sneak peeks!
     
     
    Today I am giving you are sneak peek at the new Many Thanks stamp set:
     
     
    The Many Thanks stamp set is full of fun sentiments. Including the OMG, which I used on the mug (Sip, Enjoy, Relax stamp set). To add texture to this paper-pieced card, I used wooden veneer hearts and glass bead gel.
     
    Want to see more sneak peeks? Stop on over to the Pretty Cute Stamps blog to see more! And don't forget to come back for the release blog hop starting on September 17th!
     
    Thank you for stopping by today!

    Saturday, September 12, 2015

    You Were Born to Sparkle

    Happy Saturday, Pink & Main friends! Did you see the new September release! Michelle has created some adorable sets and some also have coordinating dies! I cannot put them down! The ideas just keep on coming!
     
    Today,  I am working with the new Pink & Main's Believe Script stamp set. This set is full of beautiful sentiments that are sure to light up someone's day!


    When I saw this sentiment, I knew that I wanted to pair it up with some glitter paper. I used a fancy shaped die to create the shaped card base. I wanted to stamp the sentiment onto glitter cardstock. I was unsure if the ink was going to transfer well. I am super pleased with how it turned out! Using a circle die, I cut out the sentiment and added it to the card. To add some additional sparkle, I glued on a couple sequins to the card.
     
     
    Have you heard that Pink & Main is currently holding their first challenge! It is 'Anything Goes' and there are some awesome prizes up for grabs! The first place winner gets $50 Pink & Main gift card and the second place will win a $25 gift card. I hope you stop by the Pink & Main blog to find out the details! 
     
    Also, Pink & Main has a new Facebook group to share your Pink &  Main Creations Gallery! We would love for you to join in the fun!
     
    Thank you for stopping by! Have a wonderful day!
     
     
    Pink & Main Stamps Supplies Used:
    Believe Script Stamp Set
    Believe Script

    Other Supplies:
    DCWV Glitter Stack
    Neat and Tangled Sequins

    Friday, September 11, 2015

    DCWV Job Chart

    Hello, DCWV friends! Are you ready to see another project using one of the new DCWV oversized paper stack? If you have not seen them, you can check out the new products available at Joann Fabric & Craft Stores.

    I started off with a couple supplies: DCWV 11x17 White Stack Foiled Accents and a float frame.


    My kids are at the age where they are asking for ways to earn money. So to make it easier my goal is to create a 'Job Chart' that will be hung on the family command wall:


    I will have to attempt, this project is not finished. I will be adding 2 more clips in the middle of this board. However, the stores I went to were all out of the clips!

    This was a simple project to create. I cut down the paper to the frame size (10x13).  Before adding the paper to the frame, I added a simple title using vinyl letters. The clips are glued to the glass and the project is finished! Time to add the jobs and the money!

    Thank you for stopping by today!
     

    Saturday, September 5, 2015

    DCWV September Sketch Challenge

    Hello, everyone! I hope you are enjoy your weekend! It is a holiday weekend here in the States. And with the weather we are having, it is the perfect time to get some crafting done!
     
    Today, I am sharing the card I made to go along with the DCWV September Stack-a-holic Sketch Challenge.
     
    Here is the sketch:


    And here is my take on the sketch:


    As you can tell, I switched the postage stamps to hearts. I decided to use a variety of heart dies to create the fun design. I used different prints from the DCWV Hello Darlin' Stack. The card base is created out of a bright, fun print from the DCWV Marquee Stack. To finish the card, I stamped a simple Paper Smooches sentiment one the bottom right corner.
     
    Thank you for stopping by! Have a wonderful day!
     
    Jessi

    Also playing along with:
    Paper Smooches SPARKS - Anything Goes
     

    Supplies:
    DCWV - Marquee and Hello Darlin' Stacks
    Paper Smooches - Sentiment Sampler stamp set and Tiny Hearts Dies
    Echo Park - Heart Die
    Sizzix - Hearts

    Happy Fall y'all!

    Happy Saturday, Pink & Main friends! Are you ready for a sneak peek of a new Pink & Main stamp set? The new release stamps will be released next week! As well as their coordinating dies!
     
    Today,  I am working with the new Pink & Main Scarecrows stamp and dies.

     
    The images are stamped with brown ink. The next stamp is to color them in with a variety of markers. Line up the dies with the colored images and cut out the images. To start of the scene, I used the new Borders die to create the background hill. The cornstalks and pumpkin diecuts are added to the scene. The scarecrow is attached to the card with a foam dot. To finish the card, the sentiment is stamped at the bottom of the card.
     
     
    Have you heard that Pink & Main is currently holding their first challenge! It is 'Anything Goes' and there are some awesome prizes up for grabs! The first place winner gets $50 Pink & Main gift card and the second place will win a $25 gift card. I hope you stop by the Pink & Main blog to find out the details! 
     
    Also, Pink & Main has a new Facebook group to share your Pink & Main Creations Gallery! We would love for you to join in the fun!
     
    Thank you for stopping by! Have a wonderful day!
     
     
    Pink & Main Stamps Supplies Used:
    Scarecrows Stamp set and Coordinating Dies

    Thursday, September 3, 2015

    Little Tangles - Mint and Gold Color Combo

    Happy Thursday, everyone!
    Today starts a new Little Tangles Challenge and  it focuses on a fun color combo!


    I am in love with the Neat & Tangled's Hoop Die and wanted to make it the focus on this card:

     
    The background is a pretty mint print from the DCWV Happy Day stack. I used a DCWV Embossed foil paper for the Hoop Die. I also used the Hoop Die to cut out the 'Love' print. The two pieces using the hoop die and attached using the popular 'inlaid' technique. A simple sentiment from the Neat & Tangled's Scandinavian Flowers stamp set.

    I hope you stop by the Little Tangles blog to see more of the design team projects.

    Challenge Guidelines:

    • Create a NEW project based on the challenge theme. Your project must fit within the challenge theme in order to be eligible to win.
    • Submit your entry through the Inlinkz tool below. (If you have a blog, please link to the blog post with your challenge entry, not your entire blog!)
    • Link back to our challenge and display our challenge graphic in your blog post.
    • The use of Neat & amp; Tangled stamps is not required, but it is strongly encouraged! If you don't own any Neat & Tangled stamps, check out the FREE digi stamps HERE
    • You may enter as many times as you'd like.
    • We'd love for you to be a follower of Little Tangles!
    • You have until Thursday, September 24th at 11:59 EST to enter.

    Thank you for stopping by today!

    Jessi
     
    Supplies used:
    Neat & Tangled - Hoop Die and Scandinavian Flowers
    DCWV - Happy Day and Embossing Foil
    

    Tuesday, September 1, 2015

    Pretty Cute Stamps - Oh, Knit! I Forgot!

    Hello, stamping friends! This is my first post for the Pretty Cute Stamps design team! I am excited to be a part of this team and look forward to being inspired by the other design team members, as well as all of you! 
     
    Let me first start off with introducing myself. My name is Jessica Pascarella. I am a stay at home mom of 3, my youngest just started Kindergarten last week. My normal go-to style is CAS (Clean and Simple), however, I also like to change it up and try new styles. I consider myself a beginner when it comes to coloring in images, but I am trying to improve my coloring skills. My favorite stamping technique is paper-piecing. You can see my designs on my blog, Kissin' Krafts.
     
    Today for my first Pretty Cute Stamps projects, I am working with the Knit Happens stamp set. I adore the fun sentiments included in this set!
     
    Knit Happens Stamp Set
     
    My CAS card includes stamped images that I colored in with a variety of markers.


    After the stamped images are colored, I cut them out by hand. I added a gingham print on the bottom of the card. The stamped images are added to the card. To finish the card, the simple sentiment is stamped in black ink. And there you have it! A very simple card to create!

     If you are new to Pretty Cute Stamps, be sure to check out the adorable images/stamp sets available at the Pretty Cute Stamps online store.
     
    Thank you for stopping by today! Have a wonderful day!
     
    Jessi

    Saturday, August 29, 2015

    Enjoy the Ride!

    Happy Saturday, Pink & Main friends! I am in LOVE with the new Pink & Main matching dies! So much, that I could not wait to show my latest card!
     
    Today,  I am working with the Hot Air Balloon stamps and dies.

    To create the hot air balloon, I used a variety of prints to piece the balloon together. The balloon die is the entire balloon, so I cut off the pieces to separate the basket. Using the balloon stamp, I taped around the strings the connect the basket to the balloon and stamped onto the background. The paper pieces are added to the card using the stamped "strings". To create the banner, use the die on a different print. I used letters from the In the Budget planner stamp set to form the words 'Mr.' and 'Mrs'. The heart is from the Hot Air Balloon stamp set. The sentiment is part of the stamp included in the Hot Air Balloon set. I only wanted to use part of the sentiment, so I taped off the part I didn't want before I inked the stamp. (Make sure to remove the tape before you stamp! Sadly, I have forgotten before!)
     
    Have you heard that Pink & Main will start having challenges! The first one starts on September 1st! I hope you stop by the Pink & Main blog to find out the details! 
     
    Also, Pink & Main has a new Facebook group to share your Pink & Main Creations Gallery! We would love for you to join in the fun!
     
    Thank you for stopping by! Have a wonderful day!
     
     
    Pink & Main Stamps Supplies Used:

    Friday, August 28, 2015

    DCWV Oversized Wooden Pencil

    Hello, DCWV friends! Today, I am sharing a project made using one of the new oversized DCWV 11x17 stacks. If you have not heard, DCWV release a ton of new products at JoAnn stores, including a number of oversized paper stacks!
     
    I wanted to create a project to celebrate Back-to-School! So I went to search Pinterest for some ideas. I searched "teachers gifts" and as I was scrolling down, I saw an oversized wooden pencil. It looked so cool, I had to give it a try. The only difference, instead of painting the wood yellow, I decided to use some patterned paper.
     
     
    It is hard to tell the size in the picture above, I am took a picture of the picture on the oversized 11x17 Double-sided Brights stack.
     
     
    This project was super simple to create. I grabbed a scrap piece of a 2x4 sitting in the garage and cut one end to a point like a pencil.  Once the wood was sanded smoothly, it was time to tape of the parts that were going to be painted (point and eraser). After the paint dried, I added a strip of DCWV Dark Grey Metallic cardstock near the eraser using double-sided tape. Next, add the piece of yellow paper and wrap around the wood with tape. Using black letter stickers, I labeled the pencil. To finish of the pencil, I added a twine bow near the eraser. A perfect gift for teachers!
     
    Thank you for stopping by today!
     

    Saturday, August 22, 2015

    Geek is Chic!

    Happy Saturday, Pink & Main friends! Have you heard the good news? Pink & Main is now carrying dies to match their latest stamp sets!
     
    Today, I am showcasing the Owl Nerds stamp set/die and Planning School stamps.


    I used a variety of the word stamps from the Planning School stamp set to create the background. The owl/globe image is colored with a variety of markers and cut out using the matching die. The simple sentiment finishes the card.
     
    Thank you for stopping by! Hope you have a wonderful weekend!
     
     
    Pink & Main Stamps used:

    Friday, August 21, 2015

    Freshly Made Sketches/AEIHeartUChallenge

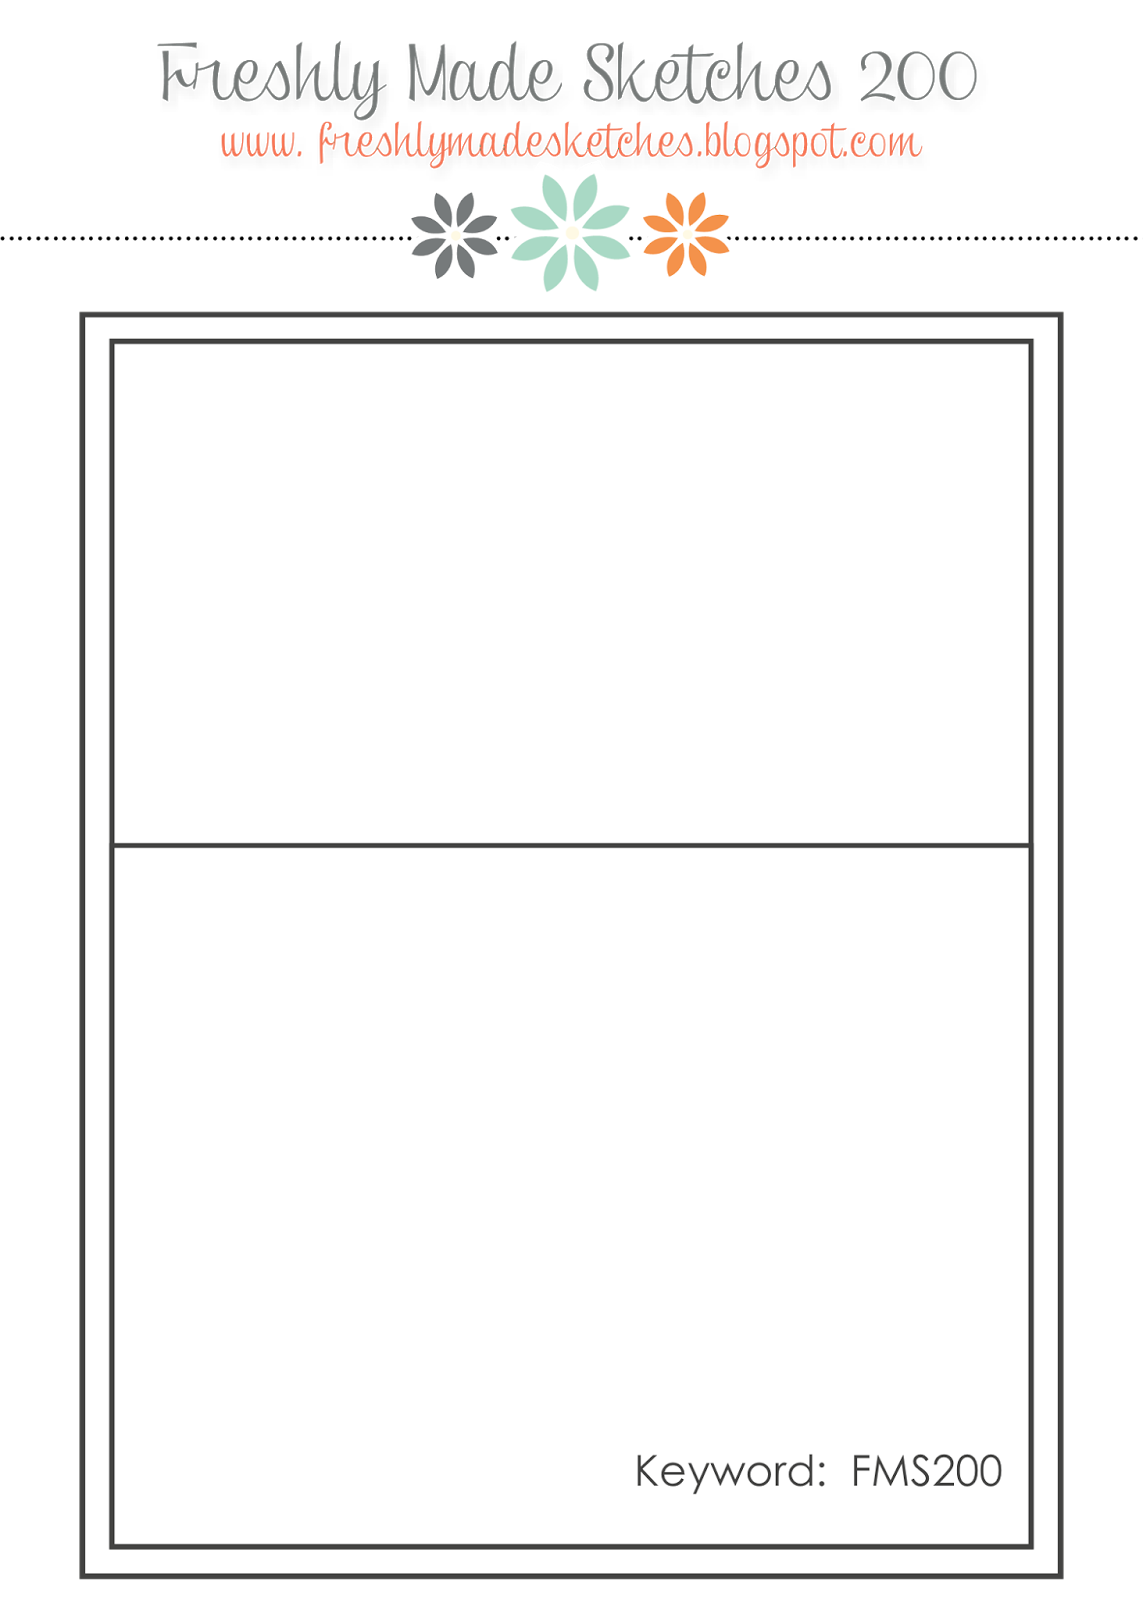
    I recently found a new challenge blog, Freshly Made Sketches. Their current sketch is the 200th, so they are having a huge celebration! When I saw the sketch, I just had to play along!

    The 200th Freshly Made Sketches sketch:


    My take on the sketch (I flipped the sketch upside down):

     
      I have been inspired by some many talented designers using the 'ink smooshing' technique. I figure it was time for me to give it a try! To create the night sky, I used a variety of blues, grays, and purples watercolors. Once the paint dried, I embossed stars with white embossing powder. The shooting star is created with yellow embossing powder.  The sentiment is stamped in white ink on a vellum pendant. The deer is stamped and colored with distress inks.
     
    I am also playing along with the AEIHeartUChallenge - Embossing.
     
    Thank you for stopping by today!
     
    Supplies:
    Vellum
    Watercolors
    White and Yellow Embossing Powders
     
    Challenges played:
     

    Thursday, August 20, 2015

    Home is wherever I am with you

    Hello, Butterfly Reflections, Ink friends!  Have you stopped by the shop lately? There are new products arriving everyday!
     
    Today, I am sharing a card using some of my favorite companies, Pebbles and Avery Elle!

     
    I used the Pebbles Home Grown 6x6 paper pad to piece together my card. I love the color combos used throughout the collection! The stamp set is the Avery Elle's Home Sweet Home.(Currently on sale!!!) The tee-pee is paper-pieced with a variety of prints. To match the sentiment, I added a few stamped hearts.
     
    Thank you for stopping by today! Hope you have a great day!
     
     
    Supplies:

    Monday, August 17, 2015

    DCWV August Stack-a-holic Sketch

    There is still time to join in this month's DCWV Stack-a-holic Challenge! Check out the layout sketch and the rules, HERE!
     
    For my take on the card sketch, I am using one of the new stacks available at JoAnn Fabric and Craft Stores, Ocean Breeze! First up, here is the card sketch:
     
     
    And here is my creation:
     
     
    To create the banners, I cut strips of the patterned paper. The strips are folded in half over a piece of white twine. It is hard to see in the picture, but there are a few diecut vellum clouds placed behind the banners. A simple sentiment is stamped on a patterned piece at paper.
     
    Want to play along with the sketch? You have until the end of the month to join in!
     
    Thank you for stopping by today!
     
    Jessi
     
    Supplies Used:
    Trendy Twine - Totally White
    Avery Elle - Red & Goldie


    Saturday, August 15, 2015

    Pink & Main - Hot Air Balloons

    Happy Saturday, Pink & Main friends! I have been having a blast working with the latest release! Be sure to stop by the store to see the new stamps. And in case you haven't heard, there are now dies to match the new stamps!
     
    Today, I am showcasing the Hot Air Balloon stamp set.
     
     
    It was so fun to create the hot air balloon. Two stamps are used to create the balloon and one for the basket. The balloon is attached to the a fun polka dot print with some clouds tucked behind the balloon. To finish the card, I used a fun sentiment from the Pink & Main Mister stamp set.
     
    Thank you for stopping by! Hope you have a wonderful weekend!
     
     
    Pink & Main Stamps used:

    Friday, August 14, 2015

    DCWV Project Paper Rolls - Vintage Roses

    Hello, DCWV friends! Have you seen all the new products available at JoAnn Fabric Stores? If not, you should stop by your local JoAnn's or check out their website. In the new release, there are quite a few oversized paper options, including several designs of DCWV Project Paper Rolls. Today, I will be sprucing up a boring serving tray with a fun, beautiful floral print (Vintage Roses)

     This project was so easy to complete. Cut a piece of paper slightly larger than the size of the tray. Using an adhesive, I used Mod Podge, cover the bottom of the tray with a thin layer. Place paper onto and smooth out all air bubbles. Trim off excess paper, using a sharp blade. Use the tray to transfer dry items. If you wish to be able to carry drinks, add a piece of glass or plexi-glass to the tray.

     Thank you for stopping by today!

    Wednesday, August 12, 2015

    The Challenge (and Thrill) of Scrapbooking

    I have recently came to the conclusion (or finally accepted), that I have way too many printed photos just sitting around. Over the last few years, I would sit down and create a scrapbook page or two per year. But I am proud to say, that over the last two months, I have created 5 of them. I am having a blast with this (semi) new adventure. Scrapbooking is definitely more challenging that cardmaking! (At least for me, anyway!) However, I find it more fun!

    My comfort level with scrapbooking is low. I can usually crank out a card in 15 minutes or so. The process for a scrapbook page is much longer than that. In fact, it might take me up to 2-3 days to reach completion! With cardmaking, my style is more Clean and Simple. With scrapbooking, the pages start of the same. But when I think I am done, I look over the page and feel like it needs something else. Some pages are finished after that one addition, and so are finished with several. I am truly enjoying this new genre of crafting!

    When I saw that Carta Bella was having a search for new design team members, I figure I would throw my name in the mix. I love their papers and embellishments. Now, I know that my chances are slim. There are so many talented and inspirational designers out there in the crafting world. So I used this call to challenge myself. Even though I classify myself as a cardmaker, I wanted to submit more layouts than cards. So after a week of crafting, I finally sent off my application! So today, I figure I would share the two layouts that I created!

    Last year, my husband and I celebrated our 10th wedding anniversary with a trip to Boston/Cape Cod. I printed up some photos and they sat around for a while. I came across the Carta Bella - Ahoy There Collection and knew that I need to pair the photos with those beautiful prints! To add texture to the layout, I also included Trendy Twine Totally Natural twine.

    My next layout used the Carta Bella's Baby Mine (Boy) Collection. Most of the layouts I do create, tend to focus on my daughter. So I challenged myself to do a layout with my middle son. I tried to keep this one more CAS, and still found myself adding little embellshments! (Note the wooden veneers and enamel dots!) In fact, I thought I was finished with the title "Shine Bright", but at the last minute I used Winnie & Walter's The Big, the Bold and You stamp set to stamp the rest of the title.


    Thank you for stopping by today!
     
    Jessi


    Saturday, August 8, 2015

    Sneak Peek from Pink & Main!

    Hello, Pink & Main friends! It is August! Meaning there are new stamps coming to the Pink & Main Store soon! The design team has started to give you sneak peeks of the new sets. The new release will be available for purchase next week!

    Today, I am using the Pink & Main Florals stamp set for my card today!


    When I first saw this stamp set, the idea of creating a stamped background was the first thing that came to mind. To do so, I started off taping off the edges to form the border around the front of the card. Using a variety of stamps and inks, stamp the images around the edge of the tape. Once the border is finished, stamp the remainder of the front. Peel off the tape to reveal the white borders. To finish the card, stamp a sentiment on a banner diecut.
     
     New to Pink & Main? Check out the store, HERE, to see all their fun designs!

    Thank you for stopping by! Have a wonderful day!


    Supplies:

    Pink & Main Stamps - Florals

    Thursday, August 6, 2015

    Little Tangles Challenge - Birthday

    Happy Thursday, everyone!
    Today starts a new Little Tangles Challenge and it is all about Birthdays!


    I am using pieces from a few different Neat and Tanglesd stamp sets to create this card.


    A simple sentiment is stamped in the center of watercolor paper. The sentiment is masked using a piece of tape. The floral images are stamped around the tape with a variety of distress ink colors. I give the ink a few seconds to dry. A dab some water on the tip of a paint brush and spread the color around the individually stamped image. Once the paint is dry, remove the tape. Attach panel to patterned paper and glue to the front of the A2 cardbase.

    I hope you stop by the Little Tangles blog to see more of the design team projects.

    Challenge Guidelines:

    • Create a NEW project based on the challenge theme. Your project must fit within the challenge theme in order to be eligible to win.
    • Submit your entry through the Inlinkz tool below. (If you have a blog, please link to the blog post with your challenge entry, not your entire blog!)
    • Link back to our challenge and display our challenge graphic in your blog post.
    • The use of Neat & Tangled stamps is not required, but it is strongly encouraged! If you don't own any Neat & Tangled stamps, check out the FREE digi stamps HERE
    • You may enter as many times as you'd like.
    • We'd love for you to be a follower of Little Tangles!
    • You have until Thursday, August 27th at 11:59 EST to enter.

    Thank you for stopping by today!

    Jessi
     
    Neat and Tangled stamp sets used: