Thursday, July 13, 2017

Happy Birthday Bus

Hello, MarkerPOP friends!!! July is a busy birthday month in my family. Do you have a certain month of the year that has more birthdays than others? Another month for us is May.

Today, I am working with the Avery Elle's Birthday Bus stamp set and Chameleon markers:


To start this card, I stamped the van image onto white cardstock. The line for the road is drawn in with a black tip pen. I decided to add the presents to the top of the car and balloons above the card. I also used the black tip pen to draw in the balloon strings. To finish the scene, I added a couple exhaust puffs to the van. The sentiment is stamped at the bottom of the card in the center.


I used lots of Chameleon markers to color in the scene, I started with the balloons and worked my way down the card, saving the van for last. To finish the card, I added a some white gel marks to each of the balloon.


The following Chameleon markers were used on today's card:
NU1, NU2, NU4, BR2, BR4, BR5, YO2, YO3, YL2, BG4, BL2, BL3, BL4, PR4, YG3, GR3, RD2, RD4, BK4, CB, OR4, PK3

Please stop by the MarkerPOP blog to see the entire supply list.

Thank you for stopping by today! Have a great one!

Jessi

Friday, July 7, 2017

Birthday Wishes

Hello, MarkerPOP friends!  Sorry for the late post today! But better late than never, right?

Today, I am working with a super adorable set from WPlus9 Design. The Modern Peonies set is full of floral images that are perfect for several special occasions. 


The floral images are stamped onto watercolor cardstock. I used the masking technique to make it look like one flower is in front of another one. The flowers are colored in with ZIG Clean Color markers. The panel is attached to a foiled print. To bring out the gold, I decided to emboss the sentiment with gold embossing powder. The sentiment is cut into strips and attached on the front og the card.


The following ZIG markers were used on today's card:
020, 022, 041, 047, 065, 070


Please stop by the MarkerPOP blog to see the entire supply list for today's card.

Thank you for stopping by today! Have a great day!

Jessi

Thursday, July 6, 2017

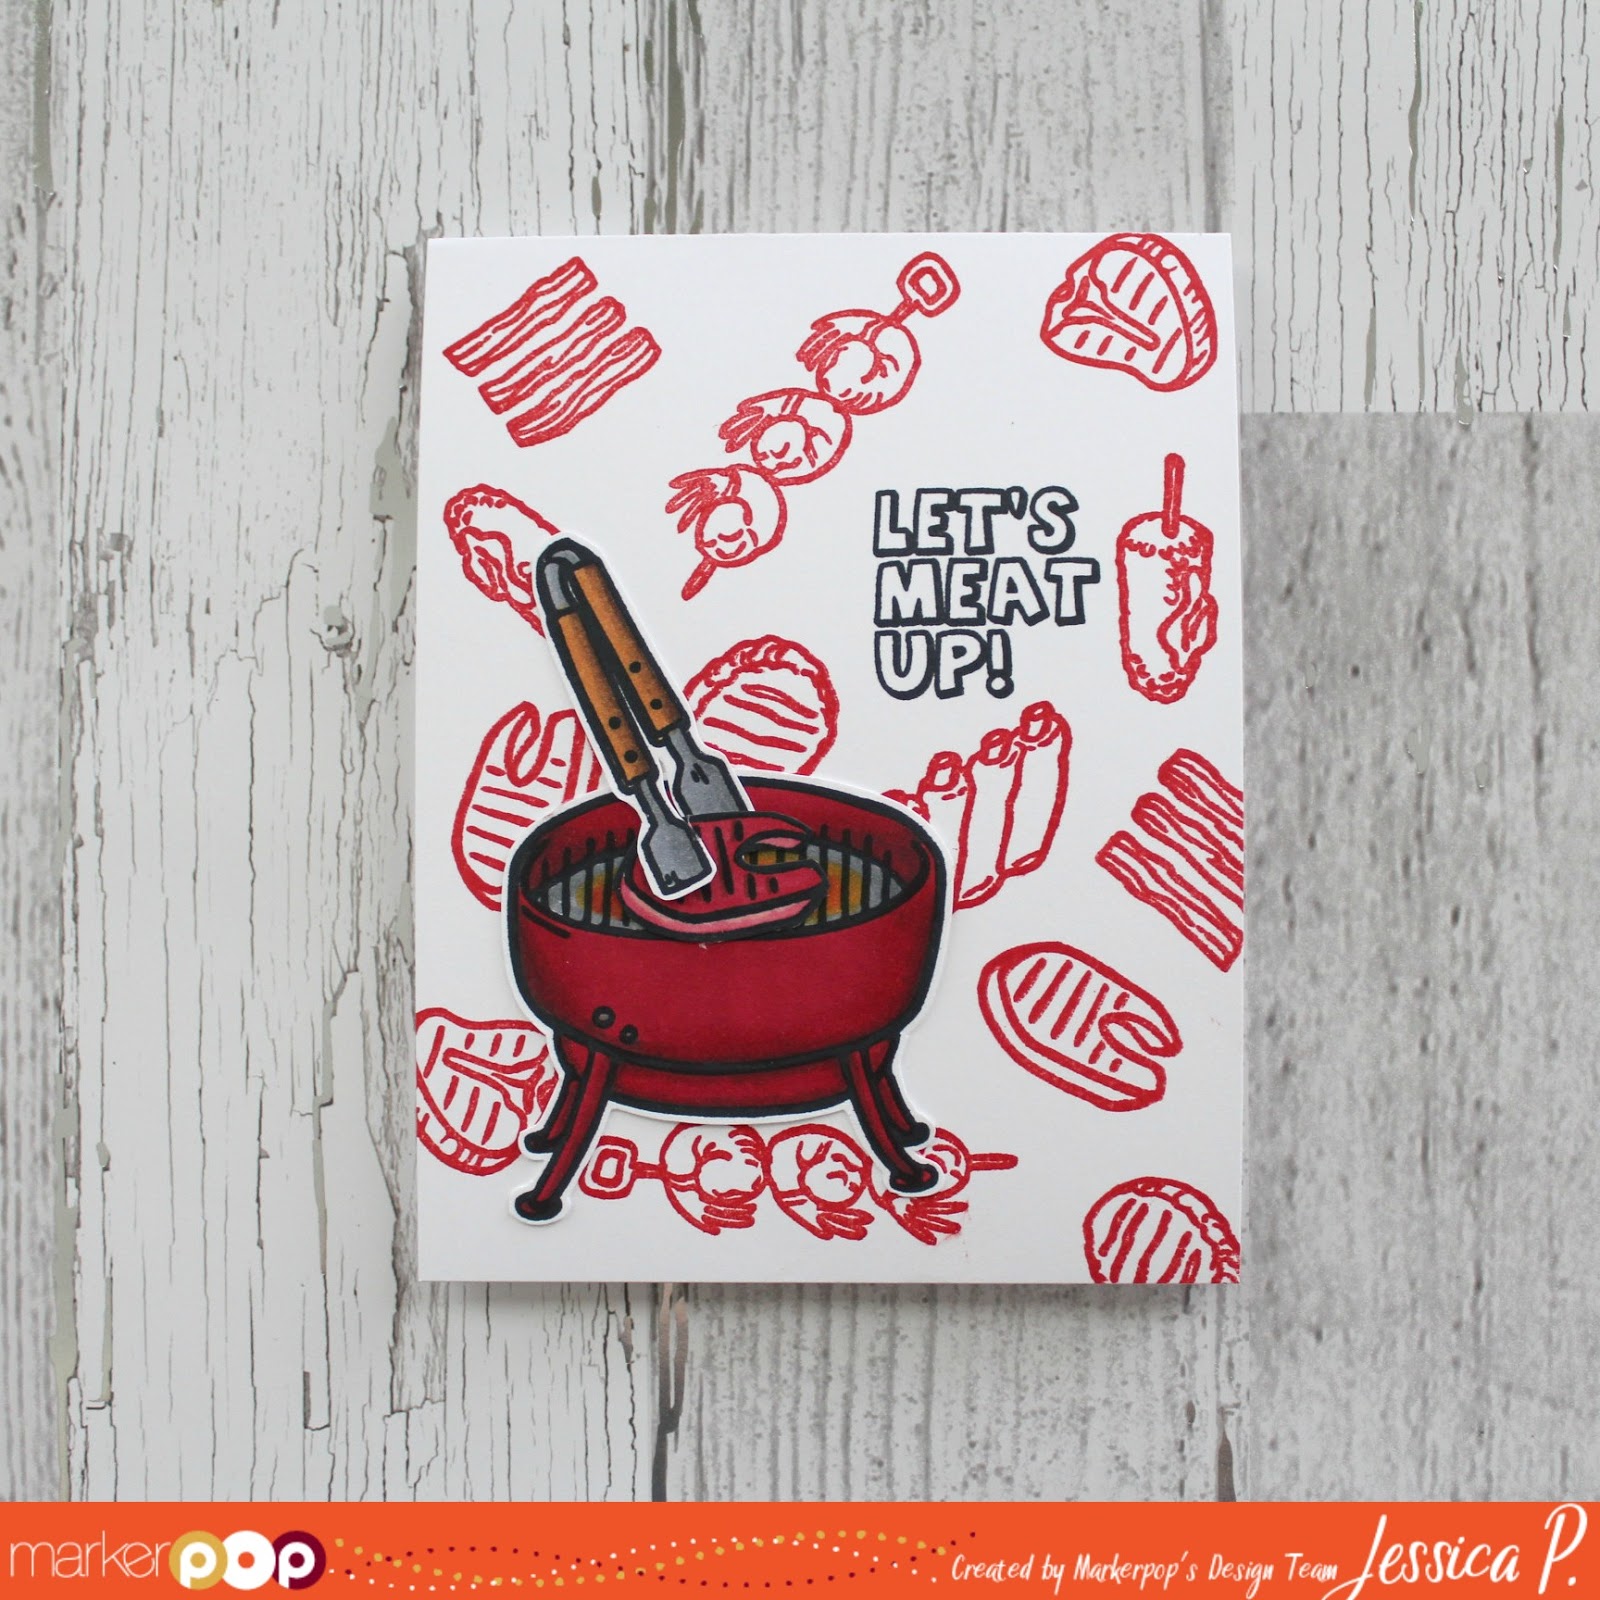
Let's Meat Up

Hello, MarkerPOP friends! I hope everyone had a wonderful 4th of July celebration! Who all BBQ'd? I know that we did...hot dogs and ribs! Yum!!! So with that in mind, I thought this week would be a great week to showcase Waffle Flower's Meat It Up stamp set.

I paired up the Meat It Up stamp set with Chameleon markers:


All the images I wanted to use on the card were stamped onto white cardstock using Memento Tuxedo Black ink. The lines on the stamps are pretty wide, so I used my MISTI tool to allow an even impression of the stamps. The images were colored in using a variety of Chameleon markers. The images were cut out and set aside.


I wanted the sentiment of the card to really pop, so I stamped it using black ink. To form the background of the card, I used red ink and stamped a variety of images from the stamp set. Once the background was complete, I attached the cut out images. The pieces are attached to make it look like the steak is cooking on the grill.


Here is the list of Chameleon markers I used on today's card:
RD2, RD4, BR4, BR5, OR3, OR4, CG5, CG8

Please stop by the MarkerPOP blog for the entire supply list.

Thank you for stopping by today!

Jessi

Tuesday, July 4, 2017

Joy Clair - Blending with NeoColors Crayons

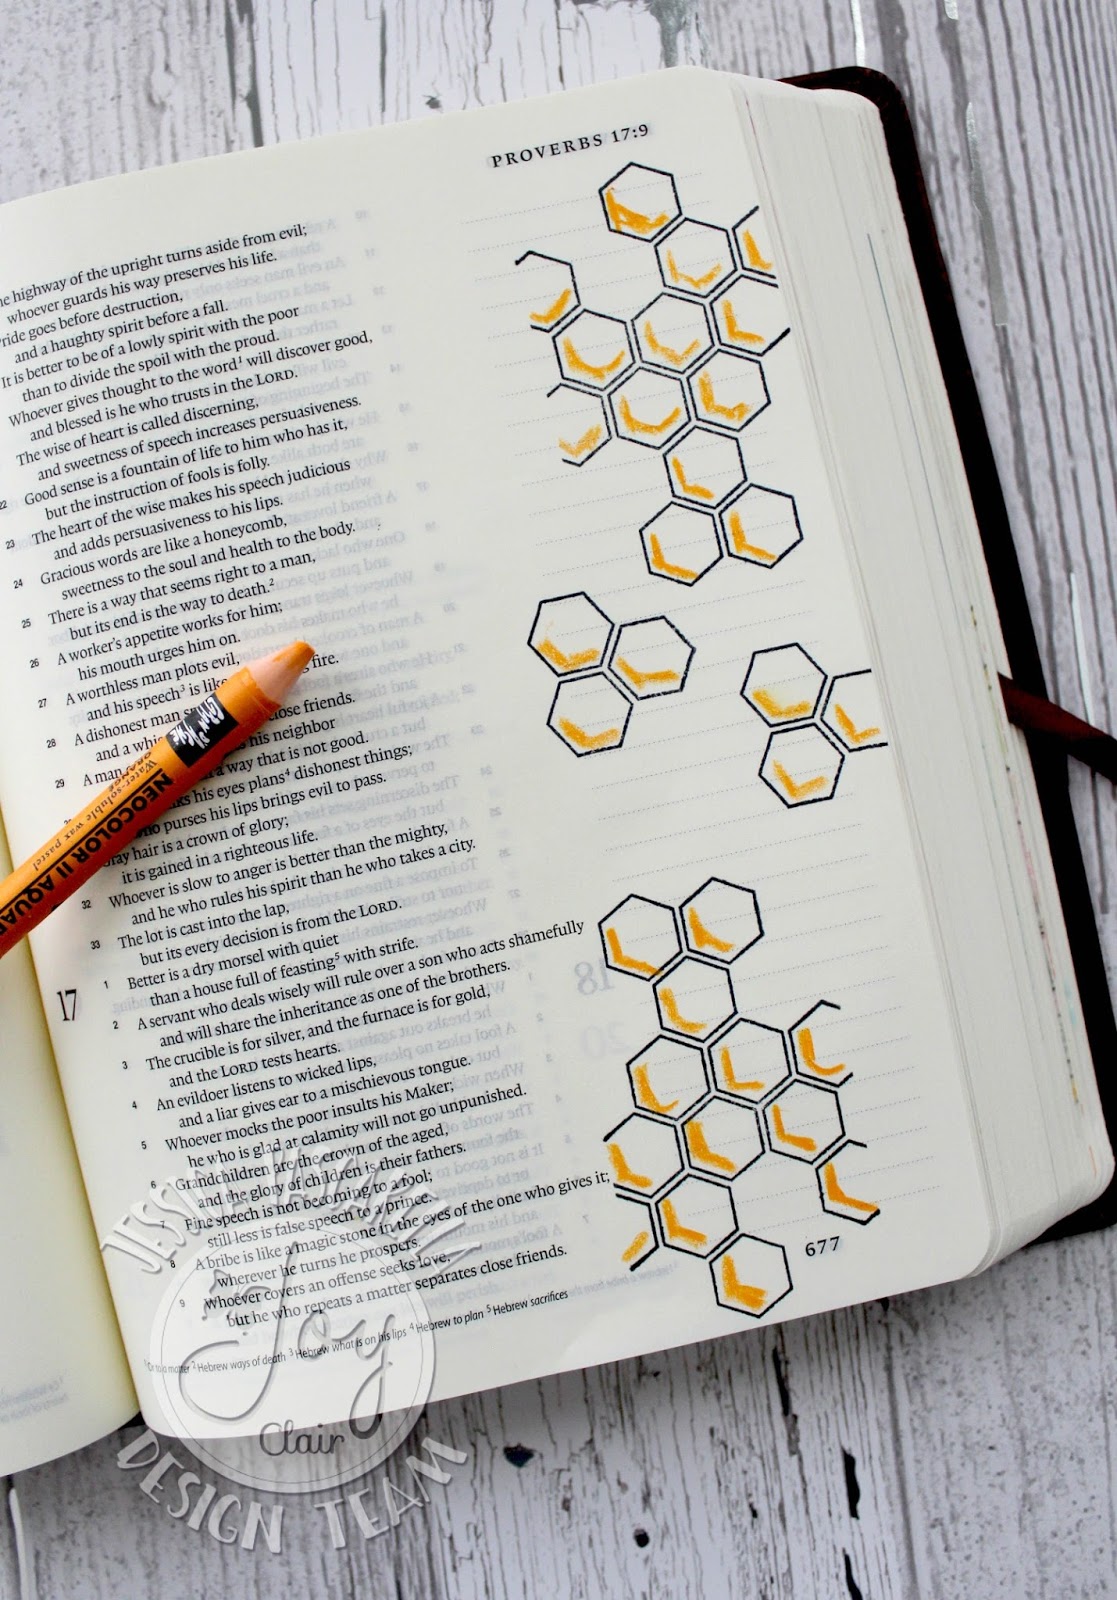
Hello, Joy Clair friends! I hope you are having a wonderful day! Today, I will be showing you my latest Bible Journaling page with the amazingly sweet Bee Kind stamp set. I love the images and sayings that are included in this set.

Have you used NeoColors? They are similar to Gelatos. I love to blend them with baby wipes, but today, I am trying something new. I am using water with them and turning them into watercolors.


To start the page, I stamp the honeycomb images along the side of the Bible Page. I drew in one line of the orange color along the bottom of each honeycomb.


Using a thin paint brush, I used water to spread the color around the image. To dry the page quicker, I used my heat gun and dried the page before I repeated the process with the yellow color.


I stamped the remaining images (beehive and bee) onto the page using black ink. The beehive with a light brown color. I wanted to highlight the verse, so I blended orange on the bottom and yellow on the top.


I loved the saying, but wanted to add on to it. I decided to break out my stickers and create a longer saying with variety of alpha and word stickers.

Are you interested in learning the latest news going on with Joy Clair? Join us on your favorite Social media sites to see our newest products and samples from the design team members.

Thank you for stopping by! Hope you have a wonderful day!


Supplies:
Joy Clair - Bee Kind
NeoColor Crayons
Memento Tuxedo Black Ink
Variety of Stickers

Saturday, July 1, 2017

Joy Clair - July Monthly Challenge

Happy July, Joy Clair friends! Today starts a new challenge over on the Joy Clair blog! This month, the design team is showcasing some of their favorite Joy Clair stamp set! The theme for this month is Anything Goes

Interested in joining the fun? Hop on over to the Joy Clair blog to find out how you can play along!

Today, I am playing with the Doodle Flower Background and Hello Sentiments stamp sets.


I love this background stamp! I decided to stamp/emboss the image in gold and cover only part of the panel. I left the bottom empty, so I could go back and emboss a sentiment. The sentiment is from the Hello Sentiment stamp set. I attached the embossed panel onto a robin's egg blue cardstock.

Such an easy card to create. You can even color in the image for a different look!

Thank you for stopping by!

Have a wonderful day!

Jessi

Thursday, June 29, 2017

This Place is Not My Home

Hello, Joy Clair friends! It is Jessi from the Joy Clair Design Team. How many of you love to camp in the summer? I think it would be fun...until I think about sleeping in the hot, sticky night and that changes my mind. Now, if I had access to a camper, that might change my mind...might.

Today I am using a number of different Joy Clair sets to create this Bible journaling page below:


To start this page, I stamped the camper image from the Happy Camper stamp set. I stamped an additional camper onto paper and use it for the masking around the camper. I wanted to make it look like the camper was moving, so I added exhaust behind the camper by stamping the bubbles from the Anchor of Hope stamp set.

The next step is to add the trees to the scene. I stamped a couple onto paper from masking process. The trees are from the Happy Camper stamp set. To add the mountain background, I placed the masking trees in place and stamped the mountains. The mountains and clouds are from the Wild and Free stamp set.

The entire page is colored in using Zig Clean Color Watercolor markers. I wanted to add stars to the sky. I wanted to try something instead of white paint splatters. I used NUVO White enamel drops to create the starry sky. Once the stars were dry, I added the stickers for the wording on the page.


Are you interested in learning the latest news going on with Joy Clair? Join us on your favorite Social media sites to see our newest products and samples from the design team members.

Thank you for stopping by! Hope you have a wonderful day!


Supplies:
Memento Tuxedo Black Ink
ZIG Clean Color Markers
NUVO White Drops
Variety of Stickers

You're Absolutely Fabulous

Hello, MarkerPOP friends! Today I am sharing a card using one of the New Hero Arts stamp set. When I first saw this set, I knew that I needed to get my hands on it! When I was much younger, maybe even now, I loved playing with paper dolls. The Stamp & Cut - Dress Up stamp set brought back some memories!

I decided to pair up this super cute stamp set and the fabulous Chasing Dreams paper pad.


Along with the stamp set, there are three skirt dies. I Iove the skirt die that you fold to make it pop off the card. I used that die on a fun print from the paper pad. I decided to paper piece the top by stamping the image onto another print and cutting it out by hand.


Time to piece the card together! First, I stamped the legs onto white cardstock. I aligned the skirt up with the legs to help with the placement of the top of the body stamp. Once the image was stamped, I glued in the paper-pieced shirt. The hair and skin portions of the image are colored into with Chameleon markers. To finish the girl image, I used pink NUVO enamel drops to color in the ponytail holder, necklace, and shoes. The simple sentiment is stamped on the corner of the cardstock panel. The panel is then attached to a fun print.


The following Chameleon markers were used on today's card: NU0, NU1, NU3, BR4, BR5

Stop by the MarkerPOP blog for the complete list of supplies!

Thank you for stopping by! Have a fabulous day!

Jessi


Friday, June 23, 2017

Joy Clair Summer Coffee Lovers Blog Hop

Hello, friends! Are you ready for another Coffee Lovers Blog Hop? It is truly amazing how big this blog hop gets! So many talented designers decided to join in the fun!

Image may contain: text

Today, I am using Joy Clair's Coffee Lovers for this Summer Coffee Lovers Blog Hop:


I decided to paper piece the large coffee cup for today's card. I stamped the image onto several different prints and cut out the individual sections. Once all the pieces are cut, I assembled them onto the vellum. The sentiment is stamped and embossed at the bottom of the vellum. The vellum is then attached to a soft pink print. The pink panel is attached to the back panel of the card. I love all the layers!

Let's talk about prizes!

Joy Clair is giving away a $25.00 gift certificates to their store! All you have to is comment on each of our design teams blog and the Joy Clair blog. The winner will be announced on the Joy Clair blog. You have until June 30th to leave your comments.

Hop on over to the Joy Clair blog to see the rest of our design team's creations!

Thank you for stopping by!

Jessi


Thursday, June 22, 2017

Hello, Friend

Hello, MarkerPOP friends! My style is Clean and Simple. I love the simplicity of the final project. I sometimes feel guilty with how quick it takes to make a card. So I have started to added some additional touches that I believe push the card to the next level! One of my new favorites is the NUVO Drops!

Today, I am using the Altenew's Be Strong stamp set and Chameleon markers:


I used Memento Tuxedo Black ink to stamp the images onto the white cardstock. I used a couple orange and yellows Chameleon markers to color in the individual bulbs. To make the bulbs look more life-like, I covered each one with Clear Nuvo Drops. When the drops dry, they give off a glassy look to the bulbs. A sentiment is stamped at the bottom of the card.


I used the following markers on today's card:
Chameleon markers -

Please head on over to the MarkerPOP blog for the list of supplies used on today's card.

Thank you for stopping by! Hope you have a great day!

Jessi

Friday, June 16, 2017

Llama Tell You...

Hello, MarkerPOP friends! It is Jessi here. "Llama tell you"...I am loving all the llamas everywhere! Now, they might not be the cutest animal in reality, but they are super cute on papers and stamps! They make some adorable and sometimes silly cards!

I love paper-piecing! So today's card focuses on that technique instead of using markers to color the image.

Today's card showcases the super adorable Gerda Steiner Designs' Llama Tell You stamp set:


I had a paper pad that included some llama images. So I decided to use the paper pad and complete the card by paper-piecing. The stamp images are stamped on a variety of prints and cut out. The llama image is completed with 2 different prints. The cactus is stamped on a fun blue print and cut out. The background sun is created by a circle die. The ground layer is created with a wavy border die. Some many fun prints to complete this card!


No markers were used on today's card, but stop by the MarkerPOP blog for the list of supplies used on this card!

What a chance to win some prizes? Join us on the current MarkerPOP challenge! We cannot wait to see what you create!

Thank you for stopping by today!
Jessi

Psst... DCWV No Problem, Llama 12 x12 paper pad was used on today's card.

Thursday, June 15, 2017

Reach for the Sky

Hello, MarkerPOP friends! It is Jessi here. Today I am sharing a sweet card with you today. I am working with the Hampton Arts' Reach for the Sky stamp set. This stamp set would make very cute baby cards. But today, I am using it for a kid's encouragement card. We all have seen our kids in moments were they need our extra support to calm them down.

Why not give them a little extra love with a handmade card!


The stamp set includes a few different adorable animal images. I stamped a few of them onto white watercolor cardstock and colored then in with a variety of ZIG Clean Color markers. The cloud image is stamped onto some printed paper, for some paper piecing. The images are attached to a printed panel. The sentiment is stamped on the bottom left corner of the card. To fill in some of the empty space, I stamped and colored the moon image  and attached to the card.


I used the following ZIG Clean Color markers on this card: 050, 060, 061, 098

Please hop on over to the MarkerPOP blog for the list of supplies used today!

Be sure to stop by and play along with our current challenge! It is an easy way to enter for your chance to win some amazing craft supplies!

Thank you for stopping by!

Jessi


Wednesday, June 14, 2017

Joy Clair's Flawless for Summer Event

Today is a special day on the Joy Clair blog! The design team is showcasing the super adorable Flawless stamp set! We wanted to share with you the variety of ways that you can use this stamp set!

When I first saw this stamp set and all the makeup images, 'Sweet Sixteen' came to mind!


I stamped the images randomly onto black cardstock and embossed in silver. (I really loved how the silver popped against the black!) I created the sentiment for the card using a variety of die cuts and colored cardstock. The 'happy' part of the sentiment is from the Everyday Sentiments stamp set and is also embossed in silver.


Interested in seeing what the rest of the design team came up with, hop on over to the Joy Clair blog!

Thank you for stopping by! Have a wonderful day!

Jessi


Thursday, June 8, 2017

A Sweet Hello

Hello, MarkerPOP friends! Are you bird watchers? My mother and her parents are. I never really thought I was until I moved to Texas near the Gulf Coast. One of the first things I realized were the different birds and in the certain area that I live...the lack of birds. One of my favorite birds are hummingbirds. They are some fascinating birds. Their bright colors and their speed!

Today's card showcases the Pink & Main's Hummingbirds and Chameleon markers:


The images are stamped with Memento Tuxedo black ink onto white cardstock. The images are colored in with a variety of Chameleon markers. The images are then cut out using the Hummingbirds coordinating dies. The sentiment is stamped onto a printed strip of paper from the Photo Paper Play Summer Bucket List 6x6 paper pad. The background panel is from the same paper pad.


The following Chameleon markers were used on this project: RD2, RD4, BG1, BG4, GR1, GR3, YG3, BR4, OR4

Hop on over to the MarkerPOP blog to see the list of supplies on today's card.

Thank you for stopping by today! Have a wonderful day!
Jessi

Wednesday, June 7, 2017

Joy Clair - Baby Wipe Technique

Hello, Joy Clair friends! It is Jessi from the Joy Clair Design Team. Do you have certain supplies that you tend to rely on when journaling in your Bible? I tend to use a lot of watercolors. I recently started to use more gelatos and water crayons. I have found that they are super easy to blend with a simple baby wipe.

Today's project will be focusing on the super cute Color By Faith's Anchor of Hope stamp set:


I wanted the water to look darker the deeper it went on the page. So I decided to use the ombre effect (same color group, starting with the lightest to the darkest). Below is a sample of how I applied the crayons to the Bible page. I started with the lightest at the top and had the darkest blue at the bottom. I blended the crayons by lightly wiping with a baby wipe.


Sometimes after the blending is completed, there is a need to make the a section darker. You can do so by applying another layer of crayon to the desired section. Blending again with a wipe. Repeat until the desired color is reached.
 

During the month of June, the design team is applying BLING to their projects. I love using sequins on some of my projects. They add a fun dimension and sparkle to the final project. For the Bible Page, I included sequins that matched the different blues in the ombre water. The sequins are attached by using a small dab of glue.


I also used a baby wipe to blend in the colors on the different parts of the scene. To finish the page, I used a fine tip black pen and drew in the chain for the anchor.

Are you interested in learning the latest news going on with Joy Clair? Join us on your favorite Social media sites to see our newest products and samples from the design team members.

Thank you for stopping by! Hope you have a wonderful day!


Supplies:
Joy Clair - Anchor of Hope
NeoColor Water Crayons
Memento Tuxedo Black Ink
Sequins
Baby Wipe 


Thursday, June 1, 2017

Joy Clair June Challenge

Hello, Joy Clair friends! Today is the 1st of the month, which means...time for a new challenge!

This month's challenge is Summer-Time. We want you to share how this photo inspires you! Is it the colors or the popsicles?

For me, I loved the colors and the scattered popsicles!


Today, I am using the Seas the Day stamp set:


This is a very simple card to recreate! I used the larger starfish image from the stamp set and repeatedly stamped around the panel in a variety of colors. I used the same colors on the sentiment to give the rainbow effect.

Please stop by the Joy Clair blog to join in the challenge and to find out the rules!

Thank you for stopping by!

Have a great day!
Jessi

Altenew Florals + ZIGs

Hello, MarkerPOP friends! Hope you all are having a wonderful Thursday! Can you believe that today is the day of June? This year is going by fast! Now that the kids are out of school and their activities slow down, I am looking forward to the additional crafting time!

One of my new favorite stamp company is Altenew. I am falling in love with all their floral stamp sets! If you are not familiar with this company, check out their selection in the MarkerPOP store!

Today, I am working with the beautiful Altenew's Bamboo Rose stamp set and ZIG Clean Color Markers:


I really enjoy using watercolors on my project. Especially because you can do the 'care-free' coloring style for a messy, but gorgeous outcome! I stamped the images with black ink. The images are then colored in with ZIG markers. The sentiment is stamped in black ink as well. To finish the card I decided to round two of the corners and attached clear droplets to the card.


Please stop by the MarkerPOP blog for the list of supplies used on today's card!


Thank you for stopping by and I hope you have an awesome day!

Jessi

Friday, May 26, 2017

Sorry, Friend


Hello, MarkerPOP friends! I hope you are enjoying the beautiful day! This card seems fitting for today, because well...I am running behind. So better late than never right!?

I recently saw a video about using Zig Markers and creating a stain glass window look. I figured I would give it a try for today's card.

I am using the Waffle Flower's Enveloper Little Birdie stamp set to create the card below.


Starting with a piece of vellum, I stamped the image with embossing ink and covered the image with white embossing powder. I used a heat gun to melt the entire image. Once the embossing was cool, I flipped the vellum over and used a variety of ZIG Markers to color in the image. Because you are coloring on the backside, you can be forgiven for coloring outside of the lines.


When the coloring was completed, the vellum is trimmed down to size to fit on the front panel of the card. The sentiment is created using a couple different supplies. The 'SORRY' is created using a word die and black cardstock/ The 'FRIEND' is stamped and embossed in black onto the vellum.

I loved the stain glass technique and cannot wait to give it another try!


Please stop by the MarkerPOP blog for the list of supplies used on today's card!

Thank you for stopping by and have a wonderful day!

Jessi

Wednesday, May 24, 2017

Joy Clair's Father Day Promotion

Today is a fun day on the Joy Clair blog! The design team is doing a special promotion with the super cool Dad's Day stamp set. The team is showing you several different ideas that can be done with this stamp set.

Here is a look at what is included in the Dad's Day stamp set:

No automatic alt text available.

For today's card, I decided to use the 'Star Wars' theme stamp.


The Yoda stamp is stamped in the middle of the card. It is immediately covered with gold embossing powder and heated with a heat gun. I then used the stars from the Three Wise Men stamp set and filled in all the empty space. The stars are also covered in embossing powder. This is were my plan was to finish the card. However, I decided to use some colored pencils to color in the Yoda image.

I love how this card turned out! Perfect for those fathers who love Star Wars!


I hope that I have inspired you! If you are looking for more inspiration, hop on over to the Joy Clair blog to see what the other design team members have created!

Thank you for stopping by!

Have a great day!
Jessi

Wednesday, May 17, 2017

Joy Clair and Imagine Blog Hop

Hello, crafty friends! Today is a super fun day! It is the first day of the Joy Clair and Imagine Blog Hop. The design teams from both companies have joined in a for special 2 day blog hop! You should be arriving from the talented, Neva's blog! If you just happened upon the blog hop and would like to start from the beginning, hop on over to the Imagine blog.

Joy Clair has a line of faith-based stamps, Color by Faith. I have decided to put together a couple of Bible pages using the Color by Faith stamps and some delicious Imagine products.

First up, I have paired the God's Treasure stamp set and Imagine's irRESTible - gold.


I love the shine that the irRESISTible leaves. It reminded me of jewelry, so I stamped the jewel images along the side of the page. Once the ink was dried, I filled in the image with the gold irRESISTible, giving the finished product a shiny coat. The phrase is stamped in Memento - Tuxedo Black ink and the dotted lines are stamped using Memento - London Fog.


I used Memento - Tuxedo Black to stamp the design images along the side of the Bible page. I used the following Fireworks: Lilac Posies, Cottage Ivy, and Rose Bud to color in the images. I poured some of the product out onto a clear stamp block. Using a small paintbrush, I colored in the images. I love the shimmer that the Fireworks leave once they are dried. (I had a hard time capturing the shimmer in the photos.)

Let's talk about prizes!

Be sure to leave comments during these two days of hop so you can be entered to win a one of two $25 Joy Clair Stamps Gift Cards or one of two $25 Gift Cards from Imagine!!! Joy Clair winners will be announced on the Joy Clair Blog at the end of the month and Imagine winners will be announced on the Imagine Blog.

Thank you for stopping today! Enjoy the hop!

Your next stop is the talented, Nadine!

Below is the list of today's hop:

DAY 1

Jessica Pascarella (you are here)