Showing posts with label diy. Show all posts

Thursday, October 6, 2016

DCWV Hats, Bats, Cats...Oh, My!

Hello, friends! It is Jessi from the DCWV Social Media design team. It is October! When it comes time to decorating the house, this is the month that I get confused on how to decorate! Do I do Fall or do I bring out the Halloween? I used to decorate for Halloween two weeks out. However, the home décor is getting cuter and cuter and hard to resist!

When I saw the DCWV Hats, Bats, Cats Project Stack, I knew exactly how I wanted to use part of the stack.


DWCV project stacks are awesome to work with. The projects take no time at all to complete. All you need to do is pop the pieces out and assemble. Let's start with the bats.


The stack includes several different sizes of bats. You pop the bats out of the stack and fold along the crease lines. You can do some many things with these bats. I taped them to a mirror. You can tape them to walls and doors. They can even hang from the ceiling fans and swirl around in the breeze.


Next up are the cats. The cats are super easy to create, but do involve some gluing. To start, you pop out all the pieces. Complete the cat's head by fold and gluing along the creased line. It is time to attach the head to the body. On the sheet , there are two strips of paper. The short on is used to attach the head to the body and the longer one is for the tail.

So if you are in need of quick decorations for your Halloween party or want to decorations that look super cool, you can find the Hats, Bats, Cats Project Stack at JoAnn Stores.

Thank you for stopping by and have a wonderful day!

Jessi

Tuesday, September 27, 2016

DCWV Fall Paper Wreath

Hello, DCWV friends! It is Jessi from the Social Media Design Team. It is Fall and it is time to bring out the fall home décor! A few weeks ago, I shared the start of my decorating with the new Lia Griffith DIY Project Stacks. Today, I am adding to the décor using the new DCWV Autumn Leaves Stack.


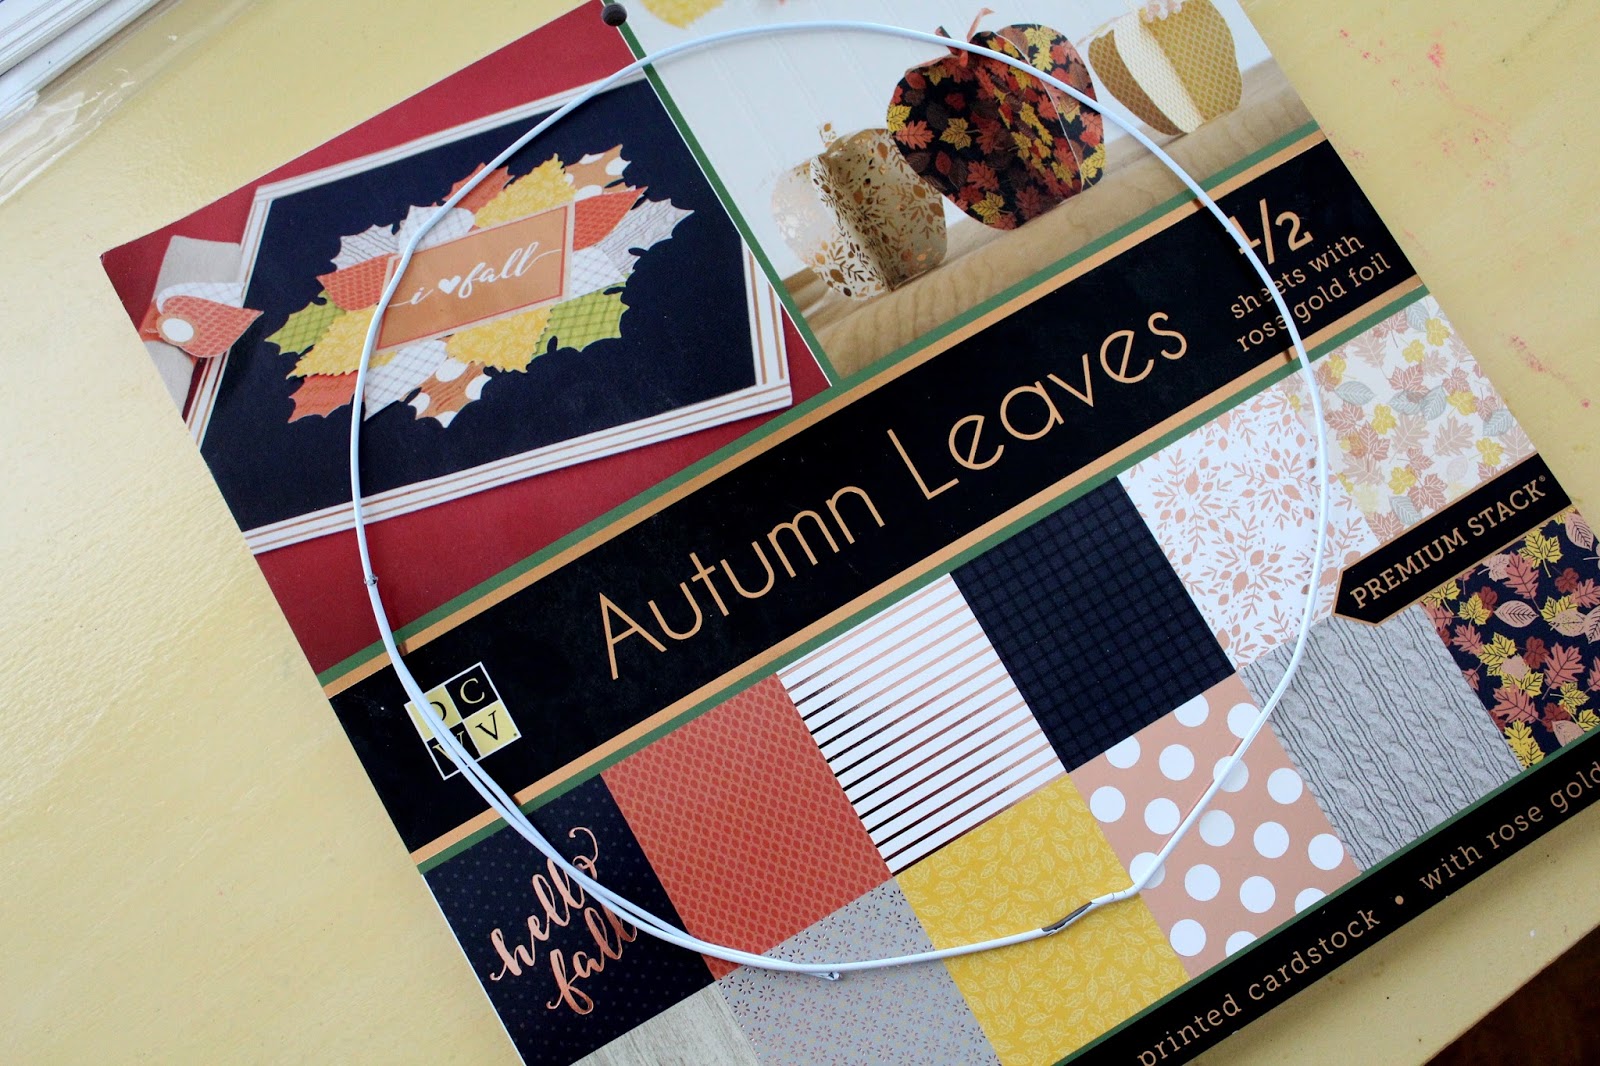
This is such a simple wreath to recreate! All you need is the DCWV Autumn Leaves Stack, glue, and a wire coat hanger!

To start the project, form a circle with the wire hanger. You can make the circle to the size that fits your needs.


Next, cut strips of printed paper. You can cut them at any width, mine are done at 1.5inches.


Fold the strips in half and place glue on the inside of one side. Put the crease of strip along the wire and fold in half. Repeat until the circle is full.  To add some detail, I cut part of the strips to make pendant-like tips at the end of the strips. To fill in the gaps in between the wreath, I added a variety of printed strips. To finish the wreath, I cut out a 12inch sentiment and placed across the center.


Thank you for stopping by!

Have a great day!

Thursday, August 25, 2016

DCWV Mini Envelopes Project Stack

Hello, DCWV friends! It's Jessi from the Social Media Design Team. It is Back to School season! Some moms are crying, while some are jumping for joy! I was one that was jumping for joy. However, a few days of the quietness has started to get to me. So today's project will help spend the love, even when you are not around.

I am showcasing the new DCWV DIY Project Stack - Mini Notes & Envelopes.


This DIY stack is perfect for the little notes you want to hand out. For example, the size is perfect to tuck inside their lunch kit for school. A wonderful surprise to help them get through the day. I even recently tucked on into my husband's computer on a very important day for him.

The envelopes are already scored! How easy is that! All you have to do is punch the template out and fold. The first step is to adhere the flaps together. I used a tape adhesive gun and placed a strip of tape along the edges of the bottom flap. Then you fold!


The next step is to write your special note. In the DIY Stack, there are a few sheets of papers that are scored and ready to cut. Simply, write your note and trim.


Simply fold the note to fit into the envelope and seal. There are some pretty glittered heart stickers included in the stack.


Time to tuck those notes into their hiding spots!

Don't you love the new DCWV DIY Project Stacks? Check out the variety available at your local Michaels stores!

Thank you for stopping by today!

Jessi

Friday, October 16, 2015

DCWV December Daily

Hello, DCWV friends! It is Jessi and the holiday crafting season is here! DCWV has a new DIY Project stack coming to Jo-Ann stores soon. The Holiday DIY Project Stack is for Favor Boxes. However, I decided to switch it up some! And let me admit, I am going out of my comfort zone!!


Each year I keep telling myself that I would make a December Daily to document the holiday season. However, each year goes by and no December Daily! When I received this stack, I was determined to make one! So this year I am glad to say I will finally have a December Daily album.


My plan for this album is to have an Instagram pic for each day. So I grabbed one of the DCWV Insta Photo Albums available at Jo-Ann stores.


The first step I took was to create the album cover. I took some of the patterned prints and the die cut embellishments available in the DIY Stack. I also used a variety of dies for the wreath and the gold letters. Every time I added something to the cover, I felt like I needed to fill up any white space. This was odd for me, because when I create cards, I LOVE white space!

After the cover was done, it was time to create the pages. I used all the prints available in the stack and cut done the pages. The idea is to include the instagram photo on one page. The other side with have a place for the journalling.


Sorry, I do not have the pages embellsihed yet. It is a very long process for my. I have to say that this cover took me over a week to complete...and I am still unsure it is finished! However, I will be using the embellishment diecuts available in the stack.


I will be back in 2 weeks to showcase a few of the pages that I created for my December Daily album. See you then :)

Have a great day!
Jessi


Supplies:
DCWV - Holiday DIY Project Stack - Favor Boxes

Monday, April 20, 2015

DCWV Scrapbooking Made Simple Part 2

Have you seen the new DCWV Ready Made Scrapbook pages now available at Jo-Ann Stores? They make scrapbooking super simple and easy to complete!

Today, I will be sharing 2 more pages that I completed.

 
I added simple add-ons to the layout. I took a piece of DCWV Foil paper and create pendant die cuts. I then ran them through an embossing folder to add dimension to the pendants. I used the pendants to create the title of the scrapbook page.

 
I attempted to stamp on the fancy die at the top of the page. I messed it up, so I needed to find a way to cover the mistake.  I decided to use a die and create a cork embellishment from DCWV Cork Stack. On top of the cork, I added a DCWV Mirror Hearts embellishment. A simple title is used to finish the page.
 
Thank you for stopping by!
 
Have a great weekend!

Friday, April 10, 2015

DCWV Scrapbooking Made Simple

Hello, everyone! It is Jessi from the DCWV Social Media Design Team! The last few days, the team has been showcasing the new DCWV Ready Made Scrapbook pages now available at Joann Fabric Stores! These pages are perfect for beginner scrapbookers (like myself)!

Today, I will be showing you a few pages that I created.

First up is the Snowflakes page:

 
First I filled the empty spots with photos and simple journaling. The final touch was to create a simple title for the page.
 
Next up is the USA page:
 
 
I didn't want to take away from the pretty photo borders. I simply added the photos and used alphas to create the title.
 
The last page for today is the Day to Celebrate page:
 
Once again, I started with the photos and journaling for the page. I wanted to change the title of the page. I used a matching DCWV stack - Chalk Art Stack to cross out the word 'DAY' and changed it to summer.

I had so much fun creating these layouts! Spent one day creating with these and walk out of the craft room with 5 layouts completed (will share the other soon)!

Thank you for stopping by today! Make sure to check out Joann's website to see the entire Ready Made Collection! The designs are awesome!

Friday, March 6, 2015

DCWV Project Stack - Cone Wreaths plus Tip

Hello, everyone! This week the DCWV Social Media Design Team is showcasing the new DCWV Project stacks available at Joann stores! Today I am using the DIY Cone Wreaths Project Stack for my post.
 
 
Interested in seeing the other DCWV Project Stacks release, check out videos the talented Tessa did for the release!
 
The Cone Wreaths Project Stack includes the paper and instructions for four wreaths. Today, I focused on the Spring/Easter wreath. 
 
 
This was my first cone wreath that I have created. The instructions made it super simple to complete the wreath.  I also included Glue Dots to connect each cone to the next cone.
 
One lesson I learned...step back and double check the patterns as you lay them in place. Once I finished the project, I noticed I had a repeated prints next to each other in two different locations.
 
 
Bonus tip of the day:
 
Once I finished creating the Spring wreath, I did have leftover paper from the Spring section of the DIY Project Stack. I wanted a way to keep the extra straps together. I use larger envelopes and attach to the front or the back cover of the stack. The scraps are tucked into the envelope. This allows you to be able to tell with stack the scraps came from.
 
 
Thank you for stopping by today! Hope you have a wonderful day!
 
Jessi