Wednesday, December 20, 2017

Joy Clair Farewell

Hello, Joy Clair friends! Today is a bittersweet day for me. Today is my last post as a member of the Joy Clair design team. After 2 years, I have decided it is time for me to take a break from design teams. This has been such an awesome company to be a part of. I had the pleasure of being one of the first design team members. It has been amazing to watch this wonderful company grow! And I am sure that we haven't seen the best from them yet! Thank you Christy and Amanda for the opportunity to be part of your crafting journey.

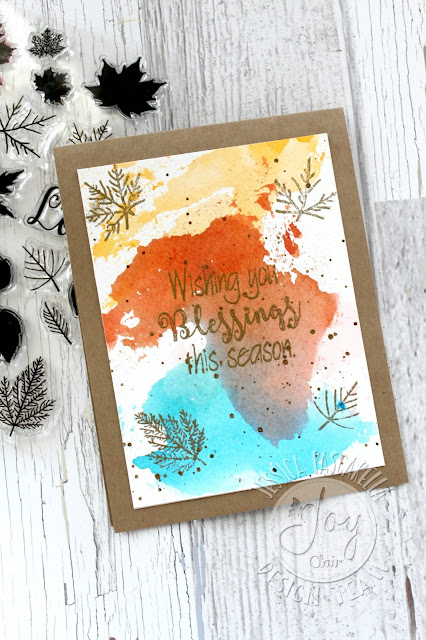
Today, I created my latest Bible Journaling page with the new Born is the King stamp set:


I used Neo-colors to color in the panel of the Bible page. I used a mixture of blues and purples to get the final color. The colors are blended using the baby wipe technique. (Simply swiping the colors with the baby wipe.) The images and words are stamped and embossed in gold. Stickers were used to complete the wording along the edge of the Bible page.

Interested in learn the latest news with Joy Clair Stamps? We would love for you to follow our Social Media pages!


Thank you for stopping by!
Jessi

Friday, December 8, 2017

Joy Clair - Winter Coffee Lovers Blog Hop

Hello, Joy Clair friends! Today the design team is participating in the Winter Coffee Lover Hop. Please stop by the Joy Clair blog to see what the other design team members created. 

No automatic alt text available.

Here is my creation using the new Christmas Cocoa stamp set:


I really love paper-piecing technique. I paired up the joy Clair stamp set with a DCWV Holiday paper pad. I love the kraft, black, red color combination for the holiday season.

Please stop by the Joy Clair blog to see the details for your chance to win some Joy Clair goodies.

Thank you for stopping by and have a wonderful day!
Jessi

Tuesday, December 5, 2017

Joy Clair - Send Me & Nativity Bible Pages

Hello, Joy Clair friends! Today I am excited to share with you two of my latest Bible journaling pages. Both pages are using some of the newest stamp sets from Joy Clair, as well as different techniques.

The first page is created using the Send Me stamp set:


I really love the suitcase image in the stamp set. I wanted to use the paper-piecing technique for the image. The suitcases are stamped on three different prints and hand cut. I attached a panel made out of a simple print to the side panel of the Bible page. The suitcases are attached towards the bottom of the page. To fill in the rest of the panel, I used a variety of stamps. One of the main focuses on the page is the gold embossed 'go'. The word is stamped half on the Bible page and half on the print panel. The pop of gold adds an unique touch to the page.

Next up is the Christmas Nativity stamp set:


Sometimes I like to explore different ideas for stamp set. They are usually designed for a certain theme or verse, but I try to show additional ways to expand the stamps. For the Christmas Nativity stamp set, I created a non-Christmas Bible page. I used the angel image and repeatedly stamped on the page using the masking technique. To make the angels pop more, I colored in the skin and hair different colors. The word title for the page is created using a variety of alpha stickers.

Interested in learn the latest news with Joy Clair Stamps? We would love for you to follow our Social Media pages!


Thank you for stopping by!
Jessi


Friday, December 1, 2017

Joy Clair December Challenge - 3D

Can you believe that it is December?! What!? But the good news is that there is a new challenge over on the Joy Clair blog. This month's challenge was a difficult one for me. I have never made a pop up card, so I made a card with a 3D element.

Today I am using the super cute 3d Poinsettia stamp set:


I love using kraft cardstock on Christmas cards. I love how the color red pops off the color. I used VersaMark ink and stamped the branches around the cardbase. To fill in the empty spaces, I added the red berries stamps. The sentiment is stamped and embossed on a fancy diecut. The poinsettia is stamped on red cardstock and embossed with gold. The flower is layered onto the card. A simple gold enamel dot is used in the center.


You have until January 29, 2018 to create a new project and enter it into Inlinkz below. 
By entering you will have a chance to win a $25 Gift Certificate to the Joy Clair Store.
TWO lucky winners will be announced on January 30, 2018!!!
Good Luck!!! 

Thank you for stopping by!
Jessi

Monday, November 27, 2017

JC- Paper-piecing with Christmas Cocoa

Hello, Joy Clair friends! I am not a coffee drinker, but I am sure a hot chocolate kind of person! It usually doesn't get cold enough here along the Texas coast to heat up a mug of cocoa. But the moment it does, I do not waste time getting a cup going!  I have tried adding different flavoring, but my all-time favorite is adding marshmallows. So many, that you fill the top of the mug! 

Today, I created a simple Thank You card using the new Christmas Cocoa stamp set:


I have been on a kraft kick lately. One thing I like to do with kraft cardstock is to using Versamark Watermark Ink. To start this card, I using one of the mug images and stamped randomly using the watermark ink. To fill in the empty space, I stamped snowflakes and stars using white ink. 

I wanted to showcase the paper-piecing technique on this card. For the center of the card, I added a circle die cut with a bold print. I wanted to highlight the red in the pattern, so I picked a matching red print and stamped the mug image. The image is then cut out and set aside.

The Christmas Cocoa stamp set includes several different options for the layering/add-ons to the mug. Since I am a marshmallow fan, I wanted to work with the marshmallow stamp. I stamped the image onto a cream color print and cut out. When it came time to assemble the mug, I layered the marshmallows onto of the upper edge of the mug. The paper-pieced mug is then attached on top of the circle die cut.

To finish the card, I used the simple 'Thanks' stamp, also from the Christmas Cocoa stamp set, and stamped onto the cream print. The sentiment is cut into a strip and attached to the bottom portion of the card.


Interested in learn the latest news with Joy Clair Stamps? We would love for you to follow our Social Media pages!


Thank you for stopping by!
Jessi


Monday, November 13, 2017

JC- Dog Gone Christmas & Calendar Fun

Hello, Joy Clair friends! Can you believe that we are almost half way through November? Where did the month go? Christmas is just around the corner! Speaking of Christmas, do you include your pets in the festivities? We always include one of the larger bones for are dog. It is so big that it sticks around for way over a month!

First up, is a project that I created using the super adorable, Dog Gone Christmas stamp set! A perfect stamp set for dog-lovers!


For this card, I wanted the dog and the dog house to pop off the card. To do so, I used a circle die to cut out the circle in the center of the card. The dog house is stamped in the center of the circle. The image is then colored in using Chameleon markers. The dog image is stamped on a separate piece of cardstock. Once the dog is colored in, the image is cut out using scissors. The dog is attached using a foam dot. To finish the card, I stamped and embossed the sentiment in white.

Next up, I included a planner page I created using the new Calendar Fun stamp set:


I really love the washi stamp images included in this set stamp. I alternated stamping the tape images in red and orange inks. These washi stamps add a unique design to the planner sheet. I used the month, day, and numbers to fill out the date at the top of the page. At the bottom of the planner page there is a place to write in a quote. So I included the speech bubble image inside the box. To add more detail to the planner page, I used the Fall Leaves stamp set to decorate the empty box towards the top of the page.

Interested in learn the latest news with Joy Clair Stamps? We would love for you to follow our Social Media pages!


Thank you for stopping by!
Jessi


Thursday, November 2, 2017

Joy Clair November Release Blog Hop

Hello, Joy Clair friends! I am super excited for the new Joy Clair release! Today, the design team is showcasing the different stamp sets in a fun blog hop! If you are hopping along already, you should be arriving from the talented Kerry's blog. If you just happened upon my blog and would like to start at the beginning, please hop on over to the Joy Clair's blog.

Today, I am showing a Bible Journaling page using the new Jesus is My Jam stamp set!


When I first saw this stamp set, my first thought was of the 80's. And when I think about the 80's, I think about the neon colors that were popular. So I gathered up a variety of bright fun paints to complete this page.

I brushed on each color one at a time with the tip of the paintbrush...allowing the paint to dry in between each color. When I was done with all the colors, I filled in some of the small spots. I wanted to stamp the words and images on top of the painted section. Once the ink dried, it was time to create the title of my page. I did this by using a variety of alpha letters and stickers.

Let's start the fun with the creativity and remember that we always have prizes for our readers and visitors that comment HERE in our corporate blog and in ALL the designer blogs during the hop.

JC_GIFTCARDS

Just left your comments and tell us which is your favorite stamp set of each day!
Here is the complete list of the Everyday Blog Hop:

Have fun and enjoy!!!

Your next stop in the talented, Steph's blog!

Thank you for stopping by! Have a great day!

Thursday, October 19, 2017

I Love Candy Corn

Hello, MarkerPOP friends! It is Jessi here with a question. Are you a fan of candy corn? I would say that I am not a true fan, but like to eat a few when the season comes along! I do find it interesting all the different flavors available now! I recent tried the Cookie flavored ones...I will not be rushing to try those again!

Today, I am sharing a card using the cute Lawn Fawn's How are Bean, Candy Corn Add-on stamp set and Chameleon markers. 


I wanted to create the candy corn stack to cover the entire bottom of the card. To do this, I stamped on image onto the card base. I stamped the image onto a piece of stamping mask paper and cut this image out. Using the mask paper, I covered the original stamped image and repeatedly stamped the image along the bottom.  I wanted to create the look like the candy corn was falling to create the pile, so I added a few individual images along the side of the card.

There is a lot of white space on the CAS card, so I stamped the quirky sentiment using a few of the worded stamped from the stamp set.


To finish the card, I used Chameleon markers, OR3 and YL2, to color in the candy corns.

Stop by the Lawn Fawn section of the store to catch the sale prices! You can even receive an extra 10% off select items! http://www.markerpop.com/catalog/stamps-dies/stamps/lawn-fawn.html

Friday, October 13, 2017

Joy Clair - Love of Watercolors!

Hello, Joy Clair friends! Have you been enjoying the projects from the design team? I love to see how each member has her own style. It is fun to see a stamp set in a new light and be inspired to stretch that stamp set further!

Today I will be showing you two projects, one using a Everyday stamp set and one using a Color by Faith stamp set. 

My first project for today is one of my latest Bible Journaling pages. I am using the everyday stamp set, Fly with Me.


My style tends to lean towards CAS (Clean and Simple). When it comes to Bible journaling, I like to keep it to the columns. (However, I do like to change it up every once in awhile!) One of my favorite things is to also use watercolors in the Bible. So for today's page, I stamped off by stamping the images in black ink. Once the ink was dried, I colored in the column with a variety of watercolors. To make the clouds look more white, than cream, I used white watercolor. To complete the page, I stamped the birds and the word stamp onto the page.

Next up, is a card using the Out of this World stamp set:


To start this card, I wanted to create a galaxy background. To do this, I used pinks, blues, purples and black. Once the background dried, I added white paint splatters. The image of the planet and spaceman are stamped in black ink. The images are then colored in using markers. The images are then cut out. This card has several different layers. I attached navy cardstock onto the kraft card base. The galaxy sky is cut out using fancy die. The next layer is a piece of vellum, also cut out using the fancy die. The stamped images are attached on top of the vellum. The sentiment is embossed in white on a black strip of black cardstock.

Interested in learn the latest news with Joy Clair Stamps? We would love for you to follow our Social Media pages!


Thank you for stopping by!
Jessi

Thursday, October 12, 2017

Warm Wishes

Hello, MarkerPOP! Are you ready for cooler weather? I know I am! We experienced our first fall cool front today! The highs were in the 70s. I will take it! I am so ready to bring out the sweaters and the cocoa mugs!

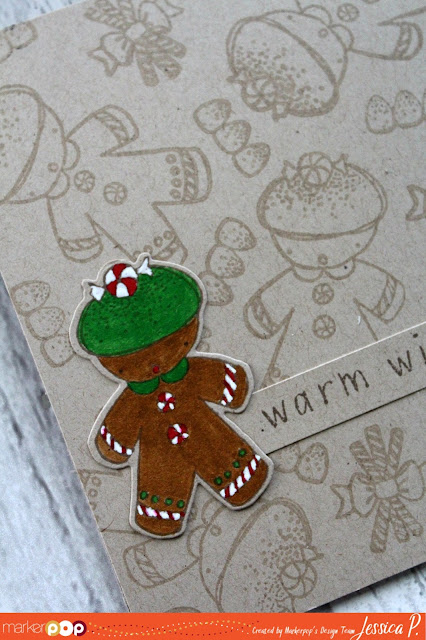
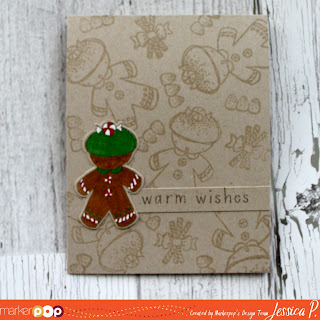
Today, I created a CAS card using Elizabeth Craft Designs Candyland stamp set and ZIG Clean Color: 


I love the look Versamark ink leaves on kraft cardstock. I love to used it to create my own background on cards! I took a few of the stamps from the stamp set and randomly placed them over the card. I stamped an extra gingerbread man onto another piece of cardstock. This image is colored in using ZIG Clean Color markers. The image is cut out using the coordinating dies for the Candyland stamp set.  The sentiment is stamped onto a strip of cardstock and attached to the card.


The following ZIGs were used on today's card:
022, 047, .072


Thank you for stopping by!
Jessi

Saturday, October 7, 2017

Joy Clair's World Card Making Day Challenge - CASE A CARD

Hello, card-making friends!! Today is World Card Making Day and Joy Clair has a entire day of challenges to celebrate the day! Please check back regularly to see the different challenges.

Image may contain: text

**Special World Cardmaking Day Sale going this weekend! Use the coupon code, JCWCMD2017 to receive 20% off your order!

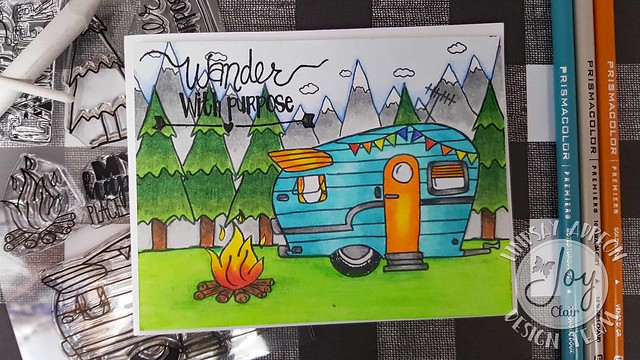
My challenge: CASE A CARD FROM A JOY CLAIR DT MEMBER (that was posted on the Joy Clair blog). It was hard to choose which card to CASE, but I narrowed it down to this card created by Lindsay:

Finished Card 2

I love the scene and also the masking technique that she used. Here is my take:


I wanted to switch up the scene a little, so I rotated the card. I also decided to use the masking technique with the trees behind the camper. I chose to keep the sky as 'empty space'. I used a blue strip of cardstock to represent the sky. 

So know it is your turn! What card will you CASE? Search the Joy Clair blog and find a card. Make sure to link your creation with the link below.

A winner will be randomly drawn from the entries for this challenge and win a Joy Clair stamp set of your choice.

Thank you for stopping by!
Jessi


Joy Clair World Cardmaking Day Blog Hop

Hello, Joy Clair friends! Welcome to World Card Making Day! Are you ready for a full day of celebration? I know that I am! My desk is clean...ready to get messy!

To celebrate the day Joy Clair's blog will be full of fun challenges! Be sure to check in throughout the day to see what is going on!

The Joy Clair design team and a few special guests are participating in a BIG BLOG HOP! If you are already joining the hop, you should be arriving from the talented Martha's blog! If you would like to start at the very beginning, please hop on over to the Joy Clair blog!

The design team decided to do a super fun challenge. We each created our own background using Joy Clair stamps. We then cut the piece in to one inch squares and mailed them off. It was interesting to see what each piece looked like when they arrived in the mail.

Here is my creation using the team squares and Joy Clair's Everyday Sentiment stamp set: 


This was such a fun challenge to work with the other design team members with! I hope you are inspired to join in the fun of World Card Making Day!

As mentioned, we have a fantastic line-up and three Special Guest Designers joining us today, all of them had been winners of our Challenges!!!. Check out the Hop order below: 
Jessica Pascarella (You are HERE)

HOP ALONG FOR THE CHANCE TO WIN PRIZES

We're giving away three Stamp sets from Joy Clair Store! Just leave a comment on every destination along the Hop to be in with a chance to win!

WCMD 2017
Comments close at 23:59 EST on 7th October 2017.

Don't forget that we have a lot more going on throughout today on Joy Clair blog too! We hope to see you back here for the rest of the events - there will be lots of opportunities to be inspired and to get crafty with us!
Happy hopping!

Your next hop stop is to the talented Lindsay's blog!

Have a wonderful day!
Jessi

Thursday, October 5, 2017

Happy Thanksgiving

Hello, MarkerPOP friends! Can you believe that it is October already? Before we know it, it will be Thanksgiving! Do you have the Thanksgiving dinner at your house or do you go visit somewhere else? I usually go to my in-laws, but I always bring along a few side dishes.

Today I am working with the Hero Arts Thanksgiving Table and ZIG Clean Color Markers:


This stamp set includes several little images. I decided to use them to create a background print. I used the MISTI to help with the placement of the stamps. To fill in some of the empty space, I stamped green leaves. I used a variety of ZIGs to color in the images. The sentiment is stamped on a strip of cardstock and attached to the card.


Have you seen the latest contest? Stop by and learn about your chance to win!


Thank you for stopping by today!


Wednesday, October 4, 2017

Joy Clair's Embossing and Watercolor

Hello, Joy Clair friends! Can you believe that it is October? This year has flown by fast! Now that with the holiday season around the corner, I am sure the rest of the year will go by faster! 

Today I will be showing you two projects, one using a Everyday stamp set and one using a Color by Faith stamp set. 

My first project for today is one of my latest Bible Journaling pages. I am using Color by Faith's Noah's Ark stamp set:


I wanted to keep this page simple. So I stamped the ark in brown. The clouds were stamped in a gray ink. The animals are stamped in a orange/brown color. Once these inks dried, I used a variety of distress inks and used them as watercolors and filled in the rest of the column. To add the look of the rain starting, I used the salt/pepper dots from the Salt and the Light stamp set. To finish the page, I stamped the phase stamps with black ink.

Next up, is a card using the Rose Sentiments stamp set:


I love working with kraft cardstock. I really love how the color red POPS off the kraft color. To start my card, I stamped the rose frame with red ink and cut the frame out. For the card, I embossed swirls on the front of the card. To make the swirls stand out, I lightly swiped a white ink pad across the embossed swirls. I wanted the sentiment to stand out, so I stamped it ink brown ink. The rose frame is attached to the card base using foam dots.

Interested in learn the latest news with Joy Clair Stamps? We would love for you to follow our Social Media pages!


Thank you for stopping by!
Jessi

Sunday, October 1, 2017

Joy Clair Monthly Challenge - Die Cuts

Who is ready for a new Joy Clair Challenge? This month is about Halloween and Die Cuts! Please stop by the Joy Clair blog to learn more details about how to participate in this month's challenge!

Today I used an older Halloween set, Spooky Greetings, and the new October Fun stamp set:


To create this shape card, I used stitched circle dies. On the black circle die cut, I used star dies to create the starry background. The mummy image is stamped multiple times and colored in. The images are cut out and set aside. To add something a little extra to the card, I used a few of the skulls from the Spooky Greetings stamp set and stamped around the frame of the card.

Are you inspired to join in this month's challenge? Join HERE!

Thank you for stopping by and have a great day!
Jessi

Saturday, September 30, 2017

Sending Birthday Wishes

Hello, MarkerPOP friends! It is football season! I am not sure about where you live, but on the weekends here, the skies are full of planes with advertisement banners.

So with that in mind, here is my card using the Waffle Flower's Across the Miles and ZIG Clean Color markers:


The airplane and banner are stamped in black ink. Once the ink dried, I used ZIG Clean Color markers to color in the scene. I added blue sky around the images. To add some design to the top of the panel,  I stamped a hot air balloon and added some die cuts of clouds.  The panel is cut out using a fancy rectangle die and attached to kraft cardstock.


The following ZIGs were used on today's card:
010, 022, 030, 047


Thank you for stopping by! Have a wonderful day!

Jessi

Thursday, September 28, 2017

Hey, Sugar!

Hello, MarkerPOP friends! As Halloween/Fall décor is starting to fill the stores, I have noticed a growing trend with Sugar Skulls. The Day of the Dead décor is seen everywhere! And I don't know about you, but I love the bright, bold colors the décor includes. So when I saw the Sugar Skulls stamp set from Hero Arts, I knew that I needed to get my hands on it!!

So today, I am sharing my first card (I have so many ideas for this set, that I know there will be more!), using the Hero Arts Sugar Skulls stamp set and ZIG Clean Color markers:


The first step I took making this card, was stamping the skulls down the edge of watercolor cardstock. I used the masking technique while stamping the skulls. I used a dark gray ZIG around edges of the skulls and spread the color using water. I really enjoyed how this made the white of the cardstock pop where the skulls were stamped.


Now it was time to color in the faces. The stamp set includes a few different layered stamps with designs. I used the layered stamps on the faces and colored in using bright and bold ZIG colors. (I did not use water on these colors.) I wanted to add a few splashes of paint on the card, so I placed a strip of paper to cover the skulls and splattered a few spots around the card. To finish the card, the sentiment is stamped in black ink.

The following ZIGs were used on today's card:
010, 022, 027, 031, 041, 052, 070, 080, 095


Thank you for stopping by! Have a wonderful day!

Jessi


Friday, September 22, 2017

Die-cutting with Rinea Foil and Joy Clair

Hello, Joy Clair friends! I love using die-cuts! They make card-making and even Bible Journaling a tad bit easier! There are some many different ways you can use them!

Today I will be showing you two projects, one using a Everyday stamp set and one using a Color by Faith stamp set. All month long the Joy Clair design team will be teaming up with Rinea Foil paper.

First up, with Halloween around the corner, I am working with the super adorable October Fun stamp set and a variety of foil papers.


I used a variety of different dies to create this card. I used one for the hill, the house, and the moon. I used gold foil for the lights of the house and silver foil for the stars in the sky. The foil adds some fun shine to the card!

Next up, is a Bible page using the Little Monsters stamp set:


I used a simple star die for this page. One word stamp is stamped with the ghost ink and wiped off. The rest of the words are randomly stamped onto the Bible page. For the monsters, I stamped them onto cardstock and colored in using markers. The monsters are cut out and attached to the page.

Please continue to stop by the Joy Clair blog for the entire month of September to see what the Joy Clair design team does with the Rinea Foil.

Interested in learn the latest news with Joy Clair Stamps? We would love for you to follow our Social Media pages!


Don't forget to join us in this month's Joy Clair challenge! Click HERE for the details! Here is my challenge card using the new Fall Leaves stamp set and hopefully will inspire you to join in the fun!


Thank you for stopping by!
Jessi

Thursday, September 21, 2017

Eat, Drink, and Be Scary

Hello, MarkerPOP friends! Halloween is next month. Are your kids getting excited? I have one that has his costume all planned out and two that will wait to the last minute! 

Have you heard of Elizabeth Craft Designs stamp company? They are one of the newest brands now available in the MarkerPOP store.

Today, I am using their Halloween stamp set on my card:


I stamped a few of the designs onto watercolor cardstock and colored in using ZIG Clean Color markers. Once the images were dry, I used the coordinating dies to cut out the image. The next step is to create an A2 card out of watercolor cardstock. On the front of the card, I stamped the gravestone image. I used the ZIGs again to color in the image. I extended the grass on both sides of the image. The sentiment is stamped below the grass. I wanted to include a moon and some stars. The moon is colored in by hand. The stars are from a cluster stamp from the My Favorite Things Somebunny I Love stamp set. The die cut images are attached using foam tape.


I used the following ZIG Clean Color markers on today's project:
022, 024, 070, 052, 046, 047, 035, 094, 010, 095


Thank you for stopping by! Have a wonderful day!
Jessi

Sunday, September 17, 2017

2017 MFT Superstar Card Contest - Clean & Simple

Hello, everyone! I hope you all had a fabulous weekend! This is one of our last 'free' weekends for a while. I think the next one is right before Thanksgiving. So my husband and I decided that the family was going to stay home and do whatever we wanted. So for me, I sent most of the day at my craft desk. It has been awhile since I did that...and it felt GREAT!

A few days ago I ran across the My Favorite Things Superstar Card Contest. If you have not heard about it, please stop by and check it out! This is the third year the contest has been around and it is so inspiring to see what everyone comes up with!

There are three different categories of the contest. I decided to play along with the Clean & Simple Genius category. Below is the card that I came up with:


I used the super cute Birds of Paradise stamp set. I chose one of the birds and stamped the image onto white cardstock. The bird is colored in using ZIG Clean Color markers. The image is then cut out using the coordinating dies. When it came time for the sentiment, I wanted to find a unique way to display it. When I think of tropical locations, I always imagine the cute wooden signs that they use to point of directions and various information. So I cut a few different strips from kraft cardstock. To make the strips look like planks of wood, I used the Die-namics Grassy Edges die along each end of the plank. The blank planks were also embossed with a woodgrain folder. The sentiment is stamped onto the wider of the planks. Before attaching the wooden sign to the card, I stamped a variety of leaves from the Blissful Blooms stamp set using Field Day and Green Room MFT inks. The wooden sign and bird are attached to the card to finish it off.

**Sadly, both the MFT Birds of Paradise and Blissful Blooms stamp sets are discontinued. But please stop by the My Favorite Things store to see their latest designs!**

Thank you for stopping by! Hope you have a wonderful day!

Jessi

Friday, September 15, 2017

Joy Clair 2017 Coffee Lovers Fall Blog Hop

Thank you for stopping by today! I am joining other members of the Joy Clair design team and playing along with the latest Coffee Lovers blog hop!


Please stop by the Joy Clair post to see what the other DT members came up with!

As a Super Sponsor, we are offering a $25 Gift Certificate for Summer edition to shop with us at the Joy Clair Store! Be sure to join in on the fun and link up your coffee loving projects HERE to play along. We can't wait to see all the coffee loving creations.

JC_GIFTCARDS

Joy Clair Stamps has a complete collection of coffee stamps for everyone and for all seasons and this is one of the reasons because we always celebrate the Coffee Lovers Blog Hop. You can find all our Coffee Stamps here. Also, you can  use the code MMMCOFFEE to buy them with the 25% OFF during the Hop. It is not an amazing promotion!!!

Promotion Coffee Banner Collage

Thank you for stopping by!
Jessi

Thursday, September 14, 2017

Fur-Friends Forever

Hello, MarkerPOP friends! Are you a pet person? If so, what is your favorite kind? I am a dog person. We currently have one dog, Olive. She is an adorable Mastiff mix. Definitely, another child I have to take care of! 

Today, I am working with the Pink & Main's Fur-Friends stamp set and Chameleon markers:


To start this card, I repeatedly stamped the bone image down the side of the card. The dog image is stamped and cut out using a circle die. The image is colored in and attached to the card. To add some extra color to the card, I added three hearts to the card. The final step for the card was to stamp the sentiment .


The following Chameleon markers were used on today's card:
BR4, BR5, RD2, RD4, YO2, YL3, NU0, NU1, NU3, PR2


Thank you for stopping by and have a wonderful day!

Jessi

Saturday, September 9, 2017

Autumn Blessings

Hello, MarkerPOP friends! Are you ready for Fall? I know that I am. Besides the cooler temperatures, one of my favorite things about Fall is the changing colors of the trees. Sadly, where I live, we do not get to see the drastic change. But I am hoping when I visit the DC area next month that I will be lucky enough to witness a few yellow and orange in the trees!

With Fall on the mind, I brought out the super adorable Hero Art's Coloring Layers Autumn Trees stamp set to makes today's card:


Did you know that Hero Art has mini layering ink collections? They make it super simple to coordinate the colors according to a certain theme. Today, I am pairing up the Autumn collection with the Autumn Tree stamp set.

To start this card, I stamped the trunk of the tree with the brown ink. After that I continued with the different layers of leaves using red, orange and rust ink. The sentiment for the card is stamped below the tree. A stitched rectangle die is used to cut out the panel that will be attached to the front of the card. What a simple card to recreate!


Thank you for stopping by! Have a wonderful day!

Jessi


Friday, September 8, 2017

Joy Clair and Rinea Foil

Hello, Joy Clair friends! Don't you love September? The kids are back in school and the temperatures are starting to cool off! Now that the kids are back in school, I am finding some extra time to get crafty!

Today I will be showing you two projects, one using a Everyday stamp set and one using a Color by Faith stamp set. All month long the Joy Clair design team will be teaming up with Rinea Foil paper.

First up, to celebrate the kiddos going back to school, I am using the Back to School stamp set:


To start this card, I stamped one image at a time using the Rinea Ghost Ink onto red foil paper. Once I stamped that image, I immediately wiped the ink off using a damp baby wipe. I repeated this stamp multiple times until the panel was full. The foil paper is attached to the card base.

Next up, is a Bible page using the Salt and the Light stamp set:


This is such a simple page to recreate! I cut a piece of blue foil paper down to size to fit within the Bible margin. I stamped each image one at a time using the Ghost Ink. The image is wiped immediately after it is stamped. The first image stamped was the Earth stamp. This allowed me to know where exactly to position the salt image. To finish the page, I included the phrase stamp at the bottom of the page.

Please continue to stop by the Joy Clair blog for the entire month of September to see what the Joy Clair design team does with the Rinea Foil.

Interested in learn the latest news with Joy Clair Stamps? We would love for you to follow our Social Media pages!


Thank you for stopping by!
Jessi