Showing posts with label fall. Show all posts

Tuesday, November 8, 2016

Inspired by Stamping - Guest Designer Pt. 1

Hello, Inspired by Stamping friends! My name is Jessica Pascarella and I am excited to be the November guest designer! I want to start off my saying 'Thank You' to Joanna for this opportunity and I look forward to working with the team this month!

I have two cards to share with you today. I created a some fall-themed cards, highlight some of my favorite Inspired by Stamping stamp sets.

First up, is a card I made using the Autumn Harvest stamp set.


I stamped the barrel and apple images with a brown ink. Once the ink dried, I used a variety of markers to color in the image. The image is cut out onto a diecut tag. A burnt orange ribbon is stapled onto the top of the tag. The tag is then attached to a variety of fall printed paper. A simple sentiment is formed using the stamps from the Autumn Harvest stamp set.

Next up is my project using the Autumn Blessings stamp set:


To start off this card, I stamped the pumpkin image repeatedly onto the cardstock. The green leave is stamped onto each pumpkin. A yellow ribbon is attached around the bottom of the pumpkin panel and attached to a brown printed paper and then attached to the card base. A fancy diecut is used for the sentiment. The sentiment is stamped in brown. To fill in some of the empty space, I stamped a branch image in two corners using a golden brown ink.

Once I again, I am excited to be with you for the next month. I will be back soon with more Inspired by Stamping creations. You can hop on over to my blog, Kissin' Krafts to see more of my creations.

Thank you for stopping by today!

Inspired by Stamping Supplies:


Saturday, October 1, 2016

Pink & Main October Challenge

It is the first of October, which means...we start a new Pink & Main Challenge! This month's theme is Fall/Halloween.

I brought out one of Pink & Main's sets from last fall, Scarecrows, for today's card.


To start off this card, I stamped the scarecrow image onto watercolor paper. The image is then painted with a variety of colors. Once the paint dried, I used the Scarecrows coordinating dies to cut out the image. The die cut is then attached to a fun fall print on the front of a card base. A yellow strip is added towards the top of the card. The Hello die is used on a green print and attached to the top of the card. To spell out 'FALL", I used the Banner Alpha stamp set and cut out the word on a pendant diecut. The pendant is attached to the card to complete the card.

We would love for you to hop on over to the Pink & Main Challenge blog and join in this month's challenge! Cannot wait to see your creations!!!

Tuesday, September 27, 2016

DCWV Fall Paper Wreath

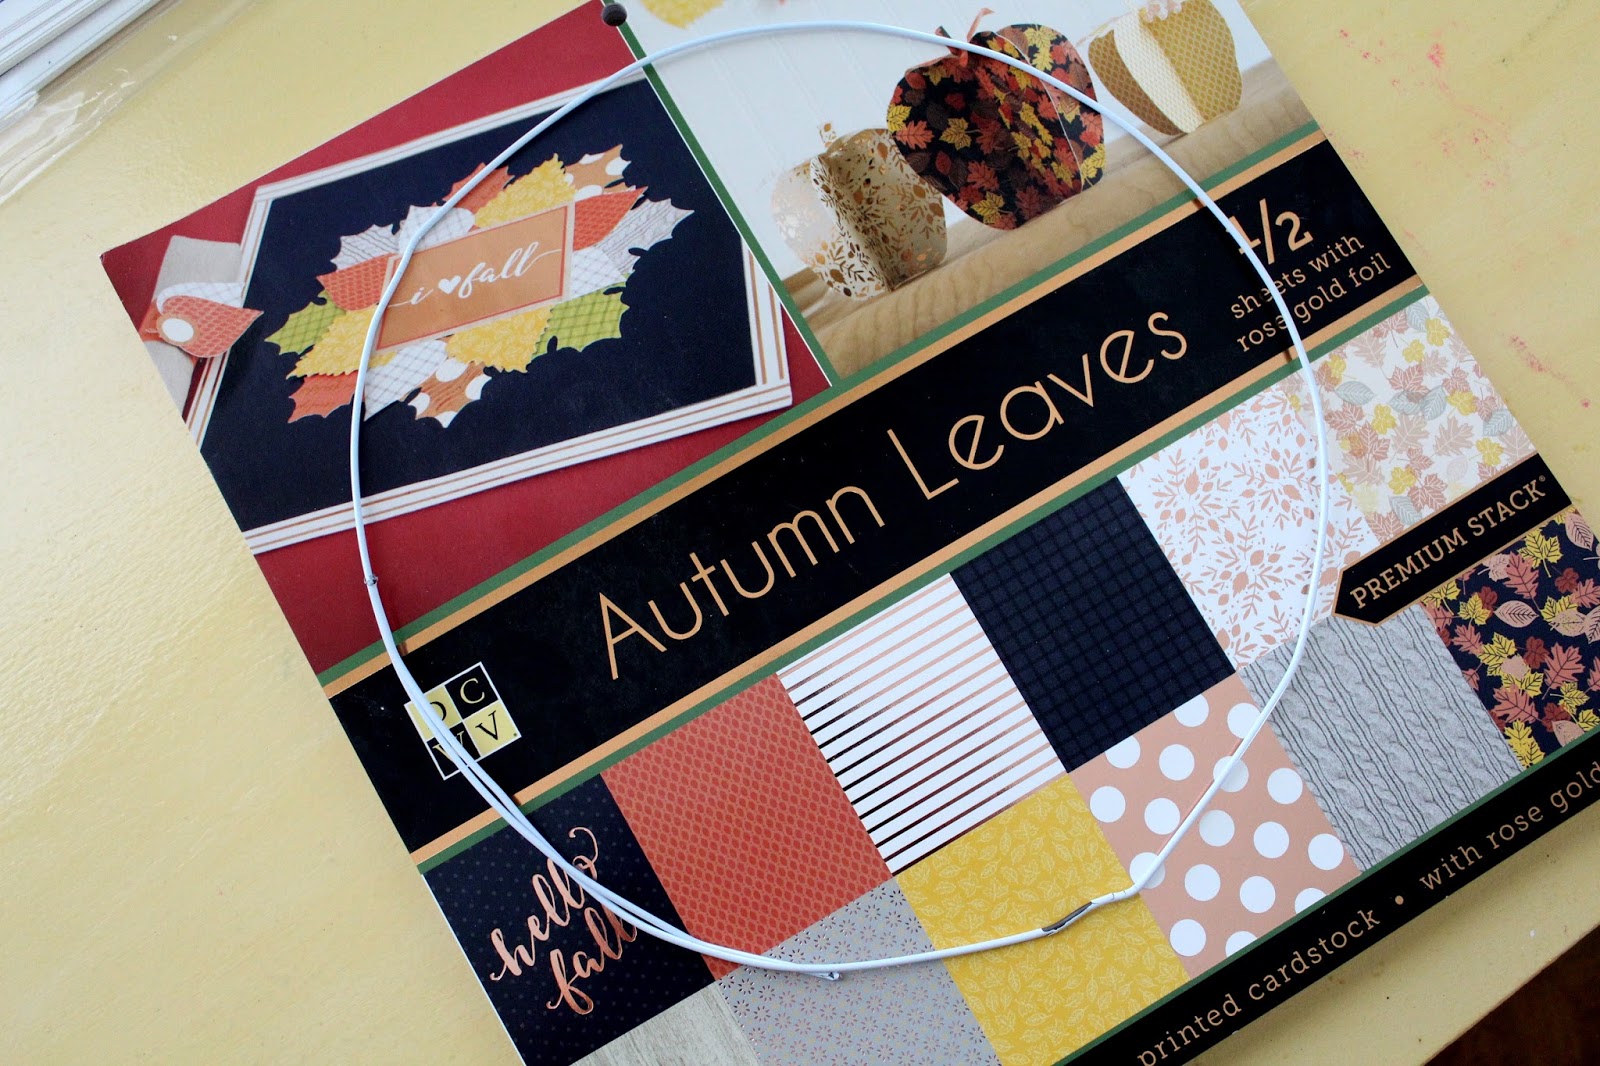
Hello, DCWV friends! It is Jessi from the Social Media Design Team. It is Fall and it is time to bring out the fall home décor! A few weeks ago, I shared the start of my decorating with the new Lia Griffith DIY Project Stacks. Today, I am adding to the décor using the new DCWV Autumn Leaves Stack.


This is such a simple wreath to recreate! All you need is the DCWV Autumn Leaves Stack, glue, and a wire coat hanger!

To start the project, form a circle with the wire hanger. You can make the circle to the size that fits your needs.


Next, cut strips of printed paper. You can cut them at any width, mine are done at 1.5inches.


Fold the strips in half and place glue on the inside of one side. Put the crease of strip along the wire and fold in half. Repeat until the circle is full.  To add some detail, I cut part of the strips to make pendant-like tips at the end of the strips. To fill in the gaps in between the wreath, I added a variety of printed strips. To finish the wreath, I cut out a 12inch sentiment and placed across the center.


Thank you for stopping by!

Have a great day!

Friday, September 9, 2016

DCWV & Lia Griffith Fall Decor

Hello, DCWV friends! It's Jessi from the Social Media Design Team. Who all is ready for Fall? I know I am! But it will not arrive for awhile here in Texas! That doesn't stop me from decorating the house! This year, DCWV and Lia Griffith teamed up to make it super easy to get in the Fall mood!

Today, I am using the DCWV & Lia Griffith project stacks available at Joann's stores. First up is the Paper Pumpkin Stack. This stack includes pumpkins in different sizes and colors. These are super easy to assemble.

1. Punch out the pumpkin.
2. Assemble the pumpkin.
3. Twist paper stem and attach.
4. Glue on pumpkin leaves.


Next up is the Fall Acorn stack. These are just as simple to make!

1. Assemble the bottom of acorn.
2. Assemble the top of acorn. Tie twine on the top.
3. Attach the two pieces together!


Be sure to stop by Joann stores to see the entire collection of DCWV and Lia Griffith Project Stacks!

Thank you for stopping by today!

Wednesday, November 11, 2015

DCWV November Stack-a-holic Challenge

 Hello, DCWV! Fall is in the air! I am loving the cooler temps and the fall décor!
Today, I am sharing the card I made to go along with the DCWV November Stack-a-holic Sketch Challenge.
Here is the sketch:
 
And here is my take on the sketch:

I used the beautiful DCWV stack, Harvest House. I decided to stick pretty close to the sketch and used a variety of prints to make this card! To add some different textures to the card, I included some embossed diecuts and some burlap.

Here are the instructions/rules from the DCWV blog:
Until then, just as a reminder, please create a page or a card that is inspired from the sketches shown above.  Once you are done, please send a picture of your creation to meganlloyd(at)dcwv(dot)com (they need to be submitted by midnight, November 30th).  I will post them on our Facebook Page as the submissions come in.  At the beginning of next month, we'll post our top 10 picks from each sketch and 4 people will be chosen to win a stack for playing along.
Thank you for stopping by! Have a wonderful day!
Jessi

DCWV Canvas Pumpkin

Hello, DCWV friends! It is finally fall here in Texas and I am in the mood to decorate! A few weeks ago, I bought a large unfinished pumpkin. I was trying to decide if I should paint it or cover it with a fun printed paper.
 
I decided to use one of DCWV Oversized Stacks available at Joann Fabrics stores. These oversized stacks are available in different types of colors and textures. I settled on using the DCWV 16x20 Oversized Canvas stack.

 
I first painted the stem and edges of the pumpkin. After the paint dried, I covered the front with Modge Podge and attached the canvas paper. I trimmed the paper along the edge. To smooth out the bubbles, I used a ruler and ran it across the front of the pumpkin. To finish the pumpkin, I added a few burlap leaves and a twine bow around the stem.
 
 
Thank you for stopping by today!
 

Tuesday, November 3, 2015

Fall Creations with Joy Clair Stamps!

Fall is in the air! I love this time of the year! However, living in Texas, I do not get to experience the fall weather and the colors as much as others do. So I rely on my crafts to get me in the fall mood!
Have you heard about Joy Clair stamps? They are a fairly new stamp company that offer a variety of images and sentiments. You can check out their designs, HERE!
I have been working with a few of their stamp sets and would love to share some of the cards that I have created with their stamps!

Here are some fall creations using their Hello Autumn stamp set:


I used Joy Clair's Rustic Occasion Sentiments stamp set for these cards:


Joy Clair_Hello Autumn3_byJessica Pascarella

Wan to see more Joy Clair creations?
 'LIKE' their Facebook page to get their latest news/products information!

Thank you for stopping by! Hope you have a great day!

Jessi

Wednesday, October 21, 2015

Joy Clair Stamps - Fall Leaves

Today is my first post using stamps from the new stamp company- Joy Clair! I am super excited to be part of their design team and look forward to seeing what the future has in store for this fun stamp company!

Most of the US is getting in the fall weather! I am still waiting for it here in Texas. I took out Joy Clair's Hello Autumn stamp set to get me in the Fall mood!

 
To start this card, I decided to stamp the different leaves onto kraft cardstock to create the background on the cardbase. The center panel is textured cardstock (hard to photograph). The leaves a stamped in a variety of colors. The quote is stamped with a chocolate brown ink. The panel is attached to the card using foam dots.
 
I used the Joy Clair - Hello Autumn stamp set for the above card. This stamp set is currently on sale, along with other Fall/Halloween sets!
 
Autumn Fall Leaves Clear Stamps by Joy Clair
 
Please visit their store to see the variety of amazing images and sentiments they have available!
 
Love to be inspired by other stampers or love to share your stamping projects?  We hope that you will join the Joy Clair Clear Stamp Projects Facebook group!
 
Thank you for stopping by today!
 
Jessi
 
Supplies:
Joy Clair - Hello Autumn stamp set
Umbrella Crafts Inks - Marsala, Tanned Leather, Classic Brown


Monday, October 5, 2015

Guest Designer - Top Dog Dies - Fall Pocket Page Die Set

I am excited to share my last guest designer project for Top Dog Dies. If you happened to miss their latest release, please stop by their store to see the fabulous designs.

I created a fall wreath using the Fall Pocket Page Die set.


 I paired the pocket page die with some yummy fall printed papers, with foil accents. To highlight the title, I added a group of leaves to two sides. The leaves dies are used on matching fall printed papers.  The simple squirrel is add to the title.  I felt that the squirrel needed something extra, so I added a small acorn to its hands. A satin ribbon is added so you can hang the wreath.
 

Before I started this project, I cut out a number of leaves from a mixture of papers. I ended up having extras after I was done with the wreath. I used the extras to make the simple fall card below. A sentiment it added to a strip of paper. To highlight the sentiment, I added a few acorn diecuts.
 
 
Thank you for stopping by! And thank you Top Dog Dies for the opportunity to guest design for your awesome company!