Showing posts with label DCWV. Show all posts

Monday, July 17, 2017

Joy Clair's Christmas in July Celebration

Welcome to the Christmas in July Celebration with Joy Clair! This week the design team is showcasing the different Christmas stamp sets available in the Joy Clair Store! I know that Christmas is still a few months away...but it is never too early to get your Christmas crafts underway!

Today I am showing one of the first ever Joy Clair's Christmas sets, Christmas Wishes:

Christmas Wishes Clear Stamps - Joy Clair - 1

When I first saw this set, I fell in love with the cutesy tree and the adorable handwritten words! I wish my cursive was that pretty!


I really wanted the tree to be the highlight of the card. I took a decorative panel and stamped/embossed the tree in gold. To add to the tree, I stamped ornaments onto the tree using the small dot stamp from the set. The star is colored in with a yellow marker. The decorative panel is layered onto a few different prints and attached to the card front.


For the inside of the card, the sentiment is stamped in black ink. I decided to add the decorative lines to the top and bottom of the sentiment. The lines are also stamped/embossed in gold.

There is a special sale going on during our Christmas in July event! From July 17 - 21, there will be a 10% off sale on all Joy Clair Christmas stamp sets. You will need to use the special discount code CIJ17 to receive the sale price.

Hop on over to the Joy Clair blog to see more projects.

Are you interested in learning the latest news going on with Joy Clair? Join us on your favorite Social media sites to see our newest products and samples from the design team members.

Thank you for stopping by! Hope you have a wonderful day!


Supplies:
Joy Clair - Christmas Wishes
DCWV - Cranberry Stack
NUVO Gold Embossing powder
Distress Ink - Candied Apple
Memento Tuxedo Black Ink

Friday, June 16, 2017

Llama Tell You...

Hello, MarkerPOP friends! It is Jessi here. "Llama tell you"...I am loving all the llamas everywhere! Now, they might not be the cutest animal in reality, but they are super cute on papers and stamps! They make some adorable and sometimes silly cards!

I love paper-piecing! So today's card focuses on that technique instead of using markers to color the image.

Today's card showcases the super adorable Gerda Steiner Designs' Llama Tell You stamp set:


I had a paper pad that included some llama images. So I decided to use the paper pad and complete the card by paper-piecing. The stamp images are stamped on a variety of prints and cut out. The llama image is completed with 2 different prints. The cactus is stamped on a fun blue print and cut out. The background sun is created by a circle die. The ground layer is created with a wavy border die. Some many fun prints to complete this card!


No markers were used on today's card, but stop by the MarkerPOP blog for the list of supplies used on this card!

What a chance to win some prizes? Join us on the current MarkerPOP challenge! We cannot wait to see what you create!

Thank you for stopping by today!
Jessi

Psst... DCWV No Problem, Llama 12 x12 paper pad was used on today's card.

Tuesday, February 7, 2017

Joy Clair - Wild & Free Galaxy Scene

Hello, Joy Clair friends! This month, the design team is showing the different types/techniques that can be done with watercolors. If you have noticed lately, galaxy backgrounds have been very popular. I have tried this watercolor technique a few times and learning different ways to improve it.

I decided to create a scene card using the new Wild & Free stamp set and a variety of watercolor mediums.


To start the galaxy background, I used a few watered down distress inks and painted the sky portion of the panel. I used purple, black and a couple blues to create the sky.


Once the watercolor dried, I dropped a few water drops over the paint. I did this by dipping a brush in water and tapping the brush to create the water drops.


The water drops are left on the paint for a couple of minutes. When it is time to remove the water drops, simply place a paper towel over the drops and press lightly to soak up the water.


To finish the galaxy background, I added some speckles of some watered down white acrylic paint. I used the same tapping the paint brush to get the speckles.


Now it is time to complete the rest of the scene. I used ZIG Clean Color markers to color in the mountains. The mountains are cut out and attached to the scene. I used watered down distress ink to paint the water part of the scene.

The fox and the canoe are stamped in black ink and colored in with ZIG Clean Color markers. The images are cut out and attached to the scene. I used a fancy rectangle to cut out the panel. The panel is added to a fun print and mounted onto a card base.  The sentiment is stamped in white and also embossed with white embossing powder.

Are you interested in learning the latest news going on with Joy Clair? Join us on your favorite Social media sites to see our newest products and samples from the design team members.
 Youtube 

Thank you for stopping by! Have a wonderful day!

Jessi

Supplies:
Joy Clair - Wild & Free stamp set
Ranger - Distress Inks
DCWV - Boho Style Paper Stack
Gina K Designs - Scalloped Rectangle Die
ZIG Clean Color Markers
Memento Tuxedo Black Ink
Lawn Fawn Yeti Ink
WOW White Embossing Powder
White Acrylic Paint

Friday, December 30, 2016

DCWV Farewell

Hello, DCWV friends! It is Jessi here from the Social Media Design Team. I am here today with a sad announcement. Today's post will be may last as a design team member. It has been an amazing two years, but the time has come to make a change. I want to send a HUGE thank you to Megan and DCWV. You have made this such an awesome team to be a part of and a company to work to with.

I always believe there is a reason for everything! I am thankful for all the interactions I have made with people I normally would not have crossed paths with. There are truly miracles all over the place! With that being said, I decided to make a Bible page using DCWV Rub On Transfers.


This page was the fastest page I have every created before. It is also the first time I successfully worked with rub-ons. In the past, the rub-ons would not transfer completely. DCWV transfer with such ease and no effort! Stick them on the paper, firmly press and peal.

Thank you for stopping by today and thank you for allowing me to chance to be part of DCWV!

Jessi

Wednesday, November 30, 2016

DCWV & Eileen Hull Blog Hop

Hello, friends! I am joining the DCWV and Eileen Hull blog hop today. You can see the design team members' projects on the DCWV blog and the Eileen Hull blog.

Today, I used the Eileen Hull Twist & Style tool and the DCWV Cranberry Christmas stack to create some simple tree ornaments.


To begin the project, I used a star shape die and cut two of each print. I covered one star with adhesive on the back side of the paper.  I attached some of the twisted wire in a hoop shape. I attached the second star to create the ornament.


A stitched circle die cut is attached to the front of the star.


To finish the ornament, I used die cut words and attached on top of the circle. Such an easy ornament to recreate!

Thank you for stopping by! Have a great day!

Jessi

Monday, November 21, 2016

DCWV Merry Christmas

Hello, DCWV friends! Are you ready for the holidays? They are right around the corner!!! Have you decorated yet? I know that some people decorate before Thanksgiving, but I am one that waits until the next day.

Today I using the new DCWV All About Christmas stack:


This stack is full of awesome prints! I wanted to make a CAS card that highlighted one of the prints.


I paired this card up with some DCWV foil cardstock and cut out some ornaments using a die cut machine. The ornaments are hanging with strings of twine. A few stars are added around the card for extra embellishments.


The sentiment is stamped onto a printed pendant. This fun print is also in the stack. The sentiment is stamped in grey and black to help it POP.

Thank you for stopping by today! Hope you have a wonderful day!

Jessi

Thursday, November 3, 2016

DCWV November Stack-a-holic Challenge

Who is ready for another DCWV Stack-a-holic challenge?

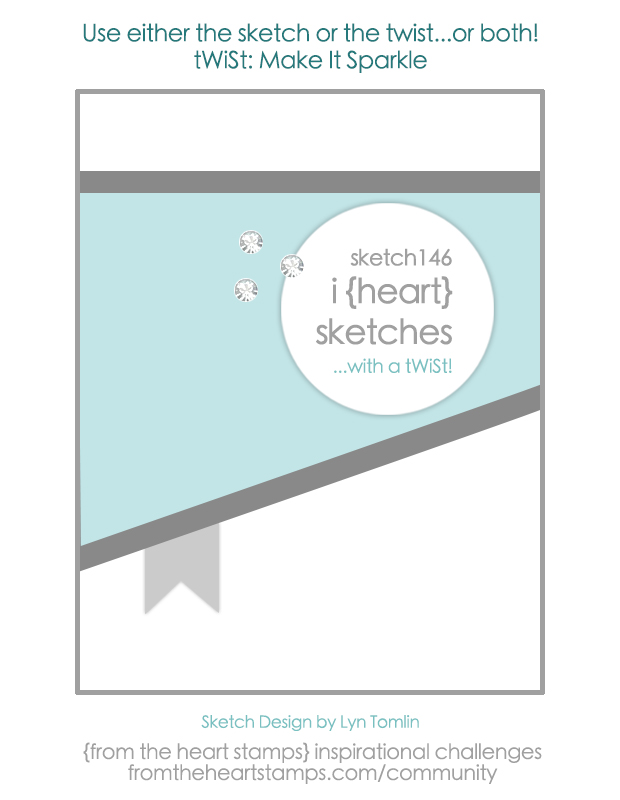
Here is this month's card sketch:


I decided to work with one of DCWV's new holiday stacks, Cranberry Christmas Stack, now available at Michaels stores.


What to see more design team members inspiration and learn more about how to enter, please stop by HERE!

Thank you for stopping by!


Wednesday, November 2, 2016

Inspired by Stamping November Release Blog Hop

Hello, friends! I am excited to be a guest designer for Inspired by Stamping. I am joining them for the month of November. First up is their November Release blog hop.


If you have been hopping along with them, you should be arriving from the talented Linsday's blog. If you happened upon my blog and would like to start at the beginning, you can start at Joanna's blog.

Inspired by Stamping is releasing three stamp sets this month. First up is the new Snowflakes stamp set. I have two projects today showing how you can use this amazing stamp set.


I love to emboss snowflakes. I decided to use white embossing powder on a navy cardstock. This allows the snowflakes to really pop off the project. To start this project, a banner diecut is cut out of the cardstock. I stamped the different snowflake images onto the cardstock and covered it with the embossing powder. Some loose powder is sprinkled over the empty spaces. A heat gun is used to heat up the powder. The sentiment is stamped onto a diecut and the same embossing technique was used. A pretty blue twine was added beneath the sentiment. I used the navy ribbon from the __________ ribbon set to from the tag.


I used the same embossing technique on this card, but with gold powder. The sentiment is added to a strip of cardstock and attached to the front of the card. I layered the embossed cardstock on top of a striped vellum piece of paper.

Did you see the amazing giveaway going on? Make sure you comment along the way for your chance to win!


There is also a great promotion going on in the shop!


Thank you for stopping by! We hope you had a great hop and was inspired to go get

Snowflakes Blog Hop- November 2nd
Jessica  (You are here)

Friday, October 21, 2016

DCWV & Chameleon Blog Hop

Hello, DCWV friends! Today, I am teaming up with a few other design team members from DCWV and Chameleon for a super fun Friend Friday blog hop.  If you are not familiar with Chameleon Markers, you can check them out HERE!

I was super excited when I learned about this blog hop. I love my Chameleon markers and have been using them for a while! I was excited to try out some new colors. I received their Color Tones Skin Tone set to play with. I knew exactly what stamp I wanted to use! So it was time to pair it up with some beautiful DCWV paper!


I decided to pair up the Chameleon markers with the DCWV Happy Day Stack. To start the layout, I stamped the image onto different cardstocks and prints to paper-piece the image together. I used the markers to color in the image.  I wanted the layout showcase a lot of the prints from the stack, so I created several layers using the different prints.


I used simple, gold alpha stickers to create the title of the layout, I wanted to highlight the gold accents throughout some of the prints.


Please stop by the DCWV blog and the Chameleon blog to see some more amazing creations created for this blog hop!

Thank you for stopping by and have a great day!

Jessi

Thursday, October 6, 2016

DCWV Hats, Bats, Cats...Oh, My!

Hello, friends! It is Jessi from the DCWV Social Media design team. It is October! When it comes time to decorating the house, this is the month that I get confused on how to decorate! Do I do Fall or do I bring out the Halloween? I used to decorate for Halloween two weeks out. However, the home décor is getting cuter and cuter and hard to resist!

When I saw the DCWV Hats, Bats, Cats Project Stack, I knew exactly how I wanted to use part of the stack.


DWCV project stacks are awesome to work with. The projects take no time at all to complete. All you need to do is pop the pieces out and assemble. Let's start with the bats.


The stack includes several different sizes of bats. You pop the bats out of the stack and fold along the crease lines. You can do some many things with these bats. I taped them to a mirror. You can tape them to walls and doors. They can even hang from the ceiling fans and swirl around in the breeze.


Next up are the cats. The cats are super easy to create, but do involve some gluing. To start, you pop out all the pieces. Complete the cat's head by fold and gluing along the creased line. It is time to attach the head to the body. On the sheet , there are two strips of paper. The short on is used to attach the head to the body and the longer one is for the tail.

So if you are in need of quick decorations for your Halloween party or want to decorations that look super cool, you can find the Hats, Bats, Cats Project Stack at JoAnn Stores.

Thank you for stopping by and have a wonderful day!

Jessi

Tuesday, September 27, 2016

DCWV Fall Paper Wreath

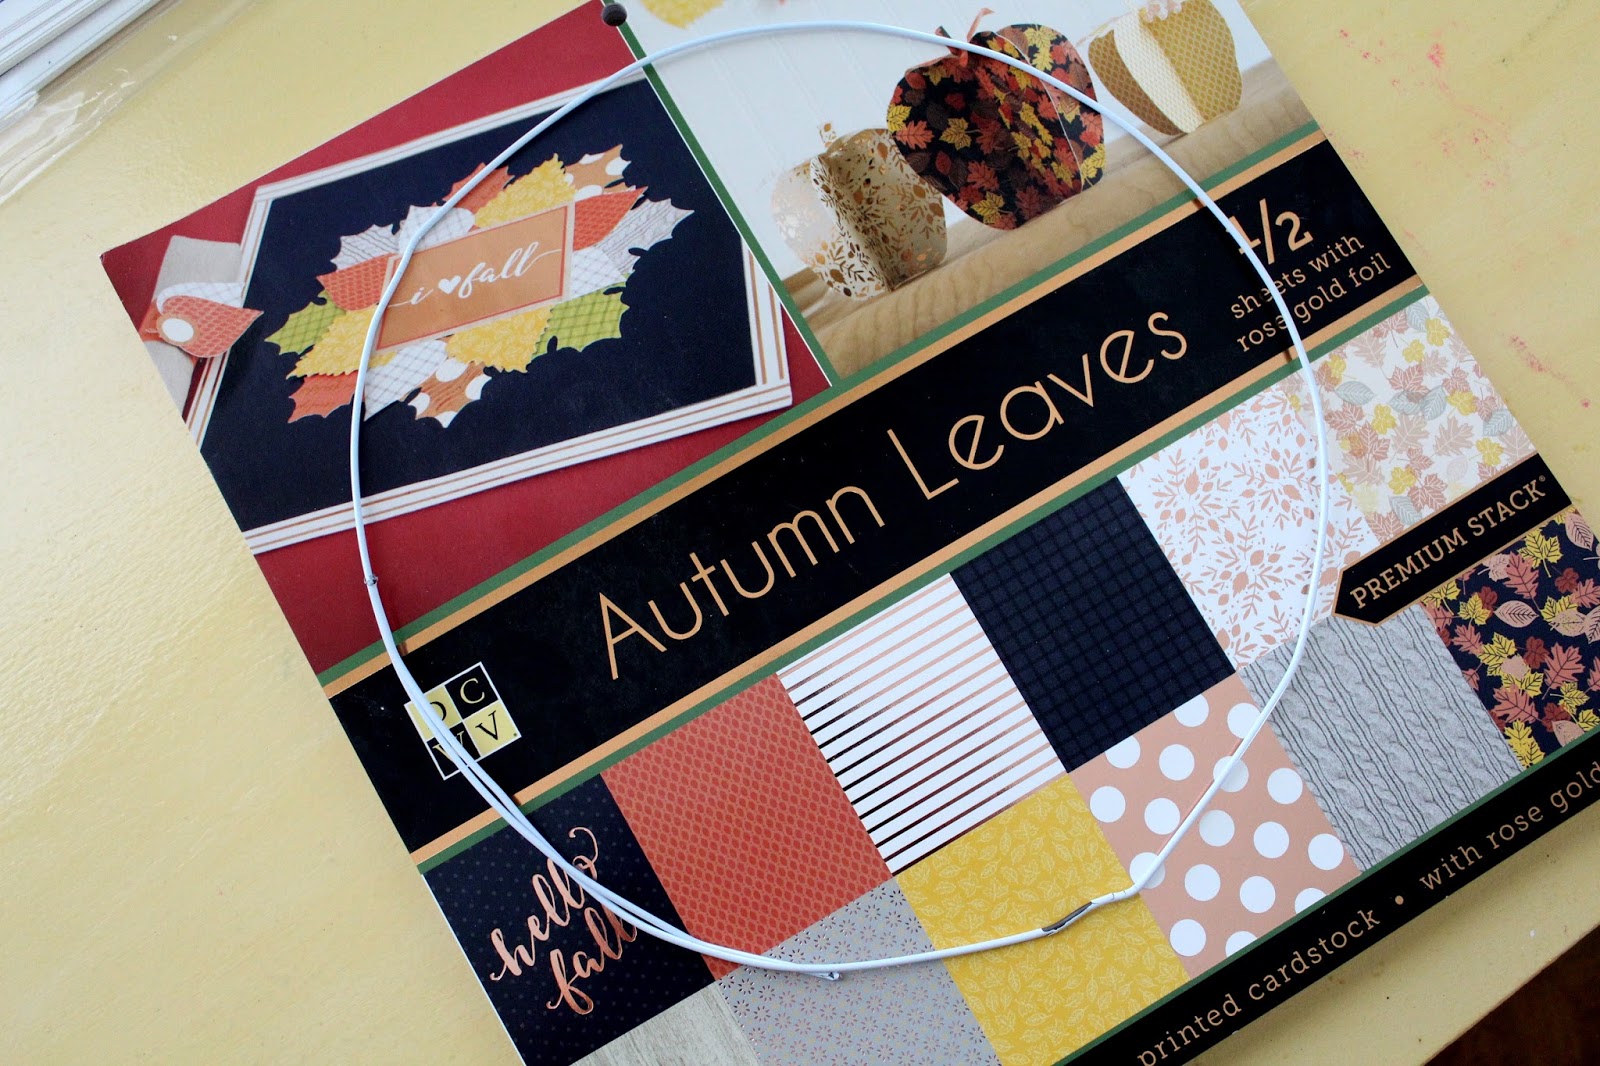
Hello, DCWV friends! It is Jessi from the Social Media Design Team. It is Fall and it is time to bring out the fall home décor! A few weeks ago, I shared the start of my decorating with the new Lia Griffith DIY Project Stacks. Today, I am adding to the décor using the new DCWV Autumn Leaves Stack.


This is such a simple wreath to recreate! All you need is the DCWV Autumn Leaves Stack, glue, and a wire coat hanger!

To start the project, form a circle with the wire hanger. You can make the circle to the size that fits your needs.


Next, cut strips of printed paper. You can cut them at any width, mine are done at 1.5inches.


Fold the strips in half and place glue on the inside of one side. Put the crease of strip along the wire and fold in half. Repeat until the circle is full.  To add some detail, I cut part of the strips to make pendant-like tips at the end of the strips. To fill in the gaps in between the wreath, I added a variety of printed strips. To finish the wreath, I cut out a 12inch sentiment and placed across the center.


Thank you for stopping by!

Have a great day!

Friday, September 9, 2016

DCWV & Lia Griffith Fall Decor

Hello, DCWV friends! It's Jessi from the Social Media Design Team. Who all is ready for Fall? I know I am! But it will not arrive for awhile here in Texas! That doesn't stop me from decorating the house! This year, DCWV and Lia Griffith teamed up to make it super easy to get in the Fall mood!

Today, I am using the DCWV & Lia Griffith project stacks available at Joann's stores. First up is the Paper Pumpkin Stack. This stack includes pumpkins in different sizes and colors. These are super easy to assemble.

1. Punch out the pumpkin.
2. Assemble the pumpkin.
3. Twist paper stem and attach.
4. Glue on pumpkin leaves.


Next up is the Fall Acorn stack. These are just as simple to make!

1. Assemble the bottom of acorn.
2. Assemble the top of acorn. Tie twine on the top.
3. Attach the two pieces together!


Be sure to stop by Joann stores to see the entire collection of DCWV and Lia Griffith Project Stacks!

Thank you for stopping by today!

Saturday, August 27, 2016

Pink & Main Wild About You

Happy Saturday, Pink & Main friends! Sorry this post is arriving late this afternoon. I have been under the weather since Wednesday. Hoping things are starting to look up for the better!

Today, I am working with the super adorable Wild About You stamp set and coordinating dies.


I absolutely love this set! The animals a so cute. When I first saw this fox, I immediately thought of a night scene. So I started off making a watercolor night sky. I wasn't too happy with how it came out, so I decided to cut a circle out of a portion of the panel. I then ran the circle with a star die. The fox image is stamped in black and colored in with a variety of markers. The fox image is cut out using the coordinating dies. I paired up the die cuts with some boho printed papers. The sentiment is stamped on a diecut banner.

Do you love to create with Pink & Main stamps? We would love to see your projects! Please join the Pink & Main Creations Facebook Group and share your projects!

Thanks for stopping by!


Supplies:
Pink & Main - Wild About You and coordinating dies
DCWV - Boho Style
Chameleon Markers

Thursday, August 25, 2016

DCWV Mini Envelopes Project Stack

Hello, DCWV friends! It's Jessi from the Social Media Design Team. It is Back to School season! Some moms are crying, while some are jumping for joy! I was one that was jumping for joy. However, a few days of the quietness has started to get to me. So today's project will help spend the love, even when you are not around.

I am showcasing the new DCWV DIY Project Stack - Mini Notes & Envelopes.


This DIY stack is perfect for the little notes you want to hand out. For example, the size is perfect to tuck inside their lunch kit for school. A wonderful surprise to help them get through the day. I even recently tucked on into my husband's computer on a very important day for him.

The envelopes are already scored! How easy is that! All you have to do is punch the template out and fold. The first step is to adhere the flaps together. I used a tape adhesive gun and placed a strip of tape along the edges of the bottom flap. Then you fold!


The next step is to write your special note. In the DIY Stack, there are a few sheets of papers that are scored and ready to cut. Simply, write your note and trim.


Simply fold the note to fit into the envelope and seal. There are some pretty glittered heart stickers included in the stack.


Time to tuck those notes into their hiding spots!

Don't you love the new DCWV DIY Project Stacks? Check out the variety available at your local Michaels stores!

Thank you for stopping by today!

Jessi

Thursday, August 4, 2016

DCWV August Stackaholic Challenge

Who is ready for the August DCWV Stackaholic Challenge? There are two amazing sketches available to work with this month! This month I decided to play along with the card sketch.

Take a look at this sketch:


Here is the card I made using the new Gilded Grey Stack available at AC Moore stores:


I chose to stick pretty close to the sketch provided. The only real difference is the part that shows three circular embellishments. I turned made this part by cutting words out of a print provided in the stack.


Want to play along with the card sketch or check out the details about entering your creation? Stop by HERE for all the information!

Thanks for stopping by today!

Supplies:
DCWV - Gilded Grey (available at AC Moore stores)

DCWV Coastal Frame

Hello, DCWV friends! It's Jessi from the Social Media Design Team. I have been longing for a fun trip to the beach. We are now in August and my family still has not been to the beach yet! That is so sad, we only live 30 miles from the Gulf of Mexico! But if the beaches nearby where in better conditions, we would go more often. So when I received the new DCWV Coastal Stack it brought back some pleasant beach memories!

The colors in the Coastal Stack are beautiful! They go perfectly with the photos of my past trip to Cape Cod. Time to create a frame for one of my favorite pictures!


DCWV Coastal Frame:
1.       Paint edges of unfinished wood frame.
2.       Cut printed cardstock to 8in.x8in. square
3.       Cover front of frame with a thin layer of Mod Podge and attach cardstock.

4.       Use exacto knife to cut out the picture opening of frame.

5.       Add embellishments to the frame. (These are hand cut from the DCWV stack)
Supplies:
DCWV Coastal Stack (now available at AC Moore stores)
Unfinished Wood Frame
Martha Stewart Putty Acrylic Paint
Exacto knife

Mod Podge
Thank you for stopping by! Have a wonderful day!

Thank you for stopping by today!

Jessi

Saturday, July 30, 2016

Pink & Main Sneak Peek = Wild About You

Happy Saturday, Pink & Main friends! Can you believe that July is almost over?!? Before we know it, August will be here and then Back to School will be upon us! (Yes, I am counting down the days until my kiddos go back to school...24!

Today, I am giving you a sneak peek at one of Pink & Main's August release stamp sets, Wild About You. It has some adorable animals in the set and I am giving you a look at the precious bear.


I stamped the bear image onto a printed paper and colored in with a variety of markers. This new stamp set also has coordinating dies to match, making it super easy to cut out the stamped images.


I paired up a printed pocket page from a paper stack with a coordinated print and attached to the front of a card base. The sentiment is stamped on the pocket page. The bear is attached to the card.

This is where I planned to stop the card, however, it felt like it was missing something. I colored the 'c' in with a matching blue marker. Three enamel dots are attached to help fill in some of the white space.

Do you love to create with Pink & Main stamps? We would love to see your projects! Please join the Pink & Main Creations Facebook Group and share your projects!

Thanks for stopping by!


Supplies:
Pink & Main - Wild About You stamp set and coordinating dies
DCWV - Boho Style
Markers - Chameleon and ZIG
Paper Studios - Enamel Dots

Monday, July 25, 2016

Christmas in July DCWV Giveaway

Today is the 25th of July! What a perfect day to do a Christmas in July giveaway!

I love being on the DCWV design team! DCWV is an amazing company with a wide selection of awesome paper goodies! They are very generous to us and now it is time to pass on some of the goodies to one lucky winner!

Here is the prize package up for grabs:


This prize package includes:
3 - 12x12 stacks
2 - 6x6 stack
1 - DIY stack
1 - small album

Who is ready to hear how to enter? Leave a comment for each item below you complete!
This giveaway ends at 11:59 PM CST July 31st. Winner will be announced on the blog the following week!

Thank you and have a great day!

Merry Christmas in July!

Saturday, July 23, 2016

Sweet Birthday Wishes

Happy Saturday, Pink & Main friends! Our family has a few July birthdays, so I have been cranking out the birthday cards and wanted to share one of my latest Pink & Main creations.

Today, I am working with one of Pink & Main oldies, Birthday Wishes stamp set.

I paired up the Pink & Main stamps with some festive birthday prints. The background of the card is cut from print and a circle is cut out and attached to the card base. The fun Pink & Main sentiment is stamped in the empty space of the circle and colored in.  A few colorful diecut balloons are attached to the card with foam tape and twine. To complete the card, I added a few diecut stars on the card!

Do you love to create with Pink & Main stamps? We would love to see your projects! Please join the Pink & Main Creations Facebook Group and share your projects!

Thanks for stopping by!


Supplies:
Pink & Main - Birthday Wishes
DCWV - The Birthday Stack
Trendy Twine - Totally White
Paper Smooches - Balloon Dies
MFT - Star Dies

Thursday, July 7, 2016

DCWV Watercolor Stack Layout

Hello, DCWV friends! It's Jessi from the Social Media Design Team. I am truly excited to be sharing another layout with you today! I am sort of in a slump of creating cards, but that is OK, because my love for scrapbooking is growing and it is now a fun art for me!

Today I am using two stacks that will be available soon at Hobby Lobby stores, Watercolor and Embossed White stacks!


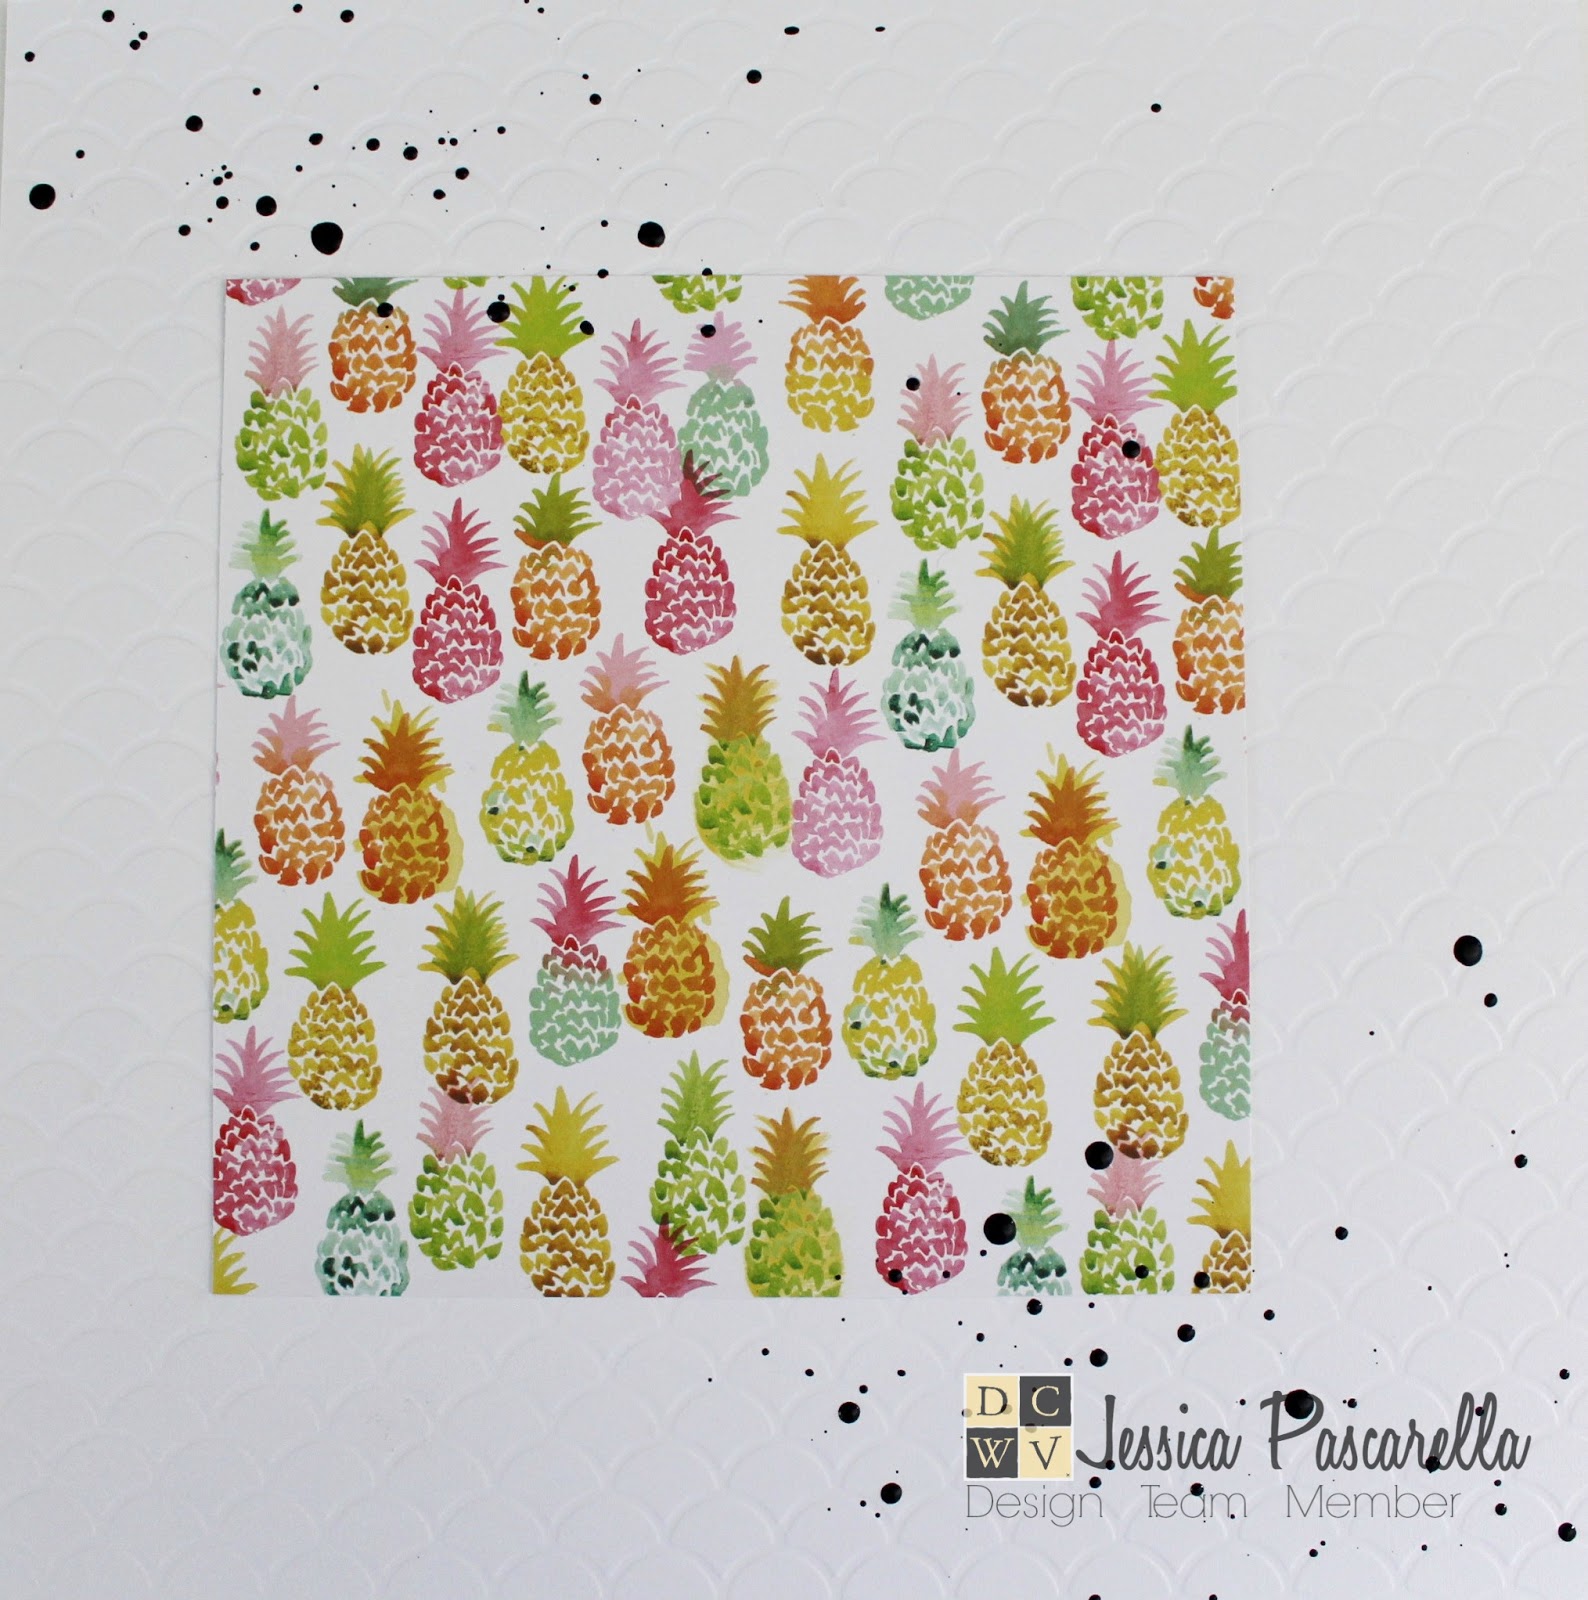
There are quite of few pineapples throughout the Watercolor Stack, so I decided to highlight them in different parts of the layout. I chose the color pineapple print to be the main background of the layout. I attached the print to a piece of white embossed cardstock. I decided to have the de-bossed side of the cardstock as the front of the layout. I loved how the print caused the indentions to the page.


I knew that the journal card I was going to use had black, so I wanted to add more black to the layout. I opted for black paint splatters. I used watered down acrylic paint on the end of a paint brush to form the splatters.


While the paint splatters are drying, it was time to piece the layers together. I used a variety of prints and one sheet of vellum to highlight the photo. The photo is attached to one fun print and set aside. A different print and vellum are attached together and matted onto the final print slightly tilted. The matted photo is attached to the top. A pineapple diecut is attached to the corner using a foam square.


To finish the layout, I added a journaling card and cut out a few words that were part of the Watercolor Stack.

Thank you for stopping by today!

Jessi


Supplies:
DCWV - Watercolor Stack and Embossed White Stack
Paper Studio - Vellum Sheet
Gina K Designs - Pineapple Die
Black Acrylic Paint