Showing posts with label card. Show all posts

Saturday, February 10, 2018

Happy Valentine's Day

Hello, friends! I am back! I decided it was time to take a little break. At first, I was thinking about a three month break. But as the month went on...I was getting antsy. So I went to my craft desk and started a few different projects. And it felt good!  Maybe my mojo is back and kickin'!

With Valentine's Day coming up in a few days, I brought out my Simple Stories Love and Adore paper pad and created an adorable card.


To start off this card, I attached a floral print to the card base. The middle panel of the card is created by pairing up two different prints.  The highlight of the card is a doily print that is fussy-cut out of a paper pad.  The finishing touch for the card is the addition of three pink enamel dots.

Thank you for stopping by! I look forward to sharing more with you throughout the year!

Have a great day!

Jessi


Monday, November 13, 2017

JC- Dog Gone Christmas & Calendar Fun

Hello, Joy Clair friends! Can you believe that we are almost half way through November? Where did the month go? Christmas is just around the corner! Speaking of Christmas, do you include your pets in the festivities? We always include one of the larger bones for are dog. It is so big that it sticks around for way over a month!

First up, is a project that I created using the super adorable, Dog Gone Christmas stamp set! A perfect stamp set for dog-lovers!


For this card, I wanted the dog and the dog house to pop off the card. To do so, I used a circle die to cut out the circle in the center of the card. The dog house is stamped in the center of the circle. The image is then colored in using Chameleon markers. The dog image is stamped on a separate piece of cardstock. Once the dog is colored in, the image is cut out using scissors. The dog is attached using a foam dot. To finish the card, I stamped and embossed the sentiment in white.

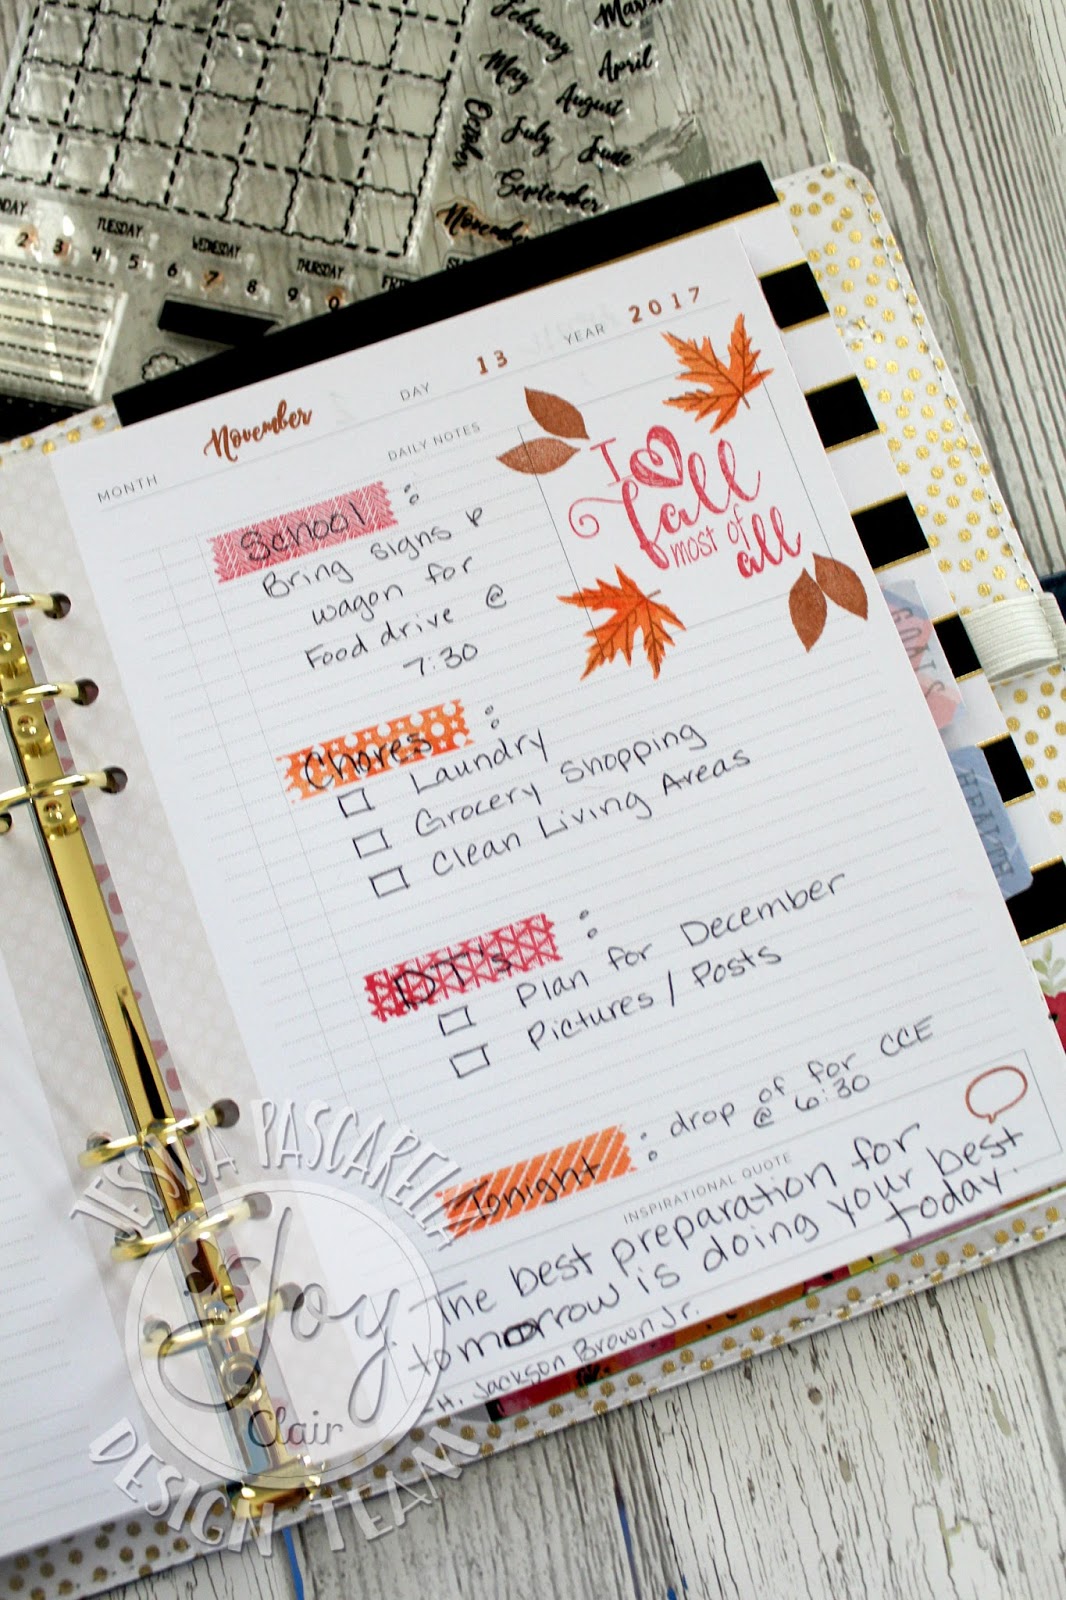
Next up, I included a planner page I created using the new Calendar Fun stamp set:


I really love the washi stamp images included in this set stamp. I alternated stamping the tape images in red and orange inks. These washi stamps add a unique design to the planner sheet. I used the month, day, and numbers to fill out the date at the top of the page. At the bottom of the planner page there is a place to write in a quote. So I included the speech bubble image inside the box. To add more detail to the planner page, I used the Fall Leaves stamp set to decorate the empty box towards the top of the page.

Interested in learn the latest news with Joy Clair Stamps? We would love for you to follow our Social Media pages!


Thank you for stopping by!
Jessi


Wednesday, October 4, 2017

Joy Clair's Embossing and Watercolor

Hello, Joy Clair friends! Can you believe that it is October? This year has flown by fast! Now that with the holiday season around the corner, I am sure the rest of the year will go by faster! 

Today I will be showing you two projects, one using a Everyday stamp set and one using a Color by Faith stamp set. 

My first project for today is one of my latest Bible Journaling pages. I am using Color by Faith's Noah's Ark stamp set:


I wanted to keep this page simple. So I stamped the ark in brown. The clouds were stamped in a gray ink. The animals are stamped in a orange/brown color. Once these inks dried, I used a variety of distress inks and used them as watercolors and filled in the rest of the column. To add the look of the rain starting, I used the salt/pepper dots from the Salt and the Light stamp set. To finish the page, I stamped the phase stamps with black ink.

Next up, is a card using the Rose Sentiments stamp set:


I love working with kraft cardstock. I really love how the color red POPS off the kraft color. To start my card, I stamped the rose frame with red ink and cut the frame out. For the card, I embossed swirls on the front of the card. To make the swirls stand out, I lightly swiped a white ink pad across the embossed swirls. I wanted the sentiment to stand out, so I stamped it ink brown ink. The rose frame is attached to the card base using foam dots.

Interested in learn the latest news with Joy Clair Stamps? We would love for you to follow our Social Media pages!


Thank you for stopping by!
Jessi

Friday, September 8, 2017

Joy Clair and Rinea Foil

Hello, Joy Clair friends! Don't you love September? The kids are back in school and the temperatures are starting to cool off! Now that the kids are back in school, I am finding some extra time to get crafty!

Today I will be showing you two projects, one using a Everyday stamp set and one using a Color by Faith stamp set. All month long the Joy Clair design team will be teaming up with Rinea Foil paper.

First up, to celebrate the kiddos going back to school, I am using the Back to School stamp set:


To start this card, I stamped one image at a time using the Rinea Ghost Ink onto red foil paper. Once I stamped that image, I immediately wiped the ink off using a damp baby wipe. I repeated this stamp multiple times until the panel was full. The foil paper is attached to the card base.

Next up, is a Bible page using the Salt and the Light stamp set:


This is such a simple page to recreate! I cut a piece of blue foil paper down to size to fit within the Bible margin. I stamped each image one at a time using the Ghost Ink. The image is wiped immediately after it is stamped. The first image stamped was the Earth stamp. This allowed me to know where exactly to position the salt image. To finish the page, I included the phrase stamp at the bottom of the page.

Please continue to stop by the Joy Clair blog for the entire month of September to see what the Joy Clair design team does with the Rinea Foil.

Interested in learn the latest news with Joy Clair Stamps? We would love for you to follow our Social Media pages!


Thank you for stopping by!
Jessi


Monday, July 17, 2017

Joy Clair's Christmas in July Celebration

Welcome to the Christmas in July Celebration with Joy Clair! This week the design team is showcasing the different Christmas stamp sets available in the Joy Clair Store! I know that Christmas is still a few months away...but it is never too early to get your Christmas crafts underway!

Today I am showing one of the first ever Joy Clair's Christmas sets, Christmas Wishes:

Christmas Wishes Clear Stamps - Joy Clair - 1

When I first saw this set, I fell in love with the cutesy tree and the adorable handwritten words! I wish my cursive was that pretty!


I really wanted the tree to be the highlight of the card. I took a decorative panel and stamped/embossed the tree in gold. To add to the tree, I stamped ornaments onto the tree using the small dot stamp from the set. The star is colored in with a yellow marker. The decorative panel is layered onto a few different prints and attached to the card front.


For the inside of the card, the sentiment is stamped in black ink. I decided to add the decorative lines to the top and bottom of the sentiment. The lines are also stamped/embossed in gold.

There is a special sale going on during our Christmas in July event! From July 17 - 21, there will be a 10% off sale on all Joy Clair Christmas stamp sets. You will need to use the special discount code CIJ17 to receive the sale price.

Hop on over to the Joy Clair blog to see more projects.

Are you interested in learning the latest news going on with Joy Clair? Join us on your favorite Social media sites to see our newest products and samples from the design team members.

Thank you for stopping by! Hope you have a wonderful day!


Supplies:
Joy Clair - Christmas Wishes
DCWV - Cranberry Stack
NUVO Gold Embossing powder
Distress Ink - Candied Apple
Memento Tuxedo Black Ink

Thursday, July 6, 2017

Let's Meat Up

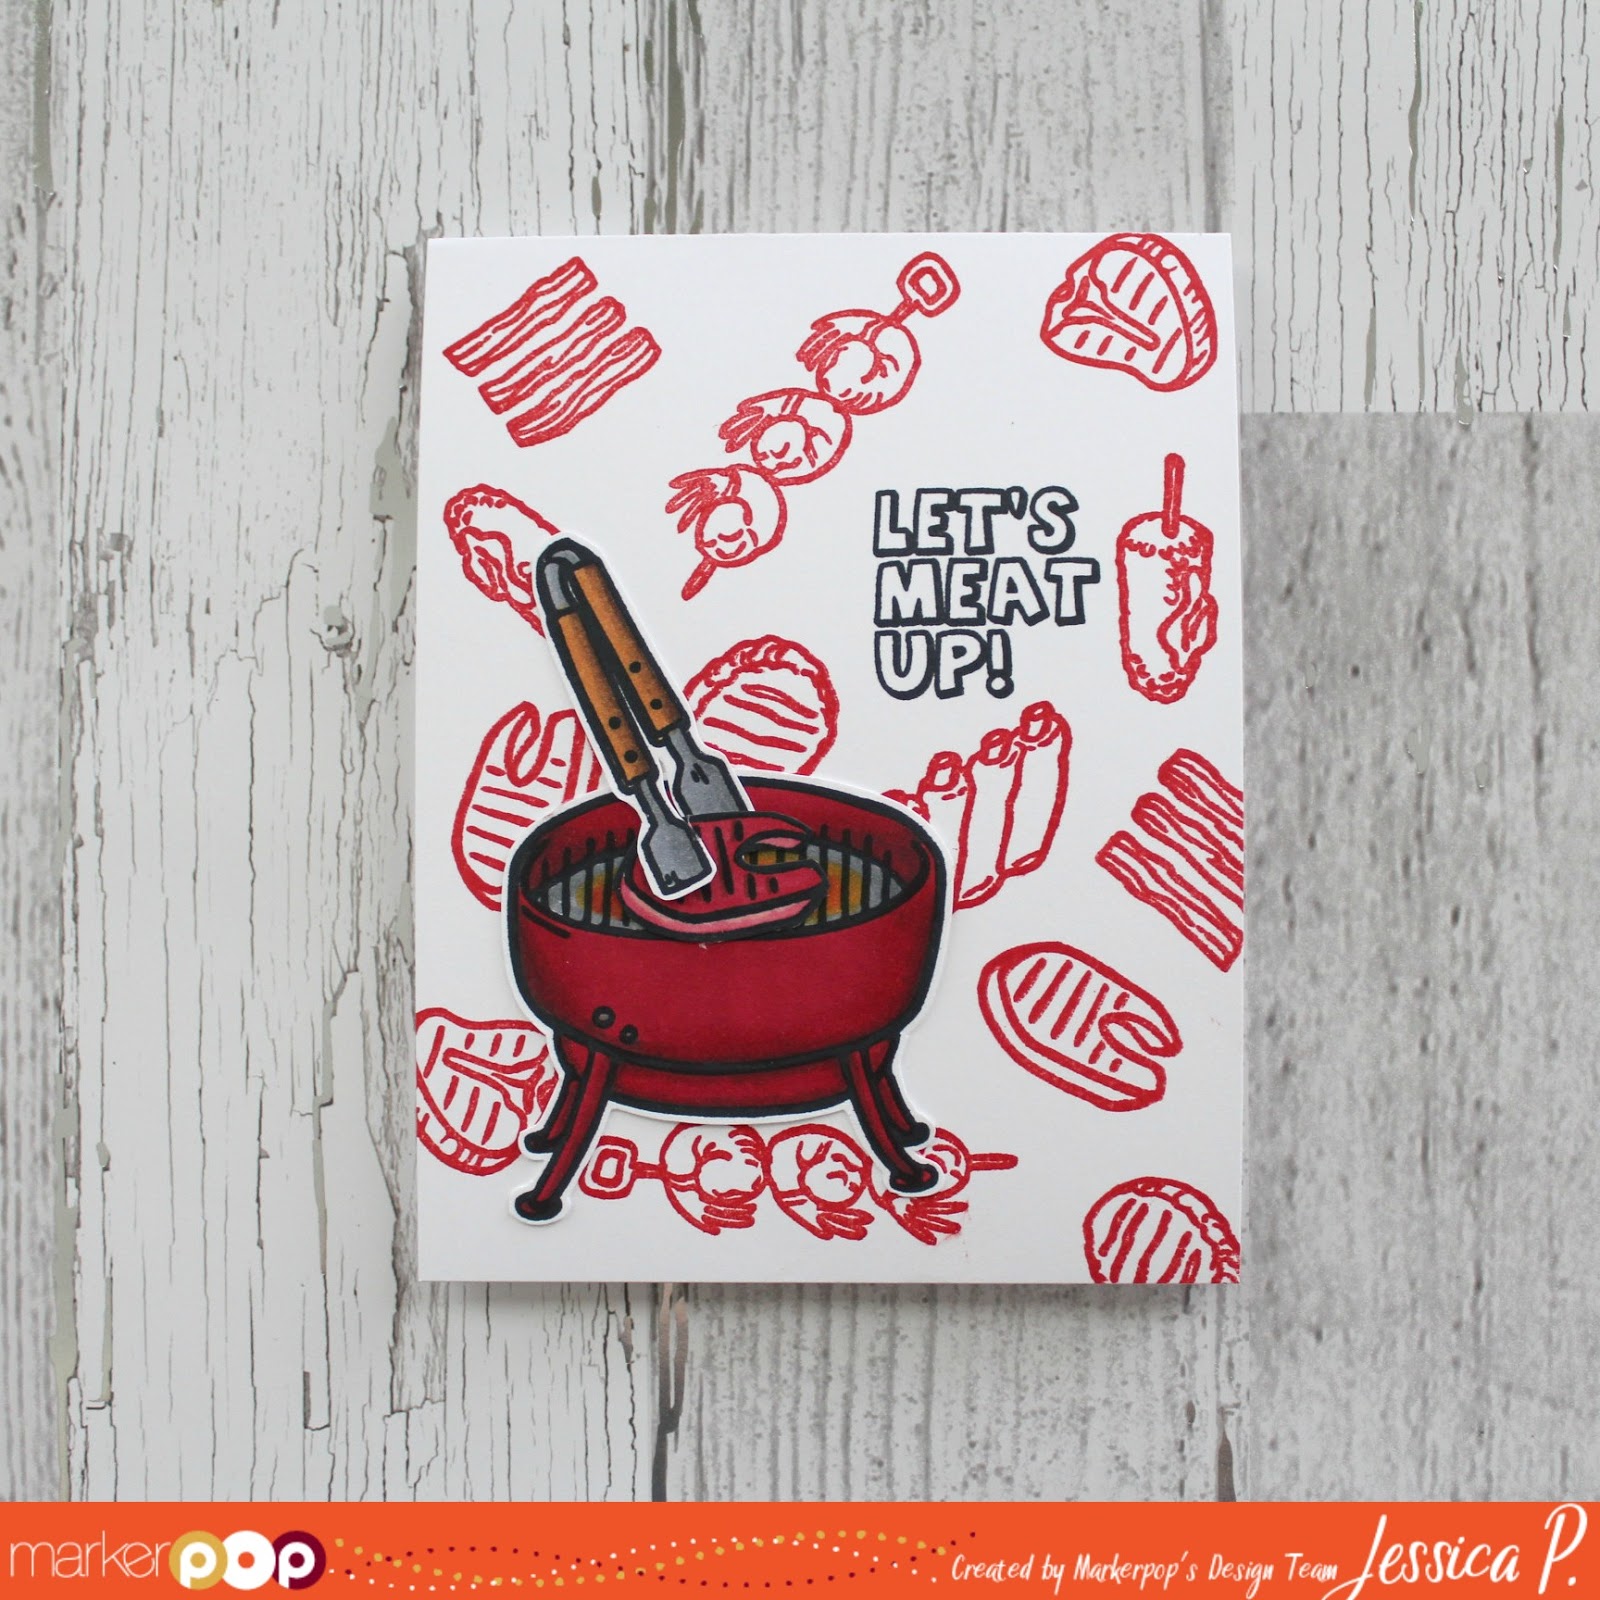
Hello, MarkerPOP friends! I hope everyone had a wonderful 4th of July celebration! Who all BBQ'd? I know that we did...hot dogs and ribs! Yum!!! So with that in mind, I thought this week would be a great week to showcase Waffle Flower's Meat It Up stamp set.

I paired up the Meat It Up stamp set with Chameleon markers:


All the images I wanted to use on the card were stamped onto white cardstock using Memento Tuxedo Black ink. The lines on the stamps are pretty wide, so I used my MISTI tool to allow an even impression of the stamps. The images were colored in using a variety of Chameleon markers. The images were cut out and set aside.


I wanted the sentiment of the card to really pop, so I stamped it using black ink. To form the background of the card, I used red ink and stamped a variety of images from the stamp set. Once the background was complete, I attached the cut out images. The pieces are attached to make it look like the steak is cooking on the grill.


Here is the list of Chameleon markers I used on today's card:
RD2, RD4, BR4, BR5, OR3, OR4, CG5, CG8

Please stop by the MarkerPOP blog for the entire supply list.

Thank you for stopping by today!

Jessi

Saturday, July 1, 2017

Joy Clair - July Monthly Challenge

Happy July, Joy Clair friends! Today starts a new challenge over on the Joy Clair blog! This month, the design team is showcasing some of their favorite Joy Clair stamp set! The theme for this month is Anything Goes

Interested in joining the fun? Hop on over to the Joy Clair blog to find out how you can play along!

Today, I am playing with the Doodle Flower Background and Hello Sentiments stamp sets.


I love this background stamp! I decided to stamp/emboss the image in gold and cover only part of the panel. I left the bottom empty, so I could go back and emboss a sentiment. The sentiment is from the Hello Sentiment stamp set. I attached the embossed panel onto a robin's egg blue cardstock.

Such an easy card to create. You can even color in the image for a different look!

Thank you for stopping by!

Have a wonderful day!

Jessi

Thursday, June 22, 2017

Hello, Friend

Hello, MarkerPOP friends! My style is Clean and Simple. I love the simplicity of the final project. I sometimes feel guilty with how quick it takes to make a card. So I have started to added some additional touches that I believe push the card to the next level! One of my new favorites is the NUVO Drops!

Today, I am using the Altenew's Be Strong stamp set and Chameleon markers:


I used Memento Tuxedo Black ink to stamp the images onto the white cardstock. I used a couple orange and yellows Chameleon markers to color in the individual bulbs. To make the bulbs look more life-like, I covered each one with Clear Nuvo Drops. When the drops dry, they give off a glassy look to the bulbs. A sentiment is stamped at the bottom of the card.


I used the following markers on today's card:
Chameleon markers -

Please head on over to the MarkerPOP blog for the list of supplies used on today's card.

Thank you for stopping by! Hope you have a great day!

Jessi

Friday, June 16, 2017

Llama Tell You...

Hello, MarkerPOP friends! It is Jessi here. "Llama tell you"...I am loving all the llamas everywhere! Now, they might not be the cutest animal in reality, but they are super cute on papers and stamps! They make some adorable and sometimes silly cards!

I love paper-piecing! So today's card focuses on that technique instead of using markers to color the image.

Today's card showcases the super adorable Gerda Steiner Designs' Llama Tell You stamp set:


I had a paper pad that included some llama images. So I decided to use the paper pad and complete the card by paper-piecing. The stamp images are stamped on a variety of prints and cut out. The llama image is completed with 2 different prints. The cactus is stamped on a fun blue print and cut out. The background sun is created by a circle die. The ground layer is created with a wavy border die. Some many fun prints to complete this card!


No markers were used on today's card, but stop by the MarkerPOP blog for the list of supplies used on this card!

What a chance to win some prizes? Join us on the current MarkerPOP challenge! We cannot wait to see what you create!

Thank you for stopping by today!
Jessi

Psst... DCWV No Problem, Llama 12 x12 paper pad was used on today's card.

Thursday, June 15, 2017

Reach for the Sky

Hello, MarkerPOP friends! It is Jessi here. Today I am sharing a sweet card with you today. I am working with the Hampton Arts' Reach for the Sky stamp set. This stamp set would make very cute baby cards. But today, I am using it for a kid's encouragement card. We all have seen our kids in moments were they need our extra support to calm them down.

Why not give them a little extra love with a handmade card!


The stamp set includes a few different adorable animal images. I stamped a few of them onto white watercolor cardstock and colored then in with a variety of ZIG Clean Color markers. The cloud image is stamped onto some printed paper, for some paper piecing. The images are attached to a printed panel. The sentiment is stamped on the bottom left corner of the card. To fill in some of the empty space, I stamped and colored the moon image  and attached to the card.


I used the following ZIG Clean Color markers on this card: 050, 060, 061, 098

Please hop on over to the MarkerPOP blog for the list of supplies used today!

Be sure to stop by and play along with our current challenge! It is an easy way to enter for your chance to win some amazing craft supplies!

Thank you for stopping by!

Jessi


Wednesday, June 14, 2017

Joy Clair's Flawless for Summer Event

Today is a special day on the Joy Clair blog! The design team is showcasing the super adorable Flawless stamp set! We wanted to share with you the variety of ways that you can use this stamp set!

When I first saw this stamp set and all the makeup images, 'Sweet Sixteen' came to mind!


I stamped the images randomly onto black cardstock and embossed in silver. (I really loved how the silver popped against the black!) I created the sentiment for the card using a variety of die cuts and colored cardstock. The 'happy' part of the sentiment is from the Everyday Sentiments stamp set and is also embossed in silver.


Interested in seeing what the rest of the design team came up with, hop on over to the Joy Clair blog!

Thank you for stopping by! Have a wonderful day!

Jessi


Thursday, May 4, 2017

Joy Clair Layering Images

Hello, Joy Clair friends! It is Jessi here. I am cannot wait to show you today's project! This month, the design team is working with layers. One way to add layers to your project is to stamp and cut out individual elements.

Today's project is showcasing the Joy Clair's Doodle Flowers stamp set:


To start this card, I stamped a variety of images onto white cardstock. The images are colored in and cut out individually. The jar image is stamped onto a printed piece of paper and cut out. A frame is created using two rectangle dies.


The frame is attached to printed paper. The jar image is glued with in the frame. Now it is time to add the different layers of flowers to the jar. The first layers to be placed are the leaves. One is placed on each side of the jar. One flower image is attached in the center of the leaves.


To finish the card, the remainder of the flowers and leaves were slipped into the place. A simple sentiment from the Joy Clair's Everyday Sentiment is stamped at the bottom of the card.

Are you interested in learning the latest news going on with Joy Clair? Join us on your favorite Social media sites to see our newest products and samples from the design team members.
 YouTube 

Thank you for stopping by today!

Friday, April 21, 2017

Happy Day + ZIGs

Hello, MarkerPOP friends! Less than one year ago, I was scared of watercolors! I was scared of them! I threw away many projects, just because I was not happy with my watercolor skills. In fact, one of my goals last year was to work on my watercolor techniques! But when I got my hands on Zig Clean Color Markers, I fell in love!

Today, I paired up my Zig markers with the super cute Waffle Flower's Happy Day stamp set:

I struggle when it comes to shadows. The Zig markers help out so much with that! I grabbed three shades of brown to color in the bear image.

Start with the lightest shade of brown and color the outline of the image. Using water and a paintbrush, spread the color from the outside towards the inside of the image.


Do the same with the middle shade of brown.


Now add the darkest shade of brown around the outer edges and spread the color towards the inside.


Now it is time to color in the rest of the image. Please stop by the MarkerPOP blog to see the list of markers used for today's card. To finish of this card, the sentiment is stamped and embossed in white onto a black strip of cardstock.


Don't forget to enter your chance to win some watercolor supplies! Stop by HERE to find out the details!


Have a wonderful day!

Jessi

Monday, April 17, 2017

Joy Clair's Mother's Day Hop

Today, the Joy Clair design team is highlighting the super adorable Mother's Day stamp set! It is full of super cute puns and funny images. A perfect stamp set to make the perfect card for the mother with a great sense of humor! So glad that my mother is one of them!

Here is a closer look of the Mother's Day stamp set:

Image may contain: text

One today's card, I wanted to make a "split personality" card. Serious on the front, party on the inside!

From the Mother's Day stamp set, I used the SH!# image stamp for the inside sentiment of the card. The image is colored in with a brown pen. A white gel pen is used to make the teeth and eyes REALLY pop!


I used the new Spring Time Flowers stamp set to create the front of the card. The floral image is stamped and embossed in white. I used a blending tool to add the ombre look with a pretty pink distress ink. The sentiment, from the Hello Sentiments stamp set, is stamped in gray ink.


Be sure to stop by the Joy Clair blog to find more of the design team's projects they created using the Mother's Day stamp set!

No automatic alt text available.

Thank you for stopping by today!
Jessi

Friday, April 7, 2017

Watercoloring Your Diecuts

Hello, MarkerPOP friends! This month the design team is going to be sharing a few of our favorite watercoloring supplies. I recently received my first Prima Confections Watercolor set. I fell in love with them! The watercolor is probably the thickest I have ever worked with!

Today, I am pairing up the watercolors with My Favorite Things dies. I love using watercolors to color paper when I cannot find the right shades of cardstock to work with!


 To start this card, I painted a variety of swatches using the different colors in the Tropical Confections set. I spaced the swatches out to allow room to fit the various dies.


Once the individual dies are cut, it is time to piece the card together! The Birdhouses die set includes the house, roof and the pole to assemble the house. There is also a couple little bird dies to add a little cute touch to your project.

The background panel is also covered with watercolor as well. I included a layer of grass diecut to add a little dimension to the card,

I wasn't sure what I what kind of sentiment I wanted to use on this card. So I decided to leave it blank. I will be able to stamp a sentiment on the inside of the card that will fit whatever the occasion might be.


Thank you for stopping by today! Stop by the MarkerPOP blog for the list of supplies used on this card!

Have a wonderful day!

Jessi

Wednesday, April 5, 2017

MISTI + Joy Clair Stamps Promotion

Hello, friends! Today is an exciting day on my blog! The design team from Joy Clair Stamps has teamed up with the design team from My Sweet Petunia! We are doing a cross promotion to show how awesome the MISTI tool is with Joy Clair clear stamps! If you are hopping along, you should be arriving from the amazing, Giovana's blog! If you just happened upon my blog and would like to start from the beginning, you can find the list of blog stops at the bottom of my post.


Today, I am working with one of Joy Clair's newest stamp sets, ____________ and the Mini MISTI!


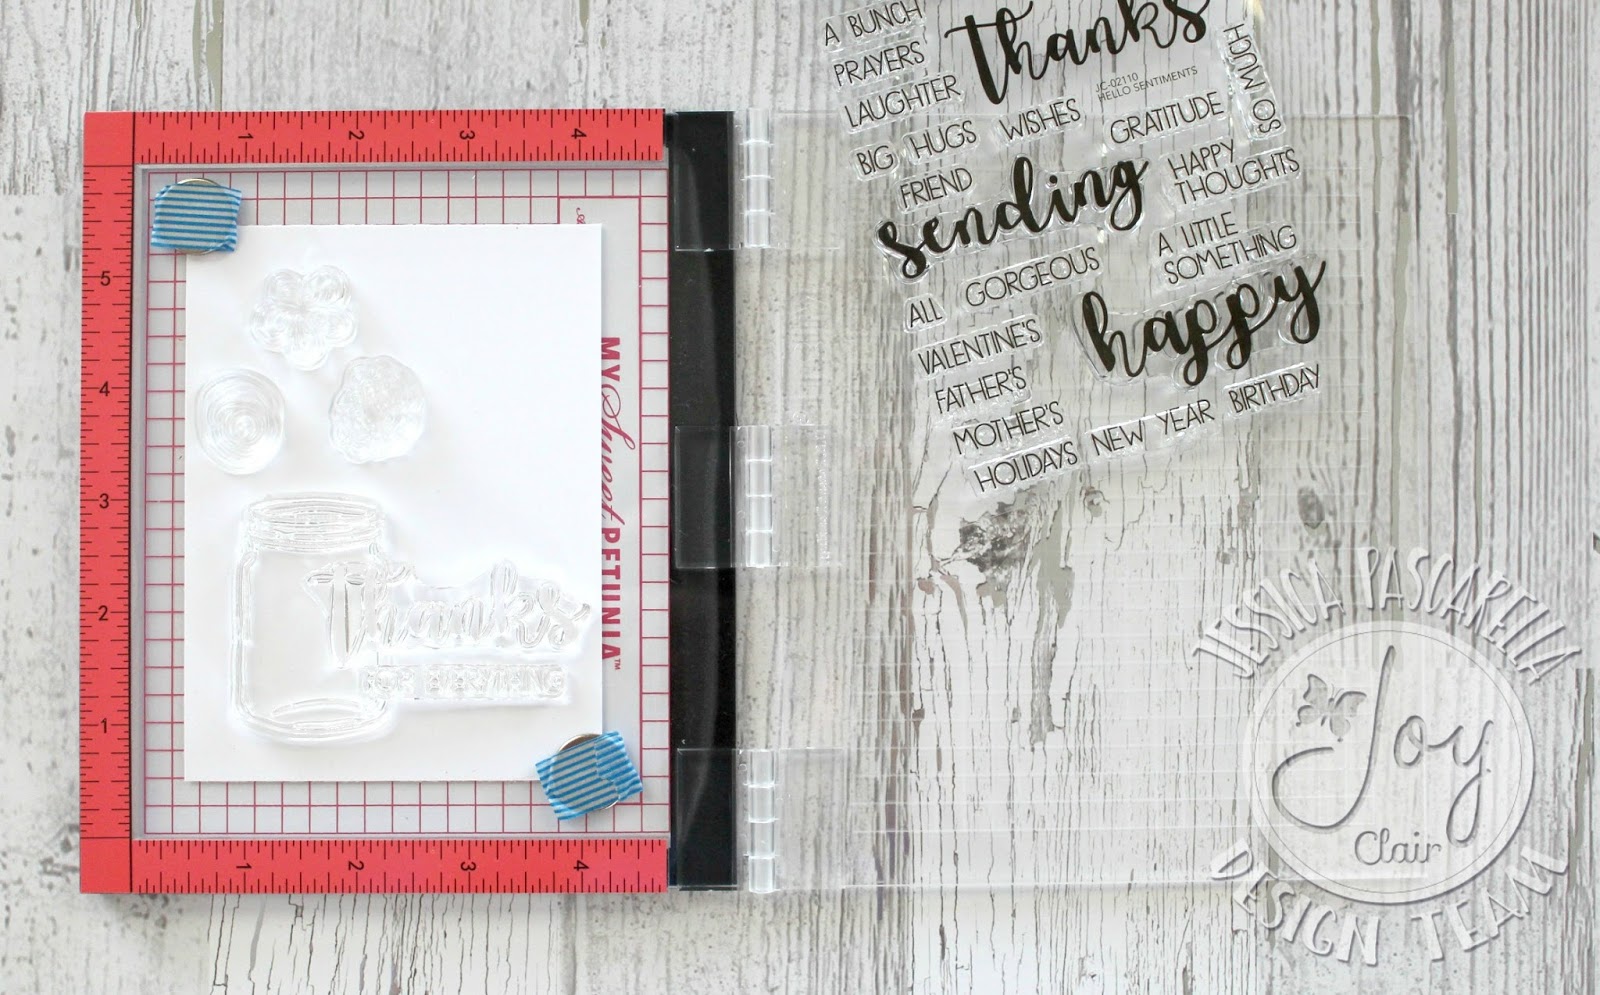
One thing I like about the MISTI tool, is that it makes it easy to work on the layout of the card. You can visualize how the stamps will look and make any changes that are needed to be made. Below, you can see that I worked with the placement of the stamps.


Now it is time to stamp the images from the Doodle Flowers stamp set.  I am planning on using different colors, so I stamp one image at a time. For now, I am only stamping the images, I plan to come back later and color in the images with the same inks.


If you have been stopping by the Joy Clair blog this month, you see that the design team is working with the 'Masking' technique. I decided to include it on this card as well. I wanted the jar to look like it is sitting on a tabletop. To achieve this, I stamped the jar image onto an extra piece of cardstock and cut the image out. The cutout is placed onto the stamped image and washi tape is place across the card. The Wood Background stamp is inked with brown ink and pressed on the card. Once you remove the tape, you can see that the wood grain image is not stamped on top of the jar.


Another thing I like about the MISTI, is that when an image does not stamp completely, you can re-ink the stamp and stamp in the exact same place, for a solid image. Below, you can see that the images from the Hello Sentiment set did not stamp correctly, so I repeated the stamping process.


To finish the card, I placed the card panel on top of a fun print and placed it onto a A2 card base.

Let's talk about prizes!!! My Sweet Petunia is giving away one MISTI and Joy Clair is giving away $25 Joy Clair gift card to two (2) lucky winners! All you have to do to increase your chances to win, is to leave a comment on each participating blog! All comments must be completed by April 9th at Midnight. The Joy Clair winners will be announce on the Joy Clair blog, Wednesday April 12.


Thank you for stopping by today! To continue along with the MISTI & Joy Clair hop, your next stop will be to the talented Stephanie's blog.

Here is the complete list of hop stops:


Supplies used on today's project:
My Sweet Petunia - Mini MISTI
Joy Clair Stamps - Doodle Flowers, Hello Sentiments and Wood Background stamp sets
My Favorite Things Inks - Cotton Candy, Poppy, Ripe Raspberry and Sour Apple
Ranger Distressed Ink - Tumbled Glass and Brushed Corduroy
Memento Tuxedo Black Ink
Echo Park - Let's Be Mermaids 6x6 paper pad

Friday, March 24, 2017

Chunky Thank You with Prima

Hello, MarkerPOP friends! I hope your week has been a great one. It has been a busy one here, trying to get back to the normal routine after Spring Break. I had some neighbors helping me out, so I needed to come up with a fun thank you card to show my appreciation.

Today, I am working with Stampendous Chunky Thank You Cling Stamp and Prima Confections watercolors to create this card:


A stamped the image with black ink onto some watercolor cardstock. The image is colored in with Prima Confections watercolor paints.

***This is the first time I used Prima Confections paints. I am so pleased with how creamy and thick these paints are. I am not use to that thickness, so I will need to practice more with learning how to get light to dark shades of one color.***

To add some detail to the card, I added some sparkle to the butterflies by added a layer from the Wink of Stella pen. (It is hard to capture the sparkle in a photo.


To finish the card, I used a stitched rectangle die to cut out the panel with the image. The image is then attached to a black cardbase. I felt the card needed a little more detail, so I added a few drops of NUVO black Crystal Drops.

Thank you for stopping by today! Don't forget, there are a few days left of the Copics Birthday celebration...be sure to join in for your chance to win!


Have a great day!