Showing posts with label scene. Show all posts

Wednesday, April 12, 2017

Joy Clair's Flawless Bible Journaling

Hello, Joy Clair friends! I am super excited to be working with the new Joy Clair release! There are a total of 8 stamps being released. Four sets for the Color by Faith line and four everyday stamp sets. For the next few months, the design team will be presenting a variety of projects with the hopes of filling you with inspiration! During the month of April, the team will be using the masking technique on our projects.

Today, I am showcasing the super adorable, Color by Faith's Flawless stamp set. 


To start this project, I stamped the images I needed onto stamping mask paper. These images will cover the stamped images to make the scene look like there is some depth.


Now it is time to start the stamping. You start with the stamped image that will be at the front of the and place the image onto the Bible page. Then you cover the image before you stamp the next one. You continue to cover the images in the places you do not the stamped image to show. When you finish the stamping, remove the masking paper.


I wanted the scene to appear like it was on a tabletop. I used an oval die to trace the inside and outside of the oval to form a mirror. Lines were drawn with a pen to create the table top.


Here is the complete scene before I started to paint it. I did forget to take a picture, but I used the Wood Background stamp and stamped it on the tabletop. I used a mixture of regular watercolors as well as metallic watercolors.
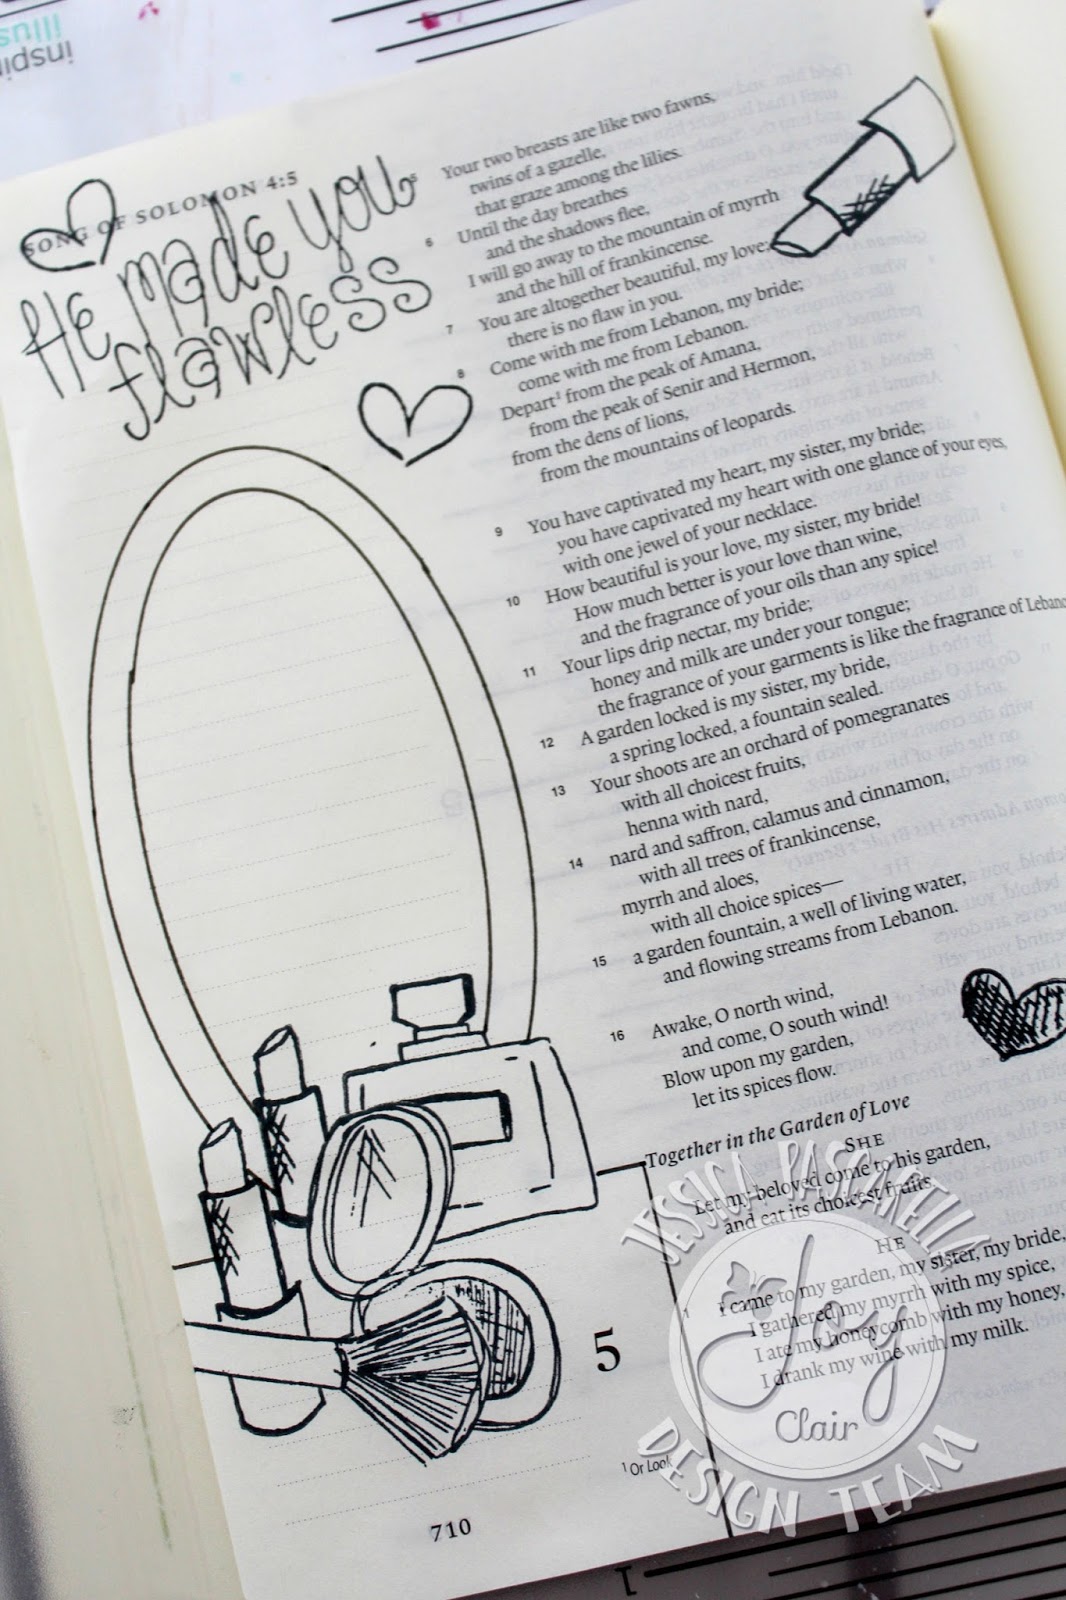

When the scene was completed, I stamped the sentiment/phrases in black ink. I also highlighted the Bible verse with the same watercolor shade I used on the lipstick image next to it.

Are you interested in learning the latest news going on with Joy Clair? Join us on your favorite Social media sites to see our newest products and samples from the design team members.
 YouTube 

Thank you for stopping by today!


Supplies:
Joy Clair - Flawless and Wood Backgroud
Memento Ink - Tuxedo Black Ink
Stamping Masking Paper
Watercolors


Friday, April 7, 2017

Watercoloring Your Diecuts

Hello, MarkerPOP friends! This month the design team is going to be sharing a few of our favorite watercoloring supplies. I recently received my first Prima Confections Watercolor set. I fell in love with them! The watercolor is probably the thickest I have ever worked with!

Today, I am pairing up the watercolors with My Favorite Things dies. I love using watercolors to color paper when I cannot find the right shades of cardstock to work with!


 To start this card, I painted a variety of swatches using the different colors in the Tropical Confections set. I spaced the swatches out to allow room to fit the various dies.


Once the individual dies are cut, it is time to piece the card together! The Birdhouses die set includes the house, roof and the pole to assemble the house. There is also a couple little bird dies to add a little cute touch to your project.

The background panel is also covered with watercolor as well. I included a layer of grass diecut to add a little dimension to the card,

I wasn't sure what I what kind of sentiment I wanted to use on this card. So I decided to leave it blank. I will be able to stamp a sentiment on the inside of the card that will fit whatever the occasion might be.


Thank you for stopping by today! Stop by the MarkerPOP blog for the list of supplies used on this card!

Have a wonderful day!

Jessi

Tuesday, February 7, 2017

Joy Clair - Wild & Free Galaxy Scene

Hello, Joy Clair friends! This month, the design team is showing the different types/techniques that can be done with watercolors. If you have noticed lately, galaxy backgrounds have been very popular. I have tried this watercolor technique a few times and learning different ways to improve it.

I decided to create a scene card using the new Wild & Free stamp set and a variety of watercolor mediums.


To start the galaxy background, I used a few watered down distress inks and painted the sky portion of the panel. I used purple, black and a couple blues to create the sky.


Once the watercolor dried, I dropped a few water drops over the paint. I did this by dipping a brush in water and tapping the brush to create the water drops.


The water drops are left on the paint for a couple of minutes. When it is time to remove the water drops, simply place a paper towel over the drops and press lightly to soak up the water.


To finish the galaxy background, I added some speckles of some watered down white acrylic paint. I used the same tapping the paint brush to get the speckles.


Now it is time to complete the rest of the scene. I used ZIG Clean Color markers to color in the mountains. The mountains are cut out and attached to the scene. I used watered down distress ink to paint the water part of the scene.

The fox and the canoe are stamped in black ink and colored in with ZIG Clean Color markers. The images are cut out and attached to the scene. I used a fancy rectangle to cut out the panel. The panel is added to a fun print and mounted onto a card base.  The sentiment is stamped in white and also embossed with white embossing powder.

Are you interested in learning the latest news going on with Joy Clair? Join us on your favorite Social media sites to see our newest products and samples from the design team members.
 Youtube 

Thank you for stopping by! Have a wonderful day!

Jessi

Supplies:
Joy Clair - Wild & Free stamp set
Ranger - Distress Inks
DCWV - Boho Style Paper Stack
Gina K Designs - Scalloped Rectangle Die
ZIG Clean Color Markers
Memento Tuxedo Black Ink
Lawn Fawn Yeti Ink
WOW White Embossing Powder
White Acrylic Paint

Saturday, November 19, 2016

Hang in There Scene

Happy Saturday, Pink & Main friends! We are getting our first taste of winter here in Texas. Perfect weather for the upcoming holiday!

Did you see the new Pink & Main November release? One word---ADORABLE! Sloths are so popular right now! Who saw Zootopia? Flash the Sloth was my favorite character!

For today's project, I am pairing up the Sloth stamp set with the oversized Stitched Oval dies.


I wanted to create a scene using a sloth image. I stamped the image and colored with a variety of markers. The image is cut out with the coordinating Sloth dies. I wanted the scene to look like the sloth was hanging out in a tree. I used some leaves and branches diecuts to create the background of the scene. The sloth image is attached on top of the scene. The simple sentiment is stamped towards the bottom of the card.


We would love to see you Pink & Main creations! Join the Pink & Main Facebook gallery and upload your projects!

Thank you for stopping by today!


Saturday, September 24, 2016

Zombies Halloween

Hello, Pink & Main friends! Who is exciting for the fall and upcoming Halloween? I actually bought my daughter's costume yesterday! Much earlier than I normally do. Now just need to get the boys taken care of!

With Halloween in mind, I decided to work with the super cute, but creepy, Zombies stamp set and coordinating dies.


I paired up the zombie image with some Halloween theme printed paper. The girl zombie is stamped onto the cardstock and colored in with markers. The image is cut out using the coordinating dies. To create the scene, I used the Scalloped Waves dies to form the hilly background. The diecut house is attached in front of the starry sky. A simple sentiment is stamped onto a orange print and attached at the card.

How you seen the latest Pink & Main Challenge? There is still time to join the fun! Check out the details HERE!


Supplies-
Pink & Main - Zombies stamp and coordinating dies, Scalloped Waves dies