Showing posts with label dies. Show all posts

Friday, July 28, 2017

Let's Have Adventure

Hello, MarkerPOP friends! Do you like adventures? I would like to say that I do. But I have found that as I get older, my adventurous level is decreasing! We are taking the kids to their first waterpark in a few weeks. This will be my second time ever to one. I am sort of freaking out!

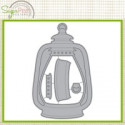
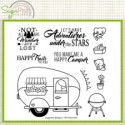
Today's card features the Sugar Peas Design's Lantern die and RV There Yet:


The lantern die cut is made using black cardstock. I also ran the die with white cardstock to get the center piece. The center piece is colored in using Distress Crayons. I blended them with a baby wipe. Once the cardstock is dry, I stamped the phrase onto the white cardstock. The lantern is attached to a starry print.


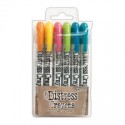
I used the following Distress Crayons: Spiced Pumpkin and Mustard Seed.


I love this lantern! Makes me want to go on a camping adventure...maybe when the temperatures cool down!

Thank you for stopping by! Have a wonderful day!

Jessi
 

Saturday, December 17, 2016

Many Thanks

Hello, Pink & Main friends! It is Jessi from Kissin' Krafts. I am sad to say that today is my last post for Pink & Main. I have been a proud member of the design team since February 2015! It has been a great pleasure to watch Pink & Main grow!

To show my appreciation to Michelle for the opportunity she has given me,  I brought out the Thanks to You stamp set and word dies for today's project:


I paired up some adorable prints to create the different layers on the card. I used the Thanks word/shadow dies to help highlight part of the sentiment. The rest of the sentiment is stamped on to printed strips and attached to complete the saying.

Thank you again, Michelle for the past (almost) two years. It has been a pleasure working with you and the rest of the Pink & Main design team!

Thank you for stopping by and have a wonderful day!

Saturday, November 26, 2016

Welcome Little One - girl

Hello, Pink & Main friends! I love making baby cards, but don't have the opportunity to make them too often. I recently found out that I will be an aunt again and am excited to hold that baby in my arms. But sadly, I have to wait a few more months!

Today's project uses an older Pink & Main set, Little Ones. In the November Release, the coordinating dies for Little Ones were included.


To create this square card, I used the new Stitched Rounded square dies. I also used the same dies to create the frame. The elephant image from Little Ones is stamped and colored on white cardstock. The image is cut out using the coordinating dies. For the sentiment, I used the fancy frame die from the Little Ones collection and stamped 'Welcome' on it. The rest of the sentiment is stamped onto the frame.


The elephant image can be used on a boy card, by replacing the pinks with blues!

Thank you for stopping by today! Have a great one!


Saturday, November 19, 2016

Hang in There Scene

Happy Saturday, Pink & Main friends! We are getting our first taste of winter here in Texas. Perfect weather for the upcoming holiday!

Did you see the new Pink & Main November release? One word---ADORABLE! Sloths are so popular right now! Who saw Zootopia? Flash the Sloth was my favorite character!

For today's project, I am pairing up the Sloth stamp set with the oversized Stitched Oval dies.


I wanted to create a scene using a sloth image. I stamped the image and colored with a variety of markers. The image is cut out with the coordinating Sloth dies. I wanted the scene to look like the sloth was hanging out in a tree. I used some leaves and branches diecuts to create the background of the scene. The sloth image is attached on top of the scene. The simple sentiment is stamped towards the bottom of the card.


We would love to see you Pink & Main creations! Join the Pink & Main Facebook gallery and upload your projects!

Thank you for stopping by today!


Thursday, November 17, 2016

Inspired by Stamping - Layered Windows

Hello, Inspired by Stamping friends. It is Jessi here for my last guest designer spot. I want to start off by thanking Joanna and the team for allowing me to play along with them this month! It has been a pleasure working with you!

I love creating layered windows on cards. So I decided to show you how to complete one with Inspired by Stamping stamp sets:


The first step is to form your A2 card base and cut our a 4in. x 5.25in panel that will be the front of the card. With this panel, use a circle die to cut out the window.


I took the forest stamp from the Winter Friends stamp set and stamped the image twice onto the cardbase. I used a grey ink, so the inks would blend into the scene. I used a light blue to color in the sky portions of the stamp.


The deer image is stamped in a brown ink and colored in with a variety of brown markers. A black marker is used to color the hooves and the tip of the nose.The image is cut out and set aside.


The front panel is flipped over and the snow drift and tree dies are attached to the back side of the window. Several foam dots are attached around the card. The panel is then attached to the cardbase.


The deer image is attached to the scene, tucked behind the die cut trees.  A simple sentiment from the Inspired by Stamping stamp set Poinsettias is stamped onto glitter paper and attached to the card.


Thank you for stopping by today and I hope you have a great day!

Supplies:
Inspired by Stamping - Poinsettias and Winter Friends
Spellbinders Circle Dies
CC Designs Tree Die
Pink & Main Scalloped Wave Die
DCWV Glitzy 6x6 pad
Neenah Solar White Cardstock
Chameleon Markers
Spectrum Noir Markers
Memento Ink - Rich Cocoa and London Fog
Foam Dots

Wednesday, November 16, 2016

Merry Christmas Packages

Hello, MarkerPOP friends! It is Jessi here. Are you ready for the holiday season? Can you believe that it is right around the corner?

Today, I am sharing a CAS Christmas card that would be simple to recreate in mass numbers and send out to your closest family and friends:


To make the card unique, I used a scalloped edge die to create the card base. The image from the Avery Elle's Christmas Packages stamp set is stamped and colored in with a variety of markers. The image is then cut out using a tag die. The tag is attached to the card and the sentiment is stamped around the tag.


Check by the MarkerPOP blog to see what markers were used on this project!


Thank you for stopping by! Have a wonderful day!

Jessi
Saturday, October 15, 2016

Dear Santa

Happy Saturday, Pink & Main friends! Today we are suppose to reach 90 degrees here in my part of Texas. So I declare today a good day to dream of snow. And the closest I am going to get to that is to work with some of Pink & Main's winter stamp sets!

For today's project, I am working with Santa Mail and Oh, Deer stamp sets:


I wanted to create a fun scene using one of the elf images. The image is stamped onto white cardstock. I also stamped the same image onto a masking sheet. The image is cut out of the masking sheet and placed on top of the image on the cardstock. I used a distress ink to create the sky coloring. Once I was done, I peeled the masking piece off. The image is colored in using colored pencils. I also added a snowy hill below the image, using the Scalloped Waves dies. I also used the Stitched Rounded Rectangles die to cut out the scene. The scene is attached to a kraft card base. I also added a few clouds to add more detail to the scene. To fill in the empty space, I used the snowflakes from the Oh, Deer stamp set and stamped around the scene. A simple sentiment is stamped at the bottom of the card.


Thank you for stopping by today! Have a great one!

Wednesday, August 3, 2016

My first MarkerPop DT post!

Happy Wednesday, everyone! My name is Jessica Pascarella and I am super excited to be joining the MarkerPop design team! So since this is my first MarkerPop post, let me introduce myself!

I am a SAHM of 3 wonderful kids. My main love is card-making. But have started to expand into scrapbooking and altered items. My love for papercrafts started over 13 years ago when I made my wedding invitations. My style is mainly Clean and Simple (CAS), but I love to challenge myself to try new styles as well as new techniques. My latest obsession is using watercolors. 

As I mentioned above, I love watercolors! And I have to admit it was 'love at first sight' when I was introduced to ZIG Clean Color Real Brush markers!

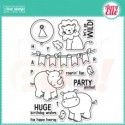
So for today's creation, I paired up the ZIG Clean Color markers with one of the newest Avery Elle stamp set, Wild Birthday.


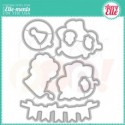
To start the card, I stamped the balloon image several times onto some watercolor cardstock using Memento Tuxedo Black ink. Once the ink dried, I used a variety of ZIG markers to color in the balloons. I used the Wild Birthday coordinating dies to cut out the balloons and set them aside. I repeated the process for the hippo image.


To create the sky background, I used the popular ink-smooching technique. If you are not familiar with this technique, let me explain quickly. On a piece of acetate, add a few colors of paint (in this case, I used a variety of blue ZIG markers) and mix with a small amount of water. Flip the acetate over and place on top of the cardstock you are working with. Move the acetate around to spread the color until you are satisfy with the overcome.

Time to piece the card together! A small hole is punched in the hippo and strands of twine are wrapped around the image. The end of the strands are arranged at the top of the card to line up the balloons. The balloons are attached with adhesive. The hippo is attached to the card with a foam dot. A simple sentiment is stamped on the bottom of the card.


Stop by my MarkerPop post for the list of supplies used on this card!

Thank you for stopping by today and seeing my first MarkerPop creation!
Have a great day!


Supplies:

Saturday, July 23, 2016

Sweet Birthday Wishes

Happy Saturday, Pink & Main friends! Our family has a few July birthdays, so I have been cranking out the birthday cards and wanted to share one of my latest Pink & Main creations.

Today, I am working with one of Pink & Main oldies, Birthday Wishes stamp set.

I paired up the Pink & Main stamps with some festive birthday prints. The background of the card is cut from print and a circle is cut out and attached to the card base. The fun Pink & Main sentiment is stamped in the empty space of the circle and colored in.  A few colorful diecut balloons are attached to the card with foam tape and twine. To complete the card, I added a few diecut stars on the card!

Do you love to create with Pink & Main stamps? We would love to see your projects! Please join the Pink & Main Creations Facebook Group and share your projects!

Thanks for stopping by!


Supplies:
Pink & Main - Birthday Wishes
DCWV - The Birthday Stack
Trendy Twine - Totally White
Paper Smooches - Balloon Dies
MFT - Star Dies

Saturday, July 2, 2016

Pink & Main - Go with the Flow


Happy Saturday, Pink & Main friends! We are now in July and I have not been to the beach yet this year! I am sort of scared to go to are closest beach...dirty waters and funny things floating around. I would love to live near some crystal clear waters!

With the beach/water on my mind lately, I decided to make a card with the perfect blue waves!


Next week, Pink & Main is releasing some new dies! Today I am using the new Scalloped border dies. I used the negative side of the diecut, it looks just like waves when you turn them upside down. I cut out three layers of waves and attached them to the bottom of the A2 card. I stamped the whale image from the Whale of a Time stamp set and colored it in with a variety of greys. The image is cut out and attached between the layers of waves. The simple sentiment is stamped on the bottom layer of waves in black ink.

Be sure to stop by on July 10th to see the newest dies added to the Pink & Main collection!

Do you love to create with Pink & Main stamps? We would love to see your projects! Please join the Pink & Main Creations Facebook Group and share your projects!

Thanks for stopping by!


Supplies:
Pink & Main - Scalloped Borders

Thursday, June 9, 2016

Hello Summer with DCWV

Hello, DCWV friends! It's Jessi from the Social Media Design Team. I hope you are all enjoying the summer weather outside. The rain has stopped here in Texas, long enough to go outside for a bike ride. After having some fresh air, I was inspired to get in the craft room to create!

I love making scenery cards! So I brought out some fun stamps and cute prints from the
DCWV Honey Chic stack.


I decided to keep this scene card more on the simple side. I used the fun chevron print for the sky background. Plain white cardstock is used to create the cloud border using a adorable border die. A grass border die is used on a green print to create the grass part of the scene. The stamps are stamped onto white cardstock and colored in. The sentiment is formed using stamps from a couple different sets and stamped onto the clouds.


A very simple card to re-create! Have you made a scene card before? It can be done with a variety of stamps, images and even prints. DCWV stacks often include larger prints (such as flowers or birds) that can be cut out and used for scenes.

Thank you for stopping by today!

Jessi

Also playing along with the following challenges:
MarkerPOP - Summertime

Supplies:
Pink & Main Stamps - Banner Alpha and Spring Train stamp sets
Markers - Copic and Chameleon

Monday, May 23, 2016

Celebrate and Rejoice!

May is my birthday month! Even though the day was a few weeks ago, I am still celebrating!
 
I am Facebook friends with the talented Savannah O'Gwynn and she was super nice to leave me birthday wishes on my special day! In her message, she included a bible versus. What she didn't know, is that verse is in one of my favorite hymns. So I knew I needed to make a bible journaling page!
 
Savannah works with Paper Smooches, so I wanted to try to include some of their stamps on the page. I play along with their challenges when I get a free moment, so I went to see what the current challenge was and it is RAINBOWS! I knew there would be a way to incorporate all this into a page.

Here is what I came up with!

 
I love the clean and simple look, so I decided to use Paper Smooches Balloons Dies with papers from the colors of the rainbows. A fun sentiment is stamped towards the page. I also included the "Happy Birthday" stamp to complete the sentiment.
 
Thank you for stopping by today! Have a wonderful day!
 
Jessi
 
Playing along with the Paper Smooches, Rainbow Challenge.
 
Supplies:

Saturday, May 7, 2016

Hello, Sunshine! - Sneak Peek for Pink & Main

Happy Saturday, Pink & Main friends! The new May Pink & Main will be available on May 10th! It is another adorable release!
 
Today, I am giving you a sneak peek of one of the new word stamp sets with coordinating dies,
Hello Friend.
 
 
 I am in love with the new rounded rectangle dies from Pink & Main. I used two of them to create the white frame. I placed a beautiful print under the frame. I paired two different prints with the new "Hello" word and shadow dies. I created a simple banner with a different print and stamped the rest of the sentiment.
 
Do you have problem matching prints as much s I do? My solution is to work with prints from the same collection. In fact, my favorite thing to use are 6x6 paper pads. I used the AC Shimelle True Stories paper pad for this card.
 
Do you love to create with Pink & Main stamps? We would love to see your projects! Please join the Pink & Main Creations Facebook Group and share your projects!
 
Do you love to participate in card challenges? Please check out the details HERE!
 
 I fell in love with the current sketch challenge over at Freshly Made Sketches and had to play along! Please stop by and check it out here!
 
 
Thanks for stopping by!
 

Friday, April 29, 2016

Sneak Peak of Upcoming Pink & Main

Happy Saturday, Pink & Main friends! Happy last day of April! Can you believe that it is almost May? Meaning that there will be a new release of Pink & Main stamps!
 
Today, I am giving you a sneak peak of a new Magical Unicorns stamp set.
 
 
This card sounds CAS! I love the unicorn images from the set, I really wanted them to POP on the card. I stamped and colored in the unicorn and cut the image out.  I used a new stitched die and stamped cloud and stars onto the diecut. The diecut is attached to a fun print. The unicorn image is attached using a pop dot. A simple sentiment is stamped to finish the card.
 
Do you love to create with Pink & Main stamps? We would love to see your projects! Please join the Pink & Main Creations Facebook Group and share your projects!
 
Do you love to participate in card challenges? Please check out the details HERE! Tomorrow will start a new challenge!
 
 
Thanks for stopping by!
 

Saturday, April 23, 2016

Rain Frogs

Happy Saturday, Pink & Main friends! We definitely has seen our fair share of rain here in Texas. I believe that we received over 10 inches of rain this week. The sun finally made its appearance and the water is drying up.
 
Today, I am working with the new Rain Frogs stamp set.
 
I was inspired by the Freshly Made Sketch challenge for this week. When I saw this sketch and the partial circle, I immediately thought about a rainbow and I knew the perfect stamp set to work with.
 
 
The image from the Rain Frogs stamp set is stamped in black ink onto white cardstock. The image is colored in with a variety of markers. The image is then fussy-cut. I used some fun prints to make the background of the card. The rainbow is made from a few different cardstocks and a rainbow die. The sentiment is stamped onto a different print.
 
Do you love to create with Pink & Main stamps? We would love to see your projects! Please join the Pink & Main Creations Facebook Group and share your projects!
 
Do you love to participate in card challenges? Please check out the details HERE! This month the challenge is a color challenge:
 
 
Thanks for stopping by!
 
 
Pink & Main Supplies:

Thursday, April 7, 2016

You're My Best Bud


Hello, Pretty Cute Stamp fans! I cannot believe that it is Thursday already? Where is this week going? I know that I have been outside more enjoying the Spring weather, have you?

I am working with the adorable Spring Flowers stamp set.


I used an stitched die to create the rectangle. On the rectangle, I stamped the scene using a flower, grass, and butterfly images from the Spring Flowers stamp set. I colored in the scene using Chameleon markers. The rectangle is attached to the middle of a card base. The simple sentiment is stamped at the bottom of the card.  
 
Thank you for stopping by today!


Supplies:
Pretty Cute Stamps - Spring Flowers

Saturday, February 6, 2016

Love Always & Forever

Happy Saturday, Pink & Main friends! Valentine's Day is next weekend...can you believe that?!? Pink & Main has some super cute word dies that fit perfectly with the holiday. So I am sharing a project with you today using the word die and the coordinating stamp set.


My task for the last week or so is purging/cleaning my craft area. During this process, I came across the glitter moon in the scrap pile. I thought it would be cute to use it on a card with a couple of birds in front of it. Then I remembered the birds from the Pink & Main Sweet Pair stamp set. I The birds are colored in with a variety of markers and cut out. The scene is put together with the 'starry' printed paper. The sentiment begins with the 'LOVE' word die and the rest is from the True Love stamp set. At first, I thought this would finish the card, but I felt the card needed a little extra of something. I decided to add a few heart diecuts.
 
Did you see this month's Pink & Main Challenge? It is all about LOVE! You can check out the details or submit your entry, HERE!
 
Thank you for stopping by today! Have a wonderful weekend! I am off to do some yard work today!
 
Jessi
 
Pink & Main Supplies:
 

Thursday, November 26, 2015

Joyful Wishes

Who is ready for a HUGE Black Friday Sale?


All stamps will be 50%---YES---50% off! What a deal!
 Make sure you stop by the Joy Clair Shop to find the deals!!!


I wanted to create a simple card to highlight this fun sentiment. I love the font and wanted it to pop on the card. I used a lamp pole die with red cardstock. And added a gold bow. I used the sparkle/snowflake in the Joyful Wishes set and stamped it in white against the cream color cardstock. It is hard to see in the first photo, so I added a close-up below.
 
 
Thank you for stopping by today! Please stop by the Joy Clair blog to see the rest of the DT Joyful Wishes creations!
 
 
Jessi

Thursday, November 12, 2015

Pretty Cute Stamps November Sneaks

Who wants to see a sneak peek of the upcoming Pretty Cute Stamps November release? I promise you, this is one ADORABLE release!!! I cannot wait for you guys to see the release in its entirety!


Today I am giving you are sneak peek at the new Doggone It stamp set:


I used a variety of dies to create the scene. I stamped the dog and the bowl onto cardstock and colored in with a few different markers. I tried to color the dog with a couple different grays to make it look furry. After the images were colored, I cut them out and added them to the scene. A fun sentiment from another set from the November release, Fur Baby, was added at the bottom of the scene.
 
Want to see more sneak peeks? Stop on over to the Pretty Cute Stamps blog to see more! And don't forget to come back for the release blog hop starting tomorrow, the 13th!
 
Thank you for stopping by today!