Saturday, August 29, 2015

Enjoy the Ride!

Happy Saturday, Pink & Main friends! I am in LOVE with the new Pink & Main matching dies! So much, that I could not wait to show my latest card!
 
Today,  I am working with the Hot Air Balloon stamps and dies.

To create the hot air balloon, I used a variety of prints to piece the balloon together. The balloon die is the entire balloon, so I cut off the pieces to separate the basket. Using the balloon stamp, I taped around the strings the connect the basket to the balloon and stamped onto the background. The paper pieces are added to the card using the stamped "strings". To create the banner, use the die on a different print. I used letters from the In the Budget planner stamp set to form the words 'Mr.' and 'Mrs'. The heart is from the Hot Air Balloon stamp set. The sentiment is part of the stamp included in the Hot Air Balloon set. I only wanted to use part of the sentiment, so I taped off the part I didn't want before I inked the stamp. (Make sure to remove the tape before you stamp! Sadly, I have forgotten before!)
 
Have you heard that Pink & Main will start having challenges! The first one starts on September 1st! I hope you stop by the Pink & Main blog to find out the details! 
 
Also, Pink & Main has a new Facebook group to share your Pink & Main Creations Gallery! We would love for you to join in the fun!
 
Thank you for stopping by! Have a wonderful day!
 
 
Pink & Main Stamps Supplies Used:

Friday, August 28, 2015

DCWV Oversized Wooden Pencil

Hello, DCWV friends! Today, I am sharing a project made using one of the new oversized DCWV 11x17 stacks. If you have not heard, DCWV release a ton of new products at JoAnn stores, including a number of oversized paper stacks!
 
I wanted to create a project to celebrate Back-to-School! So I went to search Pinterest for some ideas. I searched "teachers gifts" and as I was scrolling down, I saw an oversized wooden pencil. It looked so cool, I had to give it a try. The only difference, instead of painting the wood yellow, I decided to use some patterned paper.
 
 
It is hard to tell the size in the picture above, I am took a picture of the picture on the oversized 11x17 Double-sided Brights stack.
 
 
This project was super simple to create. I grabbed a scrap piece of a 2x4 sitting in the garage and cut one end to a point like a pencil.  Once the wood was sanded smoothly, it was time to tape of the parts that were going to be painted (point and eraser). After the paint dried, I added a strip of DCWV Dark Grey Metallic cardstock near the eraser using double-sided tape. Next, add the piece of yellow paper and wrap around the wood with tape. Using black letter stickers, I labeled the pencil. To finish of the pencil, I added a twine bow near the eraser. A perfect gift for teachers!
 
Thank you for stopping by today!
 

Saturday, August 22, 2015

Geek is Chic!

Happy Saturday, Pink & Main friends! Have you heard the good news? Pink & Main is now carrying dies to match their latest stamp sets!
 
Today, I am showcasing the Owl Nerds stamp set/die and Planning School stamps.


I used a variety of the word stamps from the Planning School stamp set to create the background. The owl/globe image is colored with a variety of markers and cut out using the matching die. The simple sentiment finishes the card.
 
Thank you for stopping by! Hope you have a wonderful weekend!
 
 
Pink & Main Stamps used:

Friday, August 21, 2015

Freshly Made Sketches/AEIHeartUChallenge

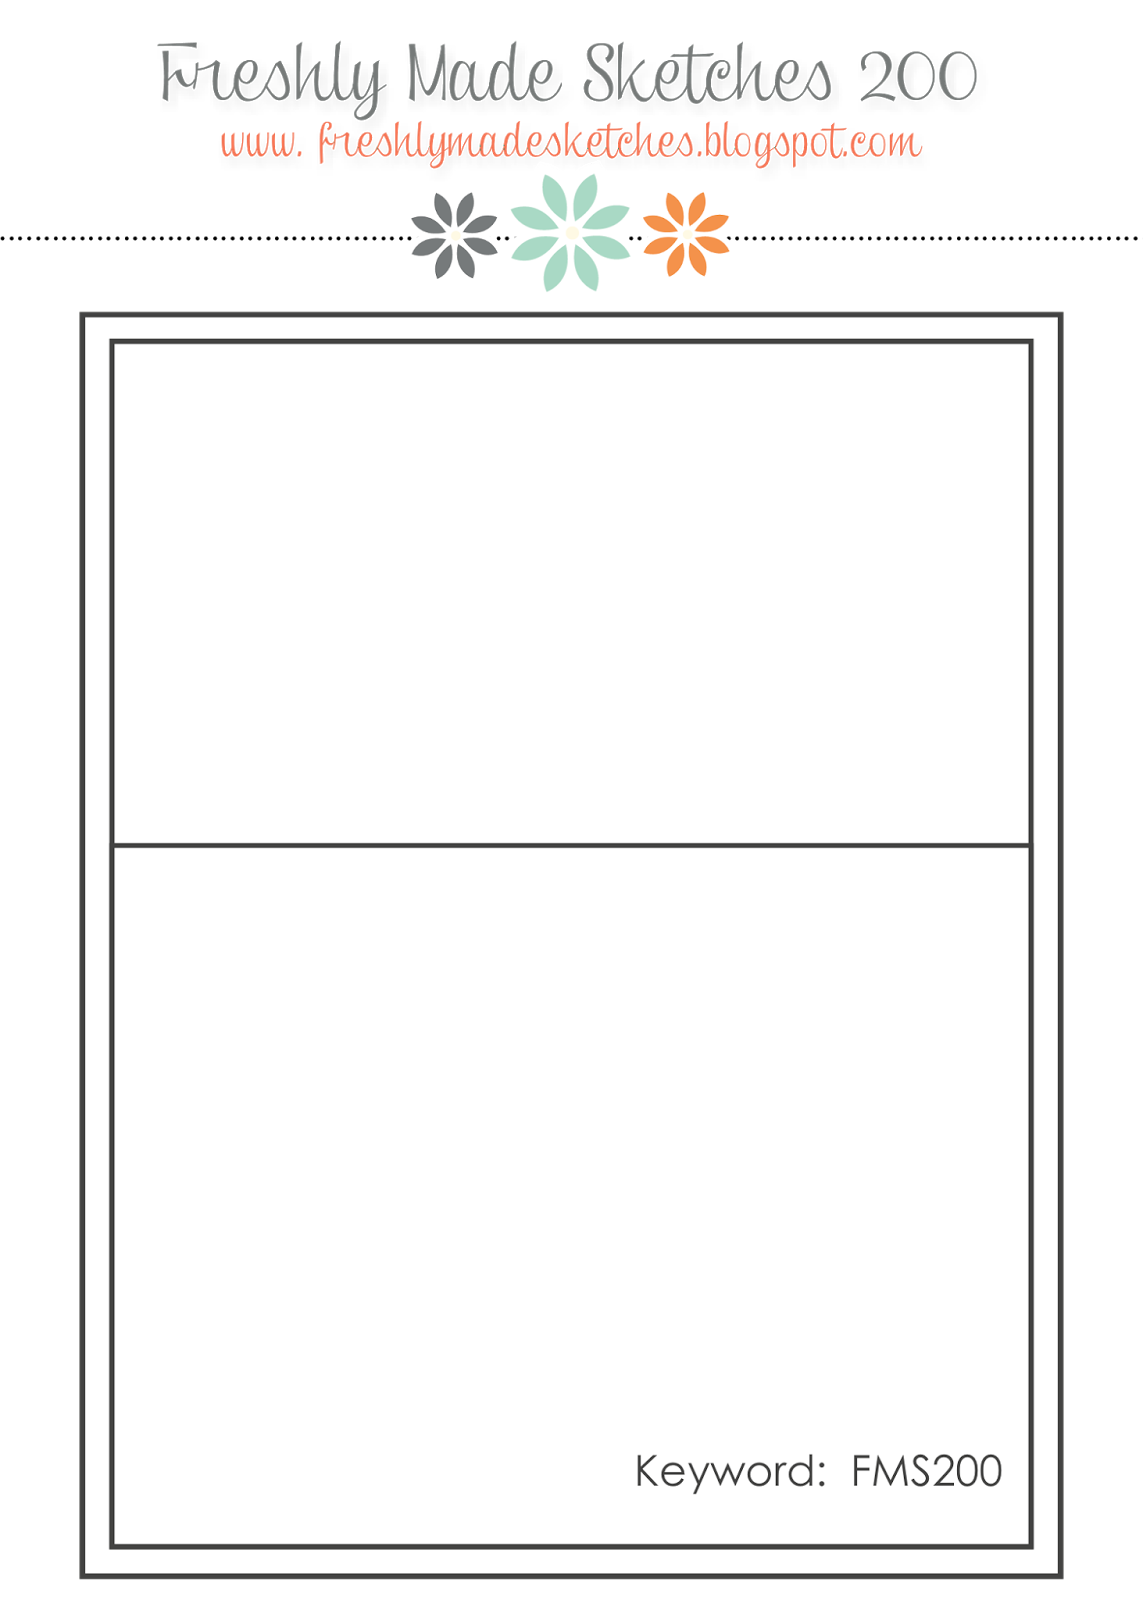
I recently found a new challenge blog, Freshly Made Sketches. Their current sketch is the 200th, so they are having a huge celebration! When I saw the sketch, I just had to play along!

The 200th Freshly Made Sketches sketch:


My take on the sketch (I flipped the sketch upside down):

 
  I have been inspired by some many talented designers using the 'ink smooshing' technique. I figure it was time for me to give it a try! To create the night sky, I used a variety of blues, grays, and purples watercolors. Once the paint dried, I embossed stars with white embossing powder. The shooting star is created with yellow embossing powder.  The sentiment is stamped in white ink on a vellum pendant. The deer is stamped and colored with distress inks.
 
I am also playing along with the AEIHeartUChallenge - Embossing.
 
Thank you for stopping by today!
 
Supplies:
Vellum
Watercolors
White and Yellow Embossing Powders
 
Challenges played:
 

Thursday, August 20, 2015

Home is wherever I am with you

Hello, Butterfly Reflections, Ink friends!  Have you stopped by the shop lately? There are new products arriving everyday!
 
Today, I am sharing a card using some of my favorite companies, Pebbles and Avery Elle!

 
I used the Pebbles Home Grown 6x6 paper pad to piece together my card. I love the color combos used throughout the collection! The stamp set is the Avery Elle's Home Sweet Home.(Currently on sale!!!) The tee-pee is paper-pieced with a variety of prints. To match the sentiment, I added a few stamped hearts.
 
Thank you for stopping by today! Hope you have a great day!
 
 
Supplies:

Monday, August 17, 2015

DCWV August Stack-a-holic Sketch

There is still time to join in this month's DCWV Stack-a-holic Challenge! Check out the layout sketch and the rules, HERE!
 
For my take on the card sketch, I am using one of the new stacks available at JoAnn Fabric and Craft Stores, Ocean Breeze! First up, here is the card sketch:
 
 
And here is my creation:
 
 
To create the banners, I cut strips of the patterned paper. The strips are folded in half over a piece of white twine. It is hard to see in the picture, but there are a few diecut vellum clouds placed behind the banners. A simple sentiment is stamped on a patterned piece at paper.
 
Want to play along with the sketch? You have until the end of the month to join in!
 
Thank you for stopping by today!
 
Jessi
 
Supplies Used:
Trendy Twine - Totally White
Avery Elle - Red & Goldie


Saturday, August 15, 2015

Pink & Main - Hot Air Balloons

Happy Saturday, Pink & Main friends! I have been having a blast working with the latest release! Be sure to stop by the store to see the new stamps. And in case you haven't heard, there are now dies to match the new stamps!
 
Today, I am showcasing the Hot Air Balloon stamp set.
 
 
It was so fun to create the hot air balloon. Two stamps are used to create the balloon and one for the basket. The balloon is attached to the a fun polka dot print with some clouds tucked behind the balloon. To finish the card, I used a fun sentiment from the Pink & Main Mister stamp set.
 
Thank you for stopping by! Hope you have a wonderful weekend!
 
 
Pink & Main Stamps used:

Friday, August 14, 2015

DCWV Project Paper Rolls - Vintage Roses

Hello, DCWV friends! Have you seen all the new products available at JoAnn Fabric Stores? If not, you should stop by your local JoAnn's or check out their website. In the new release, there are quite a few oversized paper options, including several designs of DCWV Project Paper Rolls. Today, I will be sprucing up a boring serving tray with a fun, beautiful floral print (Vintage Roses)

 This project was so easy to complete. Cut a piece of paper slightly larger than the size of the tray. Using an adhesive, I used Mod Podge, cover the bottom of the tray with a thin layer. Place paper onto and smooth out all air bubbles. Trim off excess paper, using a sharp blade. Use the tray to transfer dry items. If you wish to be able to carry drinks, add a piece of glass or plexi-glass to the tray.

 Thank you for stopping by today!

Wednesday, August 12, 2015

The Challenge (and Thrill) of Scrapbooking

I have recently came to the conclusion (or finally accepted), that I have way too many printed photos just sitting around. Over the last few years, I would sit down and create a scrapbook page or two per year. But I am proud to say, that over the last two months, I have created 5 of them. I am having a blast with this (semi) new adventure. Scrapbooking is definitely more challenging that cardmaking! (At least for me, anyway!) However, I find it more fun!

My comfort level with scrapbooking is low. I can usually crank out a card in 15 minutes or so. The process for a scrapbook page is much longer than that. In fact, it might take me up to 2-3 days to reach completion! With cardmaking, my style is more Clean and Simple. With scrapbooking, the pages start of the same. But when I think I am done, I look over the page and feel like it needs something else. Some pages are finished after that one addition, and so are finished with several. I am truly enjoying this new genre of crafting!

When I saw that Carta Bella was having a search for new design team members, I figure I would throw my name in the mix. I love their papers and embellishments. Now, I know that my chances are slim. There are so many talented and inspirational designers out there in the crafting world. So I used this call to challenge myself. Even though I classify myself as a cardmaker, I wanted to submit more layouts than cards. So after a week of crafting, I finally sent off my application! So today, I figure I would share the two layouts that I created!

Last year, my husband and I celebrated our 10th wedding anniversary with a trip to Boston/Cape Cod. I printed up some photos and they sat around for a while. I came across the Carta Bella - Ahoy There Collection and knew that I need to pair the photos with those beautiful prints! To add texture to the layout, I also included Trendy Twine Totally Natural twine.

My next layout used the Carta Bella's Baby Mine (Boy) Collection. Most of the layouts I do create, tend to focus on my daughter. So I challenged myself to do a layout with my middle son. I tried to keep this one more CAS, and still found myself adding little embellshments! (Note the wooden veneers and enamel dots!) In fact, I thought I was finished with the title "Shine Bright", but at the last minute I used Winnie & Walter's The Big, the Bold and You stamp set to stamp the rest of the title.


Thank you for stopping by today!
 
Jessi


Saturday, August 8, 2015

Sneak Peek from Pink & Main!

Hello, Pink & Main friends! It is August! Meaning there are new stamps coming to the Pink & Main Store soon! The design team has started to give you sneak peeks of the new sets. The new release will be available for purchase next week!

Today, I am using the Pink & Main Florals stamp set for my card today!


When I first saw this stamp set, the idea of creating a stamped background was the first thing that came to mind. To do so, I started off taping off the edges to form the border around the front of the card. Using a variety of stamps and inks, stamp the images around the edge of the tape. Once the border is finished, stamp the remainder of the front. Peel off the tape to reveal the white borders. To finish the card, stamp a sentiment on a banner diecut.
 
 New to Pink & Main? Check out the store, HERE, to see all their fun designs!

Thank you for stopping by! Have a wonderful day!


Supplies:

Pink & Main Stamps - Florals

Thursday, August 6, 2015

Little Tangles Challenge - Birthday

Happy Thursday, everyone!
Today starts a new Little Tangles Challenge and it is all about Birthdays!


I am using pieces from a few different Neat and Tanglesd stamp sets to create this card.


A simple sentiment is stamped in the center of watercolor paper. The sentiment is masked using a piece of tape. The floral images are stamped around the tape with a variety of distress ink colors. I give the ink a few seconds to dry. A dab some water on the tip of a paint brush and spread the color around the individually stamped image. Once the paint is dry, remove the tape. Attach panel to patterned paper and glue to the front of the A2 cardbase.

I hope you stop by the Little Tangles blog to see more of the design team projects.

Challenge Guidelines:

  • Create a NEW project based on the challenge theme. Your project must fit within the challenge theme in order to be eligible to win.
  • Submit your entry through the Inlinkz tool below. (If you have a blog, please link to the blog post with your challenge entry, not your entire blog!)
  • Link back to our challenge and display our challenge graphic in your blog post.
  • The use of Neat & Tangled stamps is not required, but it is strongly encouraged! If you don't own any Neat & Tangled stamps, check out the FREE digi stamps HERE
  • You may enter as many times as you'd like.
  • We'd love for you to be a follower of Little Tangles!
  • You have until Thursday, August 27th at 11:59 EST to enter.

Thank you for stopping by today!

Jessi
 
Neat and Tangled stamp sets used:


Saturday, August 1, 2015

Paper Sweeties 3rd Birthday Celebration and Giveaway!

Have you heard? Paper Sweeties is celebrating their third birthday! In honor of the big event, they are having a month long celebration, with lots of wonderful prizes! To find out more details, please stop by the Paper Sweeties blog to find out how you can win!
 
 3rdBirthday

Today, I am using one of the new Pink & Main stamp sets - Birthday Wishes.

 
Who wants a chance to win a fun stamp set? Michelle Currie, owner of Pink and Main, has given permission to giveaway one of her awesome stamp sets! The winner will receive the Pink and Main Stamp Set - What a Hoot!
 
Here's what you have to do:
1) Follow my blog
AND
2) Leave a comment below
 
Giveaway ends 8-15 at midnight CST. Winner will be announced the following week.
 
What a Hoot Stamp Set
 
What a Hoot

Bon Voyage! Pink & Main Style

Hello, Pink & Main friends! It is August, but I am sharing one more card using the July release! I cannot put these stamps down!!! The images are just too cute!
Today, I am using the Pink & Main Destination Fun stamp set for my card today!
 
I had a fun travel themed paper pad that I used for this card. The tropical sentiment paper fits perfectly with this adorable stamp image. The boy image is colored in with a variety of markers. The luggage is actually stamped and cut out of paper. A simple banner diecut is used for the card's sentiment.


New to Pink & Main? Check out the store, HERE, to see all their fun designs!
Thank you for stopping by! Have a wonderful day!
 
 
Supplies:
Pink & Main Stamps - Destination Fun
Destination Fun

Friday, July 31, 2015

DCWV Happy Day Stack - Hello Friend Card

Hello, crafty friends! It is Jessi from the DCWV Social Media Team. Have you been enjoying the projects the design team has been whipping up with the new DCWV products? They have been inspiring for me and hopefully you as well!  In case you have not heard, DCWV just had a HUGE release of products available at JoAnn Stores! If you do not have a store near you, check out their website!

Today I am working with the new DCWV Happy Day stack! The colors in this stack are beautiful! The possibilities are endless!  Due to limited time, I needed to create a quick project. The card below was created in less than 15 minutes! 

Instructions to create this card:
  1. Cut and score cardstock to form A2 card.
  2. Measure and cut print to fit the front of the A2 card (4.25in x 5.5in). Attach to front of the card.
  3. Measure and cut floral print layer (3.5in x 4.75in). Add adhesive .5 in from the edges and attach to the card. Using fingers or a tool, curl the paper edges up. (Check out the picture below.)
  4. Measure and cut vellum layer (3.25in x 4.5in). Placing the adhesive in the center. Attach to card and curl up the edges.
  5. Cut out printed tag and push hole in the top. Attach satin pink ribbon. Attach to the card with foam dots.
 
What to see products before they hit the stores? Check out the DCWV Instagram page to see more product reveals! Thank you for stopping by today!
 
Supplies:


Saturday, July 25, 2015

Pink & Main - I've Been Crabby

Hello, Pink & Main friends! Can you believe that July is almost over? Where does the time go? But there is still time to showcase some more cards using the new stamps from the July release!
 
I am using the Pink & Main Sunkissed Greetings stamp set for my card today!


What crab wants to be pulled from the water? I thought creating a scene to resemble that, would go perfect with the "Sorry I've been crabby" sentiment.  To keep the card simple, I used a printed paper with the sun and clouds as the background of the card. The water is created with a different print and using a border punch. The crab is colored with a variety of markers and cut out. Using a small hole punch,  a hole is added to one of the arm's to place the string through. The crab is dangled between the waves and the string is attached and taped to the back.
 
New to Pink & Main? Check out the store, HERE, to see all their fun designs!
 
Thank you for stopping by! Have a wonderful day!
 
 
Supplies:
Pink & Main - Sunkissed Greetings set
Sunkissed Greetings
American Crafts - Day Dreamer and Yes, Please
Trendy Twine - Totally  Black
Fiskars - Border Punch
Memento - Tuxedo Black

Thursday, July 23, 2015

Welcome Little Man - Cocoa Vanilla Studio

Have you heard about the paper company Cocoa Vanilla Studio? If not, you really should check them out! They have some adorable collections! Along with their papers, they also have a variety of embellishments that match their collections.
 
Today, I am working with the Cocoa Vanilla Studio collection, Flying High!

 
This is a really simple card to create. Start off with a printed paper measuring A2 size (4.25in x 5.5in). Cut off a strip from the long edge, measuring .25in  (or wider). Attach the two pieces to the front of an A2 card base. Take one of the airplane/banner stickers, stamp sentiment,  and attach with foam dots towards the bottom third of the card. To complete the sentiment, attach a sticker below the banner. To finish the card, I added a couple different embellishments (flair button and wooden veneer stars). And the voilà, the card is finished!
 
Thank you for stopping by today! 

Supplies:
Cocoa Vanilla Studio - Flying High (Little Man) Paper
Cocoa Vanilla Studio - Flying High Accessory Stickers
Cocoa Vanilla Studio - Flying High Flair Buttons
Cocoa Vanilla Studio - Flying High Wooden Veneers

Tuesday, July 21, 2015

Hello Girlie DCWV Layout

Hello, DCWV friends! It is Jessi from the Social Media Team.  In case you haven't heard...DCWV Inc. is coming out with some new product! And to wrap it up in a few words... they are amazing! Today, I am sharing a layout created with the new Hello Darlin' Stack!
 
I am not one to scrapbook. I try, but I tend to lean towards cards. However, when I received the DCWV Hello Darlin' Stack, the first project that came to mind was a scrapbook page. The colors and prints are PERFECT for 'girly' layouts!
 
I was also inspired by this month's DCWV Layout Sketch:


Here is my take on the sketch:

 
I think my favorite print in the entire stack is the black floral. I love how bold the colors are. With that in mind, I wanted it to be a highlight on the page. Resulting in choosing a light background.  The entire layout is very simple. In addition to the simple pieces of paper, I added a variety of embellishments to make the layout POP.

 
If you feel inspired, I hope you will join in this month's DCWV Challenge!
You can find the details HERE.
 
Thank you for stopping by! Stay tune for more information about the new products!


Monday, July 20, 2015

You're So Sweet

Hello, Butterfly Reflections friends! Did you know that yesterday was National Ice Cream Day? Did you have the chance to enjoy any?  Sadly, I did not have the chance to enjoy the real thing. So to make up for it, I decided to celebrate with paper! :)
Using a Crate Paper 6x6 paper pad, choose a selection of papers to form the card layers and ice cream cone.  My Favorite Things dies make it super easy to create the ice cream cone.  Attach the layers of cards onto the card base. Attach the ice cream cone, topped off with a red sequin...as a cherry.
 
To finish the card, a sentiment from the Lawn Fawn Sweet Smile set does the trick! The card seemed a little too Clean and Simple, so the addition of enamel dots, complete the card!
 
There are always new products arriving in the Butterfly Reflections, Ink store! Stop by and check out what is available!
 

Supplies:
Crate Paper - Open Book
Lawn Fawn - Sweet Smiles
My Mind's Eye - Enamel Dots
 

Saturday, July 18, 2015

Pink & Main Stamps - Mermaids

Happy Saturday! I missed last week due to a much needed vacation, but I am excited and refreshed to be back to a normal routine! Which means, today is my day on the Pink & Main Stamps blog! :)
 
Pink & Main Stamps July release is full of fun summertime images! If you have not seen the new stamps, please check them out HERE!
 
For my card today, I used the new Mermaids stamp set.
 
 
When I came across theses patterned papers, the idea for this scene came to me.  I just had to wait for the right images to use. So when I received the Mermaids set, it was time to create!
 
Instructions:
  1. Color stamped images with a variety of markers and cut the images out.
  2. Attached the sun and water strips to the card base.
  3. Cut out large wave and attached to the bottom of the card with a few foam dots
  4. The stamped images are placed behind the large wave.
  5. Stamp sentiment onto the card.


Thank you for stopping by today! I hope you have a wonderful weekend and go outside to enjoy the sun!
 
 
Supplies used:
Pink & Main Stamps - Mermaids
Echo Park Co. - A Perfect Summer


Wednesday, July 15, 2015

Much needed Vacay!

Hello, everyone! I know that I have been missing from blogland for a few days! My family and I had a wonderful vacation with a road trip to Utah!  It was refreshing and now I am ready to get back to the crafting table!

I will be back later this week with more creations!