Showing posts with label avery elle. Show all posts

Thursday, July 13, 2017

Happy Birthday Bus

Hello, MarkerPOP friends!!! July is a busy birthday month in my family. Do you have a certain month of the year that has more birthdays than others? Another month for us is May.

Today, I am working with the Avery Elle's Birthday Bus stamp set and Chameleon markers:


To start this card, I stamped the van image onto white cardstock. The line for the road is drawn in with a black tip pen. I decided to add the presents to the top of the car and balloons above the card. I also used the black tip pen to draw in the balloon strings. To finish the scene, I added a couple exhaust puffs to the van. The sentiment is stamped at the bottom of the card in the center.


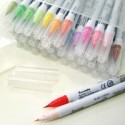
I used lots of Chameleon markers to color in the scene, I started with the balloons and worked my way down the card, saving the van for last. To finish the card, I added a some white gel marks to each of the balloon.


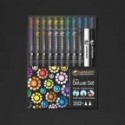
The following Chameleon markers were used on today's card:
NU1, NU2, NU4, BR2, BR4, BR5, YO2, YO3, YL2, BG4, BL2, BL3, BL4, PR4, YG3, GR3, RD2, RD4, BK4, CB, OR4, PK3

Please stop by the MarkerPOP blog to see the entire supply list.

Thank you for stopping by today! Have a great one!

Jessi

Tuesday, March 7, 2017

Happy Mother's Day - Avery Elle

Hello, MarkerPOP friends! It seems a little early to be making a Mother's Day card, but did you know that the UK equivalent is later this month on March 26th?

Today's card using the new Avery Elle's Mother's Day stamp set, paired up with some Touch Markers:


I used the word stamp to create the background for the card. The stamp is stamped in black ink at an angle, repeatedly. The floral image is stamped and colored in. The matching die, for the Mother's Day stamp set, is used to cut out the floral image. The floral image is then attached with foam tape. To add a little more detail to the card, I glued on a few clear droplets.


This is my first project using the Touch markers. The colors are so vibrate. I cannot wait to get my hands onto more colors very soon! Check out the colors available in the MarkerPOP store, HERE.


Interested in learning more about the supplies used on today's project? Please stop by the MarkerPOP blog for the details!

Also, Did you hear about the awesome COPICS giveaway? Check out THIS post for the information on how you can enter for the chance to win some amazing prizes!


Thank you for stopping by today!

Jessi

Monday, December 12, 2016

You Are the Swan for Me

Hello, MarkerPOP friends! Did you see Avery Elle's newest release? It is simply adorable! You can see it in the Avery Elle section in the MarkerPOP store.

Today, I am working with the new Swans stamp set:


The swan image is stamped onto white cardstock and colored in with Chameleon Markers. The image is cut out and set aside. I used a rectangle die to start the panel on the card. I created the waves using a border die and added the layers to the panel. The swan image is added in between the waves.


To add some additional detail to the card, I stamped the tiny hearts into the white space of the card. I used NUVO Drops to color in the hearts. To finish the card, a sentiment is stamped towards the bottom of the card.


Please stop by the MarkerPOP blog to see the list of supplies used on today's project.

Thank you for stopping by!

Wednesday, November 16, 2016

Merry Christmas Packages

Hello, MarkerPOP friends! It is Jessi here. Are you ready for the holiday season? Can you believe that it is right around the corner?

Today, I am sharing a CAS Christmas card that would be simple to recreate in mass numbers and send out to your closest family and friends:


To make the card unique, I used a scalloped edge die to create the card base. The image from the Avery Elle's Christmas Packages stamp set is stamped and colored in with a variety of markers. The image is then cut out using a tag die. The tag is attached to the card and the sentiment is stamped around the tag.


Check by the MarkerPOP blog to see what markers were used on this project!


Thank you for stopping by! Have a wonderful day!

Jessi

Wednesday, October 19, 2016

Merry Christmas Tag

Hello, MarkerPop friends! It is Jessi here today. I am excited to share with you my latest project. I paired up a couple different stamp sets with a super adorable paper pad for today's project.

I decided to take a step away from cards and create a tag. I used the C.C. Designs Layering Tag dies and My Mind's Eye's Sugar Plum to form the tags.


I used one of the deer images from the Avery Elle's North Pole Pals stamp set and colored it in with Chameleon markers. The image is then cut out and attached to the front of the tag. A simple sentiment is formed from the Lawn Fawn's Frosty Fairy Friends stamp set and attached at the bottom of the tag. To finish the tag, a hole is punched at the top and twine is insert. The tag is now ready to be added to the perfect gift!
 

You can hop on over to the MarkerPop blog to learn more about the markers and supplies used on today's project.


Thank you for stopping by today! Have a wonderful day!

Wednesday, September 14, 2016

Avery Elle - Thank You

Hello, everyone! It is Jessi here today! As I have said before, Avery Elle is one of my favorite stamp companies! Their images are super fun and so easy to work with! So I decided to bring out one of their older sets and give it a new life!


I don't know about you, but when I think of flowers I usually think about bright and cheery colors. I decided that since fall is around the corner, I was going to use fall colors on the flowers in the Avery Elle's Floral Frame stamp set.


The first step I took was to stamp and emboss the image in black. The image is then colored in with a variety of Zig Clean Color Markers. I used some of the regular reds, oranges, and yellows ZIG markers. To turn the colors more into the fall scheme, I added touches of browns. The sentiment is stamped onto a stitched pendant die cut.


Stop by my MarkerPop post for the list of supplies used on this card!

Thank you for stopping by today!
Have a great day!

Wednesday, August 24, 2016

Let's Party WILD

Hello, everyone! It is Jessi here today. I love making CAS (Clean and Simple) cards. They are super easy cards to create. Another thing I love... stamps that have coordinating dies! They also make card-making easy!

Today, I am pairing up my favorite style with some of my favorite supplies! Avery Elle's Wild Birthday stamps and coordinating dies and a variety of Chameleon markers.


I started this card with a blank white 3.75in x 5in cardstock panel. The banner stamp is done at an angle to make it look like it was hanging off trees. The letters from the stamp set were stamped onto the pendants to spell PARTY. The banner image is colored in using a variety of blues and greens.


The animals are stamped onto white cardstock and cut out using the coordinating dies. The animals are colored in with markers. Before the animals are attached to the panel, I used the Pink & Main's Scalloped Waves dies to create the green grass background and attached it at the bottom of the panel. The animals are attached using tape adhesive and a foam dot. The panel is attached to a Lawn Fawn Scalloped Rectangles diecut and is mounted onto the card front.


Stop by my MarkerPop post for the list of supplies used on this card!

Thank you for stopping by today!
Have a great day!


Wednesday, August 3, 2016

My first MarkerPop DT post!

Happy Wednesday, everyone! My name is Jessica Pascarella and I am super excited to be joining the MarkerPop design team! So since this is my first MarkerPop post, let me introduce myself!

I am a SAHM of 3 wonderful kids. My main love is card-making. But have started to expand into scrapbooking and altered items. My love for papercrafts started over 13 years ago when I made my wedding invitations. My style is mainly Clean and Simple (CAS), but I love to challenge myself to try new styles as well as new techniques. My latest obsession is using watercolors. 

As I mentioned above, I love watercolors! And I have to admit it was 'love at first sight' when I was introduced to ZIG Clean Color Real Brush markers!

So for today's creation, I paired up the ZIG Clean Color markers with one of the newest Avery Elle stamp set, Wild Birthday.


To start the card, I stamped the balloon image several times onto some watercolor cardstock using Memento Tuxedo Black ink. Once the ink dried, I used a variety of ZIG markers to color in the balloons. I used the Wild Birthday coordinating dies to cut out the balloons and set them aside. I repeated the process for the hippo image.


To create the sky background, I used the popular ink-smooching technique. If you are not familiar with this technique, let me explain quickly. On a piece of acetate, add a few colors of paint (in this case, I used a variety of blue ZIG markers) and mix with a small amount of water. Flip the acetate over and place on top of the cardstock you are working with. Move the acetate around to spread the color until you are satisfy with the overcome.

Time to piece the card together! A small hole is punched in the hippo and strands of twine are wrapped around the image. The end of the strands are arranged at the top of the card to line up the balloons. The balloons are attached with adhesive. The hippo is attached to the card with a foam dot. A simple sentiment is stamped on the bottom of the card.


Stop by my MarkerPop post for the list of supplies used on this card!

Thank you for stopping by today and seeing my first MarkerPop creation!
Have a great day!


Supplies:

Wednesday, February 24, 2016

Creating Together with Marcie Sharp

Hello, friends! I am excited for today's post. Towards the end of last year, the talented Marcie Sharp had an idea about creating a series of working with a variety of card-makers. She sent out a request for people who were interested and I jumped at the opportunity to work with her! Please check out her blog, Sharp Designs, to see some previous installments of the Create Together series.


The fun thing about this series is that she puts a different challenge for each designer. What a unique way to inspire others. My challenge was to CASE a card she had previously created. So off to her Pinterest page to see a large group of her creations. After sending a few days narrowing down the possibilites, I chose to CASE this card created by Marcie. You can see it HERE on her blog.


If you have been following Marcie, she has been on a journey to work on different ways to work on her coloring skills. So I decided to take the coloring challenge as well for this installment of Create Together. I recently won a set of ZIG markers. I have been trying to get use to this form of watercoloring. So I decided to pull out a few different colors and get to work.


What drew me to Marcie's card was the the CAS style, but mostly the adorable elephant image. I recently purchased an elephant image from Butterfly Reflections, Ink and wanted to use the image for my card. So I stamped it onto watercolor paper and begin the painting process.


Let me tell you...I am in love with these ZIG markers and cannot wait to work with them more! Here is my final card CASEing her card.


I really love the layout of her card and stuck pretty close to it. My image is a little larger, so all the elements are crammed closer together. I also decided to added some double-stitching dies along the edges of the panel.

Know onto Marcie's blog to see what card of mine she decided to CASE. I am looking forward to seeing what she created!

Thank you for stopping by today. And thank you Marcie for letting me participate in the Create Together series with you! You always make some inspiring cards! Cannot wait to see what you have in store!

Friday, August 21, 2015

Freshly Made Sketches/AEIHeartUChallenge

I recently found a new challenge blog, Freshly Made Sketches. Their current sketch is the 200th, so they are having a huge celebration! When I saw the sketch, I just had to play along!

The 200th Freshly Made Sketches sketch:


My take on the sketch (I flipped the sketch upside down):

 
  I have been inspired by some many talented designers using the 'ink smooshing' technique. I figure it was time for me to give it a try! To create the night sky, I used a variety of blues, grays, and purples watercolors. Once the paint dried, I embossed stars with white embossing powder. The shooting star is created with yellow embossing powder.  The sentiment is stamped in white ink on a vellum pendant. The deer is stamped and colored with distress inks.
 
I am also playing along with the AEIHeartUChallenge - Embossing.
 
Thank you for stopping by today!
 
Supplies:
Vellum
Watercolors
White and Yellow Embossing Powders
 
Challenges played:
 

Thursday, August 20, 2015

Home is wherever I am with you

Hello, Butterfly Reflections, Ink friends!  Have you stopped by the shop lately? There are new products arriving everyday!
 
Today, I am sharing a card using some of my favorite companies, Pebbles and Avery Elle!

 
I used the Pebbles Home Grown 6x6 paper pad to piece together my card. I love the color combos used throughout the collection! The stamp set is the Avery Elle's Home Sweet Home.(Currently on sale!!!) The tee-pee is paper-pieced with a variety of prints. To match the sentiment, I added a few stamped hearts.
 
Thank you for stopping by today! Hope you have a great day!
 
 
Supplies:

Monday, August 17, 2015

DCWV August Stack-a-holic Sketch

There is still time to join in this month's DCWV Stack-a-holic Challenge! Check out the layout sketch and the rules, HERE!
 
For my take on the card sketch, I am using one of the new stacks available at JoAnn Fabric and Craft Stores, Ocean Breeze! First up, here is the card sketch:
 
 
And here is my creation:
 
 
To create the banners, I cut strips of the patterned paper. The strips are folded in half over a piece of white twine. It is hard to see in the picture, but there are a few diecut vellum clouds placed behind the banners. A simple sentiment is stamped on a patterned piece at paper.
 
Want to play along with the sketch? You have until the end of the month to join in!
 
Thank you for stopping by today!
 
Jessi
 
Supplies Used:
Trendy Twine - Totally White
Avery Elle - Red & Goldie


Friday, March 20, 2015

Hello, Friend!

Hello, Butterfly Reflections friends! I am excited to be in the Butterfly Reflection, Ink blog today!

One of the colors I gave myself for 2015 was to improve my coloring skills. It is a work in progress and I am having a blast with it!

Have you noticed that there are several cute elephant stamps out there!  I bought the Avery Elle Ellie stamp set from the Butterfly Reflections.

 
This elephant is simply adorable! Because I am learning (and make lots of mistakes) I stamp the scene on a blank cardstock. Then I stamp the images I will be coloring onto a separate sheet. That way if I make a mistake it is not on the actual card. After I few attempts, I was finally happy with the coloring. I cut out the elephant and attached to the card. I did the same step with the balloons. The grass and flowers are stamped and colored. A simple sentiment is used to finish the card.
 
**This Avery Elle set is currently out of stock, but check out the Avery Elle section in the Butterfly Reflection, Ink store to see more amazing images!
 
Thank you for stopping by today! Check out Butterfly Reflections for the latest product! Their selection is full of amazing possibilities!


Supplies:
Avery Elle - Ellie
Markers

Saturday, January 17, 2015

It's Your Time to Soar

Hello, Butterfly Reflections friends! It is Jessi from Kissin' Krafts and I am glad to be back to share with you a fun and fresh card. Reflection
 
Who else is ready to put winter behind them? I am ready to start crafting with fun and fresh prints!
 
Today's card, I am using a few supplies I bought from the Butterfly Reflections store lately!
 
 
I knew I wanted to use this fun sentiment from Avery Elle's Look Up stamp set.  My first thought was to use cloud print paper and maybe add a kite. As I was searching for the right paper, I came across the paper airplane print from AC Day Dreamer 6x6 paper pad.  The rest of the prints came from the same paper pad. (Who doesn't love paper pads? They make it so easy to coordinate papers!!!)
 
Once I attached the papers, I added a small white wooden clothespin to the card. However, it needed something else. I started messing with adding string to the project, but simply could not decide how to make it work. So after several attempts, I decided rely on my go-to add-on, enamel dots.
 
Thank you for stopping by today! Check out Butterfly Reflections for the latest product! Their selection is full of amazing possibilities!
 

Supplies:
American Crafts - Day Dreamer paper pad
Avery Elle  - Look Up stamp set
My Mind's Eye - Market Street Enamel Dots
 

Friday, November 14, 2014

Isn't Watercoloring FUN!!!???

So a few weeks ago, I submitted a handful or so of cards to a World Cardmaking Day Contest. Sadly, I didn't win! (However, one of my cards was chosen as an Honorable Mention!) But the good news... I can start showing some of the cards!

The card below was one of my favorite that I sent in!


Who doesn't love messing around with watercolors?! I love how it is perfectly OK to make a mistake and make it look like it was on purpose! The first step was to stamp and emboss the image (Delicate Blooms by Hero Arts) in white. Once the image was dry, it was time to watercolor!

I added a simple sentiment (from the Red & Goldie stamp set by Avery Elle) stamped in black. The last step was to create the card mat and attach to the card base!

Thank you for stopping by today! Check back soon for my of my WCMD creations! Including my 'Honorable Mention'!