Wednesday, August 31, 2016

Sweet Halloween


Hello, everyone! It is Jessi here today. Did you hear the MarkerPop will be carrying Pink & Main products? There is a HUGE selection on its way to the store, some even available now! Stop by the store to see the variety of Pink & Main stamps and dies!

With today being the 31st, I thought it would be fun to create a Halloween card! Can you believe it is only 2 months away? EEEKK! I am working with the Pink & Main Sweet Halloween stamp set and coordinating dies.


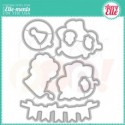
I stamped a variety of the candies and a couple of the vampire cupcake images from the Sweet Halloween stamp set. The images are colored in with a variety of markers and cut out using the Coordinating Sweet Halloween die set. I really wanted the images to pop off the card, so I attached them onto a simple white panel. The panel is attached to a black card base.


The sentiment for the card is stamped in black onto a stitched rectangle. The rectangle is created with the Pink & Main's Stitched Rectangle die set.


Stop by my MarkerPop post for the list of supplies used on this card!

Thank you for stopping by today!
Have a great day!

Jessi

Saturday, August 27, 2016

Pink & Main Wild About You

Happy Saturday, Pink & Main friends! Sorry this post is arriving late this afternoon. I have been under the weather since Wednesday. Hoping things are starting to look up for the better!

Today, I am working with the super adorable Wild About You stamp set and coordinating dies.


I absolutely love this set! The animals a so cute. When I first saw this fox, I immediately thought of a night scene. So I started off making a watercolor night sky. I wasn't too happy with how it came out, so I decided to cut a circle out of a portion of the panel. I then ran the circle with a star die. The fox image is stamped in black and colored in with a variety of markers. The fox image is cut out using the coordinating dies. I paired up the die cuts with some boho printed papers. The sentiment is stamped on a diecut banner.

Do you love to create with Pink & Main stamps? We would love to see your projects! Please join the Pink & Main Creations Facebook Group and share your projects!

Thanks for stopping by!


Supplies:
Pink & Main - Wild About You and coordinating dies
DCWV - Boho Style
Chameleon Markers

Thursday, August 25, 2016

DCWV Mini Envelopes Project Stack

Hello, DCWV friends! It's Jessi from the Social Media Design Team. It is Back to School season! Some moms are crying, while some are jumping for joy! I was one that was jumping for joy. However, a few days of the quietness has started to get to me. So today's project will help spend the love, even when you are not around.

I am showcasing the new DCWV DIY Project Stack - Mini Notes & Envelopes.


This DIY stack is perfect for the little notes you want to hand out. For example, the size is perfect to tuck inside their lunch kit for school. A wonderful surprise to help them get through the day. I even recently tucked on into my husband's computer on a very important day for him.

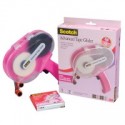
The envelopes are already scored! How easy is that! All you have to do is punch the template out and fold. The first step is to adhere the flaps together. I used a tape adhesive gun and placed a strip of tape along the edges of the bottom flap. Then you fold!


The next step is to write your special note. In the DIY Stack, there are a few sheets of papers that are scored and ready to cut. Simply, write your note and trim.


Simply fold the note to fit into the envelope and seal. There are some pretty glittered heart stickers included in the stack.


Time to tuck those notes into their hiding spots!

Don't you love the new DCWV DIY Project Stacks? Check out the variety available at your local Michaels stores!

Thank you for stopping by today!

Jessi

Wednesday, August 24, 2016

Let's Party WILD

Hello, everyone! It is Jessi here today. I love making CAS (Clean and Simple) cards. They are super easy cards to create. Another thing I love... stamps that have coordinating dies! They also make card-making easy!

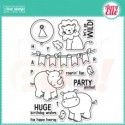
Today, I am pairing up my favorite style with some of my favorite supplies! Avery Elle's Wild Birthday stamps and coordinating dies and a variety of Chameleon markers.


I started this card with a blank white 3.75in x 5in cardstock panel. The banner stamp is done at an angle to make it look like it was hanging off trees. The letters from the stamp set were stamped onto the pendants to spell PARTY. The banner image is colored in using a variety of blues and greens.


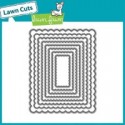
The animals are stamped onto white cardstock and cut out using the coordinating dies. The animals are colored in with markers. Before the animals are attached to the panel, I used the Pink & Main's Scalloped Waves dies to create the green grass background and attached it at the bottom of the panel. The animals are attached using tape adhesive and a foam dot. The panel is attached to a Lawn Fawn Scalloped Rectangles diecut and is mounted onto the card front.


Stop by my MarkerPop post for the list of supplies used on this card!

Thank you for stopping by today!
Have a great day!


Saturday, August 20, 2016

Beware if ZOMBIES!!!

Happy Saturday, Pink & Main friends! Who is ready for Halloween? The decorations are starting to show up in the stores and Pink & Main's new Halloween sets are now available!

Today, I am working with the Zombies stamp set and the coordinating dies.


I paired up the Zombie's boy zombie with some fun Halloween printed papers. The zombie image is stamped with black ink and colored in with a variety of Peerless Watercolors. The image is cut out using the dies and attached to the card. The fun phrase is stamped onto to printed paper. I thought the card needed a little something extra, so I stamped 3 skulls and used the coordinating dies on them. They were added randomly onto the card.

Do you love to create with Pink & Main stamps? We would love to see your projects! Please join the Pink & Main Creations Facebook Group and share your projects!

Thanks for stopping by!


Supplies:
Pink & Main - Zombies Stamps and coordinating dies
DCWV - Spooky Delight 
Peerless Watercolors

Friday, August 19, 2016

Joy Clair Hoop Art & Bible Journaling

Hello, friends! It is Jessi from the Joy Clair design team. I have been enjoying making a variety of projects lately! I actually had to challenge myself yesterday to sit down and make a card! I actually finished my projects for today's post last week. It has been super hard to keep one of these projects under wraps! I stepped out of my comfort zone and so glad that I did!

My first project for today highlights the new Bee Kind stamp set. This stamp set is part of the Color by Faith stamp series.


My second project for the day is a Bible page using the new My Cup Runneth Over stamp set.


Interested in learning how I made these projects? You can find out the details on the Joy Clair blog!

What to learn more about Joy Clair stamps or see a number of inspirational projects using the stamps, please join the Joy Clair Facebook Group and our Color by Faith Facebook Group.
Thank you for stopping by!

Jessi
Supplies:
Joy Clair Stamps - Bee Kind and My Cup Runneth Over stamp sets

Wednesday, August 17, 2016

Celebrate with Concord & 9th

I saw that Concord & 9th was going to start a new challenge blog, Where Creativity Meets C9,  starting next month. They are looking for a couple people to complete their design team. I love their stamps, so I decided to throw my name in the hat. It would be a great opportunity!

Here is the card I created for this design team search, using their 


To create the background of this card, there is a stamp with 5 candles on it. I actually cut the stamp into five individual stamps. **Tip**I use to hesitate cutting apart clear stamps! But sometimes I only want to use part of a larger image. It is much easier to cut the stamp than covering part of the stamp with tape. It is easy to line the image back up and stamp whenever needed.

To start the card, I stamped the cake image in the center of the card. Candle images are stamped randomly around the card. To fill in part of the empty space, I stamped the star image. Time to color in! I used a variety of watercolors to color in the images. I used a light blue to fill in the background. Once the paint dried, I stamped the star clusters to all the empty spaces. The sentiment is stamped onto a die cut banner and attached to the card.

Interested in joining the design team search? You can find the details on THIS POST!

Good luck to all those who apply!

Have a great day!
Jessi 
MarkerPop & The Greeting Farm's Bible Page

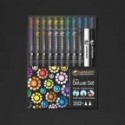
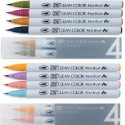
Hello, everyone! It is Jessi here today. I am mainly a cardmaker, but recently, I started my journey with Bible Journaling. You can use a variety of mediums on the Bible pages. Today I will be using some Zig Clean Color Markers and some Chameleon markers, as well.

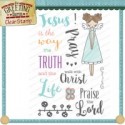
Along with the markers, I am working with the super cute stamp set, Jesus is the Way, from The Greeting Farm.


To start this page, I stamped the angel image onto white cardstock. Chameleon makers were use to color in the hair and skin parts of the image. The image is cut out and set aside. I took a piece of scrapbook paper and cut a strip to fit in the margin of the Bible. The angel image is attached towards the bottom of the strip and phrase ' Praise the Lord' is stamped towards the top of the strip. Once this is done, set the strip aside and move onto the page itself.


The Greeting Farm's Jesus is the Way stamp set includes a lot of word stamps.  I decided to use a variety of them to stamp onto the page. I am highlighting the words on a certain verse. In between some of the words and the empty spaces, I stamped the butterfly image or the trio of hearts stamp. The butterflies are colored in with a variety of yellow and orange ZIG Clean Color Markers.


To finish the page, I used a piece of washi tape to attach the strip of paper with the angel image. The tape is placed at the top of the strip (Half on the paper strip and half on the Bible page.) This allows you to flip up the strip to see the stamped verse underneath.

Stop by my MarkerPop post for the list of supplies used on this card!

Thank you for stopping by today!
Have a great day!


Tuesday, August 16, 2016

MFT Camp Bonfire Entry

Print


Last week, My Favorite Things had a fun Camp Create Session. My goal was to participate in all the sessions, however...life got in the way. I did manage to crank out one card for the Camp Create Farewell Bonfire.

Print

This session is called Single Layer Savvy. The challenge is to create a card using one layer. So here is what I came up with using the fun Birds of Paradise stamp set.


I used a variety of stamps from the Birds of Paradise stamp set to create this scene. To prevent the images from overlapping one another, I used the masking technique. For this technique, I stamped the image on a different sheet and cut the image out. Before I stamp the next image on the scene, I would use the mask to keep the stamps from overlapping. I used bright ZIG Clean Color markers to color in the images.

Thank you for stopping by!

Jessi

Saturday, August 13, 2016

Pink & Main's Magical Unicorns & Coordinating Dies

Happy Saturday, Pink & Main friends! Who is loving the newest Pink & Main release?
I know that I am!

Today, I am working with the Magical Unicorns stamp set. This stamp set was released a few months back, but the coordinating dies were released this week.


The idea for this card started with the background print. The print includes a few small moons, so I decided to make a larger one for the center of the card. I stamped the unicorn image and colored it in with a variety of markers. The horn on the unicorn is colored in with a glitter pen. The image is cut out using the coordinating die. The card needed a little more, so I used the star die from the set and added a few around the card. The sentiment is stamped onto the card.

Do you love to create with Pink & Main stamps? We would love to see your projects! Please join the Pink &  Main Creations Facebook Group and share your projects!

Thanks for stopping by!


Supplies:
Lawn Fawn - Hello Sunshine
Markers - Spectrum Noir

Thursday, August 11, 2016

Hello Sweet Forest Friends

Hello, everyone! It is Jessi here today. I love stamps. In fact, I probably need to join a support group. I have probably three or four stamp companies that are my favorites. Today I will be showcasing products from one of them... My Favorite Things. Believe it or not, it has only been in the last year that I started to hear much about them. And I have been falling in loving with every release since!

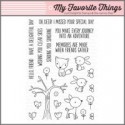
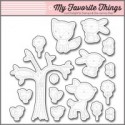
On my card today, I am using the super adorable, Sweet Forest Friends stamp set and the Sweet Forest Friends coordinating dies. The combination of the stamps and dies make it super easy and super fast to put together amazing cards!


One of my favorite type of cards to create are scene cards! So for this card I used stitched dies to highlight the scene, pendant for the background and rectangle for the scene itself. The next step is to stamp and color in the images to create the scene. I used a variety of Chameleon markers on the images. For additional effect, I used a White Gelly Roll pen to add white dots to the deer's back. Once the images were ready, I used the coordinating dies to cut them out.


Time to piece the card together! First up, I choice a fun fall color print for the background the card. the next layer is the stitched pendant. Next is the blue stitched rectangle that represents the sky. I used the same stitched rectangle and the Lawn Fawn Grassy die to create the basis of the scene. The stamped elements are added to the scene. The last part is to stamp the sentiment. I thought 'Hello, Friend' was perfect because the deer is looking up at the bird.


Stop by my MarkerPop post for the list of supplies used on this card!

Thank you for stopping by today!
Have a great day!


Wednesday, August 10, 2016

Joy Clair's New Sets - Butterfly Kisses & Everyday Sentiments

Hello, friends! It is Jessi from the Joy Clair design team. Did you see the newest Joy Clair release from last week? So many wonderful sets! I could not wait to get to stamping with them. From cards to bible pages to a new type of project (you will have to wait for my next post in a few weeks), the possibilities are endless!

I have two projects to share with you today! First up is one of my latest Bible Journaling pages using the new Butterfly Kisses stamp set.


My second project for the day is a card using the new Everyday Sentiments stamp set.


Interested in learning how I made these projects? You can find out the details on the Joy Clair blog!

What to learn more about Joy Clair stamps or see a number of inspirational projects using the stamps, please join the Joy Clair Facebook Group and our Color by Faith Facebook Group.
Thank you for stopping by!

Jessi
Supplies:
Joy Clair Stamps - Butterfly Kisses, Everyday Sentiments, and Raise Your  Glass

Saturday, August 6, 2016

Sunshine & Smiles

Happy Saturday, Pink & Main friends! Fall is around the corner! At least that is what I keep telling myself! Anything to deal with this HEAT!!! Sigh...

Pink & Main's August release will be available on the 10th! The design team has been sharing some sneak peeks. Today, I am working with the Sunflowers stamp set. This stamp set will also have coordinating dies available.


I really wanted to highlight the awesome sunflower in the Sunflower stamp set. I used a variety of fall colors to color in the images for this card. I used the coordinating dies to cut out the images. I used the Rounded Rectangles Dies to create a frame to highlight the sunflower.


The adorable bear is attached with foam dots on the corner of the frame. The simple sentiment is stamped towards the bottom of the card. Such a easy and fun card to create!

Do you love to create with Pink & Main stamps? We would love to see your projects! Please join the Pink & Main Creations Facebook Group and share your projects!

Thanks for stopping by!


Supplies:
Pink & Main - Sunflowers stamp set and coordinating dies
We R Memory Keepers - Wildflowers 6x6 paper pad
Markers - Chameleon