Friday, December 30, 2016

DCWV Farewell

Hello, DCWV friends! It is Jessi here from the Social Media Design Team. I am here today with a sad announcement. Today's post will be may last as a design team member. It has been an amazing two years, but the time has come to make a change. I want to send a HUGE thank you to Megan and DCWV. You have made this such an awesome team to be a part of and a company to work to with.

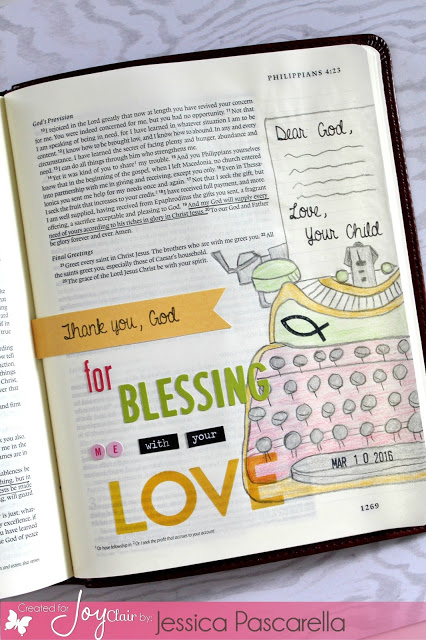
I always believe there is a reason for everything! I am thankful for all the interactions I have made with people I normally would not have crossed paths with. There are truly miracles all over the place! With that being said, I decided to make a Bible page using DCWV Rub On Transfers.


This page was the fastest page I have every created before. It is also the first time I successfully worked with rub-ons. In the past, the rub-ons would not transfer completely. DCWV transfer with such ease and no effort! Stick them on the paper, firmly press and peal.

Thank you for stopping by today and thank you for allowing me to chance to be part of DCWV!

Jessi

Friday, December 23, 2016

ADORNit Planner Prep Pt. 3

It is almost time to start using my new planner for 2017. I have been working on the final details and am looking forward to sharing them with you. You can check it out my previous planner posts HERE and HERE! I received the ADORNit Watercolor pencils and decided to used them for the rest of the monthly dividers.

May - August:

September - December:


There is a huge difference between colored pencils and watercolor pencils. It is hard for me to decide which ones I like better! Which one do you like better?

Thank you for stopping by! Hope you have a great day!

Jessi
ADORNit Planner - Calendar Girls Planner
ADORNit Watercolor Pencils

Thursday, December 22, 2016

Succulent Thank You

Hello, MarkerPOP friends! As we are getting closer to the holiday, my need for Thank You cards are growing. I try to get some done before the holidays, just so I do not have to make as many after.

Today I am using some cute Hero Arts stamps to create this card:


I started a few of the succulents images onto some watercolor cardstock. The images were stamped in a light color, so the outlines could be covered once they are colored in using Zig Clean Color Markers. The images are cut out and set aside. The bowl image is stamped and embossed in gold.


The pieces are arranged and attached to a fun print. The panel is added to a few different layers of prints. The sentiment is stamped and embossed in gold onto a piece of black cardstock.


Please stop by the MarkerPOP blog for a list of supplies used on today's card.

Thank you for stopping by today!


Tuesday, December 20, 2016

Guest Designer - Die Cuttin' Divas

Happy Tuesday, everyone! I am excited to be a guest designer on the latest Die Cuttin' Divas Challenge! If you have not heard of them before, stop by HERE to check them out!

Today's challenge theme is Reindeer and/or Santa:


I used a variety of dies to create the scene on the card. The scene is created by using a Pink & Main Stitched square die. The reindeer is created using the Taylored Expressions Fawn die. To complete the Rudolph, I added a red enamel dot for the nose. The snowy hill is formed using the My Favorite Things Snow Drift die. The tree dies are from C.C. Designs. The scene is attached to a fun print. The sentiment is stamped onto a red printed stripe.

I hope you are inspired to stop by and join in this Die Cuttin' Divas Challenge!

Thank you for stopping by!

Jessi
Monday, December 19, 2016

Best of 2016 - Joy Clair

Hello, Joy Clair friends! I am super excited to be writing this post! For the next several days, the Joy Clair design team members will be sharing their favorite projects from 2016.

What year 2016 has been for my journey with Joy Clair! The year started off with a trip to CHA to help Christy and Amanda spread the word about Joy Clair. It was my first time attending the show and I was overwhelmed with the tremendous talent of so many designers. I definitely came home inspired!

I want to my Top 3 Color by Faith projects, followed by my Top 3 Joy Clair projects. Below each project, I will provide the link to the original post.


Top 3 Joy Clair projects:


Seas the Day

Thank you for stopping by today! Please make sure to check back to see the rest of the design team's favorites!

Have a great day!

Jessi

Saturday, December 17, 2016

Many Thanks

Hello, Pink & Main friends! It is Jessi from Kissin' Krafts. I am sad to say that today is my last post for Pink & Main. I have been a proud member of the design team since February 2015! It has been a great pleasure to watch Pink & Main grow!

To show my appreciation to Michelle for the opportunity she has given me,  I brought out the Thanks to You stamp set and word dies for today's project:


I paired up some adorable prints to create the different layers on the card. I used the Thanks word/shadow dies to help highlight part of the sentiment. The rest of the sentiment is stamped on to printed strips and attached to complete the saying.

Thank you again, Michelle for the past (almost) two years. It has been a pleasure working with you and the rest of the Pink & Main design team!

Thank you for stopping by and have a wonderful day!

Thursday, December 15, 2016

ADORNit Planner Prep Pt. 2

Do you remember my earlier post about coloring my ADORNit planner covers? You can check it out HERE! The next step in my preparation process is to color the monthly dividers. I started off coloring with plain colored pencils.

I love how bright the colors turned out using the colored pencils!

January:

February:

March:

April:

I will post the rest in the next part. I received the ADORNit watercolor pencils, so I switched to the watercolors for the rest of the dividers. I cannot wait to show you the differences!

Thank you for stopping by! Hope you have a great day!

Jessi
ADORNit Planner - Calendar Girls Planner

Wednesday, December 14, 2016

ADORNit Christmas Chalkboard

Hey there, ADORNit friends! I am taking a break from Christmas cards to share a quick altered project I completed using some awesome ADORNit Holiday products! 

**Let me warn you in advance that the pictures for this project did not turn out, we had some rain storms as I was crafting and the lighting was horrible! So my plan to have a tutorial step by step process, did not work out.

Did you know that ADORNit has a great selection of wooden pieces? I took one of the fancy shaped pieces and the plan was to make a table sign. (I needed one for a PTA luncheon for the teachers, so I wanted to make it festive.)

I picked out the main print for the plaque:


Step-by-Step:
1. Attach paper using Mod Podge. Smooth out all bubbles.
2. Once dried, trim the edges and sand if necessary.
3. Attach a strip of red printed paper at the bottom. Trim once dried.
4. Place a couple fancy border stickers above the red printed paper. Trim around the edges.
5.Cut chalkboard paper to a square and attach to the center of the plaque.
6. Top the plaque off with a festive bow!


Looking for a place to shop for ADORNit products? Check out the ADORNit selection in the Scrapbook.com store!

Thank you for stopping by! Hope you have a great day!
Jessi

ADORNit Supplies Used:
Wooden Plaque
ADORNit Holiday Prints
ADORNit Holiday Border Stickers


Little Stinker

Hello, MarkerPOP friends! It is Jessi here for a second post this week. Christmas is right around the corner, but is it too soon to have Valentine's Day on the mind? Who do you send Valentine's Day cards to? That special someone? Family? Friends?

Today, I am showcasing a CAS card using an adorable Neat & Tangled stamp set, Little Stinker:


The skunk image is stamped and colored in. The coordinating die is used to cut out the image. The coordinating die set also includes a tiny heart die. I used the die to cut out three hearts. I attached a red piece of cardstock underneath the white cardstock. The panel is then attached to the card front. A fun stripe print is added at the bottom of the panel. The skunk is attached and a sentiment is stamped above the printed paper.


To add some more detail to the card, I used a Wink of Stella pen to add glitter touches to the hearts on the card.


Please stop by the MarkerPOP blog for the list of supplies used on today's project!

Thank you for stopping by today!

Jessi

Monday, December 12, 2016

You Are the Swan for Me

Hello, MarkerPOP friends! Did you see Avery Elle's newest release? It is simply adorable! You can see it in the Avery Elle section in the MarkerPOP store.

Today, I am working with the new Swans stamp set:


The swan image is stamped onto white cardstock and colored in with Chameleon Markers. The image is cut out and set aside. I used a rectangle die to start the panel on the card. I created the waves using a border die and added the layers to the panel. The swan image is added in between the waves.


To add some additional detail to the card, I stamped the tiny hearts into the white space of the card. I used NUVO Drops to color in the hearts. To finish the card, a sentiment is stamped towards the bottom of the card.


Please stop by the MarkerPOP blog to see the list of supplies used on today's project.

Thank you for stopping by!

Saturday, December 10, 2016

ADORNit Watercolors & Paintables

Hello, friends! I recently sat down and got to play with my new watercolor pencils from ADORNit! I used the pencils on several of their ArtPlay Paintables.

I love that the Paintables are the right size to make quick and simple cards. Below is just one of the cards I have created. Today I am working with the Occasions- Paintables


I used the watercolor pencils to color in the image. I used the ADORNit waterbrush to create the watercolor look on the Paintables. Once the paint was dry, I rounded the corners and added to a yellow print (from the ADORNit Basic Color Paper Stack). From the same pack, I picked a soft blue print to back the card. To break up the card some, I used a orange printed cardstock, also made by ADORNit.


Such a simple way to make a mass selection of cards. Color, paint, and assemble!

Thank you for stopping by today!
Jessi

Wednesday, December 7, 2016

Floral Thanks From the Bottom of My Heart

Hello, MarkerPOP friends! It is Jessi here. I am continuing creating piles of Thank You cards. I figured I would share with you, one of my latest cards using supplies from the MarkerPOP store.

Today, I am working with the super adorable Honey Bee Stamps' Zen Floral set:


I love pairing up white embossed images and Zig Clean Color Markers! To start the card, I stamped the floral image repeatedly in white on a watercolor cardstock. The stamped images are covered in white embossing powder and heated. I used a variety of Zig markers to color in the floral designs. The watercolor panel is attached to a piece of vellum,


To create the sentiment, I used the Pink & Main Thanks die set. The shadow die is used on vellum and the word die is used on black cardstock. The rest of the sentiment uses stamps from the Honey Bee Stamps' Thanks stamp set stamped in white ink onto black cardstock. A few layers to create this stunning card!


You can stop by the MarkerPOP blog to see the list of supplies used to create this card.

Thank you for stopping by! I hope you have a great one!

Monday, December 5, 2016

Joy Clair's Coffee Lover Chalkboard

Hello, Joy Clair friends! Are you enjoying the 'winter' weather lately? We do not get too cold here in Texas, but the last few days have been perfect for enjoying a hot cup of coffee or hot chocolate. I personally am not a coffee drinker, but I love the Coffee Shop look. So when I saw the new Coffee Lover stamp set, I wanted to make a card that reminded me of a coffee shop.

One thing I notice in coffee shops are there are tons of chalkboards! I wanted to make a card that looked like a chalkboard.


I stamped a variety of images onto a piece of black cardstock. The cardstock is attached to a white A2 card. To finish the card, I attached a few red sequins to pop off the card.

Thank you for stopping by and I hope you stop by and join the Joy Clair Facebook to hear the latest news from Joy Clair Stamps!

Have a great day!

Jessi

Thank You for Everything

Hello, MarkerPOP friends! It is Jessi here! We are in the middle of holiday season. The holiday cards are being sent and gifts are being exchanged. I find that after all the gift exchanges, I am in need of lots of thank you cards. I also find that it is hard to find time to create them all at once. So I try to create a few here and there in preparation.

Today, I am working with the Honey Bee Stamps' Thank You and Lotus stamp sets:


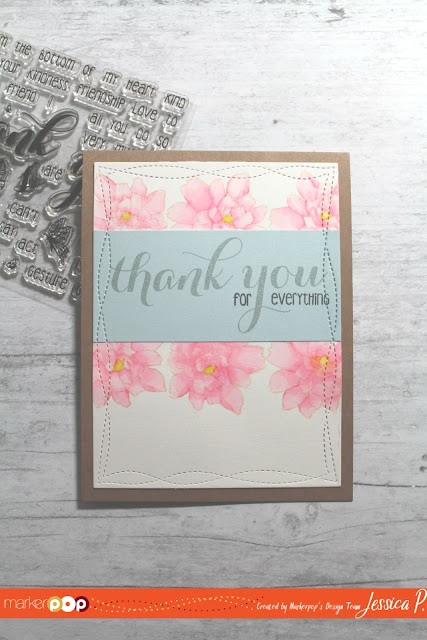
I wanted to use the no-line technique on the flowers. I stamped them onto the cardstock in a light ink color. I used a pink and yellow Zig Clean Color markers to paint the flower. The sentiment is stamped onto a stripe of blue cardstock and attached to the card. The panel is then cut out using a rectangle die cut.


Stop by the MarkerPOP blog for the list of supplies used.


Thank you for stopping by! Have a great day!

Saturday, December 3, 2016

Mery & Bright

Happy Saturday, Pink & Main friends! It is raining day here in Texas. We are super glad that we got our holiday decorations up last weekend!

With holiday decorations on the mind, I thought it would be perfect to work with the Merry & Bright stamp set:


I stamped the adorable image onto white cardstock and colored in with Chameleon markers. The image is then cut out using the coordinating dies. The background of the card is created with the holly stamps from the Merry & Bright and Santa Mail stamp sets. The sentiment is stamped and embossed in white on a black strip. A very simple card to recreate!

Thank you for stopping and have a great day!

Jessi

Friday, December 2, 2016

Joy Clair December Blog Hop

Welcome to the Joy Clair December Blog Hop!
We decided to switch it up a bit for this month. There is no official stamp release this month, however, Joy Clair did release a super cute coffee stamp set, Coffee Lover.


This month, the design team members are working with some of their favorite stamp sets.  You should be arriving from LeeAnn's blog.If you are stopping by my blog and would like to start at the beginning, please stop by the Joy Clair blog.

Today I am showing off the Color by Faith's A Child is Born:


I decided to use this stamp set for illustrating Isaiah's announcing the future birth of Jesus. I wanted to make the image appear like it is like a vision or dream. So I drew the dream bubble with the stamped image inside. The pregnant woman is colored in with color pencils. The verse is completed with a variety of alpha/word stickers.

Now let’s talk about the grand prize! There will be TWO winners from the blog hop. Each winner will receive $25 Joy Clair gift certificate. WHAT A PRIZE!!!
1. Comment on the Joy Clair blog and the blogs of each participate along the way!


You have until December 5th, 2016 at noon EST. The winners will be announced on December 30th.
Thank you for stopping my blog! Your next stop will be the talented Donna's blog!

Hop with us. Be sure to visit each of the designers on this blog hop!

Wednesday, November 30, 2016

Sunny Studio - Mug Hugs

Hello, MarkerPOP friends! It is Jessi here. My husband surprised me with a trip to Colorado last week and I got to stick my hand in some snow! So coming back to reality and 80+ degrees, I found myself dreaming of a hot cup of chocolate back in snowy Colorado!

I decided to cave into the cravings with the adorable Sunny Studio's Mug Hugs stamp set:


I started with a solid white cardstock and stamped the mug images all over the card. To cover in some of the empty spaces, I stamped a snowflake image and the tiny heart image also included in the Mug Hugs stamp set.


I wanted the card to remain simple. However, I wanted to add some color to the card. I used the Red Zig Clean Color marker to color in the hearts. I used the Stella Wink - Clear to add the glittery sparkle to the snowflakes and the top of the heart. The sentiment phrases were stamped onto the front of each mug.


Please stop by the MarkerPOP blog for the list of supplies used to create this card.

Thank you for stopping by! Have a great day!

Jessi

DCWV & Eileen Hull Blog Hop

Hello, friends! I am joining the DCWV and Eileen Hull blog hop today. You can see the design team members' projects on the DCWV blog and the Eileen Hull blog.

Today, I used the Eileen Hull Twist & Style tool and the DCWV Cranberry Christmas stack to create some simple tree ornaments.


To begin the project, I used a star shape die and cut two of each print. I covered one star with adhesive on the back side of the paper.  I attached some of the twisted wire in a hoop shape. I attached the second star to create the ornament.


A stitched circle die cut is attached to the front of the star.


To finish the ornament, I used die cut words and attached on top of the circle. Such an easy ornament to recreate!

Thank you for stopping by! Have a great day!

Jessi

Saturday, November 26, 2016

Welcome Little One - girl

Hello, Pink & Main friends! I love making baby cards, but don't have the opportunity to make them too often. I recently found out that I will be an aunt again and am excited to hold that baby in my arms. But sadly, I have to wait a few more months!

Today's project uses an older Pink & Main set, Little Ones. In the November Release, the coordinating dies for Little Ones were included.


To create this square card, I used the new Stitched Rounded square dies. I also used the same dies to create the frame. The elephant image from Little Ones is stamped and colored on white cardstock. The image is cut out using the coordinating dies. For the sentiment, I used the fancy frame die from the Little Ones collection and stamped 'Welcome' on it. The rest of the sentiment is stamped onto the frame.


The elephant image can be used on a boy card, by replacing the pinks with blues!

Thank you for stopping by today! Have a great one!


Tuesday, November 22, 2016

Donut Birthday - Neat & Tangled

Hello, MarkerPOP friends! Have you ever had donuts instead of cake for your birthday? I haven't! But I think I need to change that on my next birthday. All these pictures of donut cakes are making me want one!

Today, I am working with the Neat & Tangled's Say Yes to Donut stamp set. I paired up the stamps with the Simple Stories So Fancy 6x6 paper pad:


The donut image is stamped onto white cardstock. The image is colored in with a variety of Chameleon markers. The image is cut out using a stitched circle die. I used a couple of different prints from the paper pad to finish the card. The floral print is used to cover the front of the card. The purple print is cut with a stitched rectangle die. The sentiment is stamped onto a yellow print and attached to towards the bottom part of the purple. The circle die is attached towards the top.


The stamped image is stamped in black ink. This made the sprinkles black. I covered the black part with a white gel pen to turn the sprinkles to white.


Please stop by the MarkerPOP blog for the list of markers and supplies I used to create this card.

Thank you for stopping by today! Hope you have a great one!


Monday, November 21, 2016

DCWV Merry Christmas

Hello, DCWV friends! Are you ready for the holidays? They are right around the corner!!! Have you decorated yet? I know that some people decorate before Thanksgiving, but I am one that waits until the next day.

Today I using the new DCWV All About Christmas stack:


This stack is full of awesome prints! I wanted to make a CAS card that highlighted one of the prints.


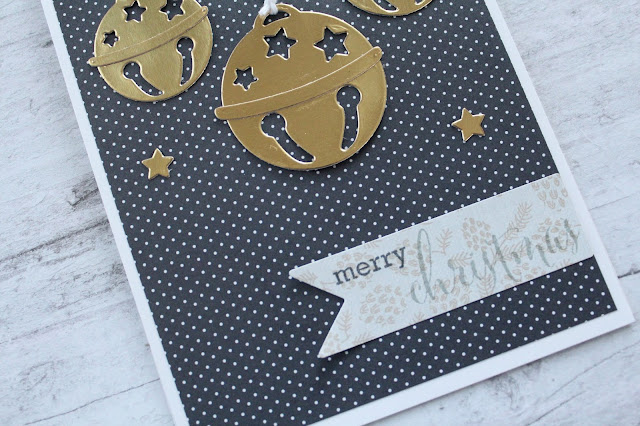
I paired this card up with some DCWV foil cardstock and cut out some ornaments using a die cut machine. The ornaments are hanging with strings of twine. A few stars are added around the card for extra embellishments.


The sentiment is stamped onto a printed pendant. This fun print is also in the stack. The sentiment is stamped in grey and black to help it POP.

Thank you for stopping by today! Hope you have a wonderful day!

Jessi